Lemon & Asparagus Cavatappi With Cannellini Beans – Bright, Comforting, and Easy
· Yasmine Taljaard
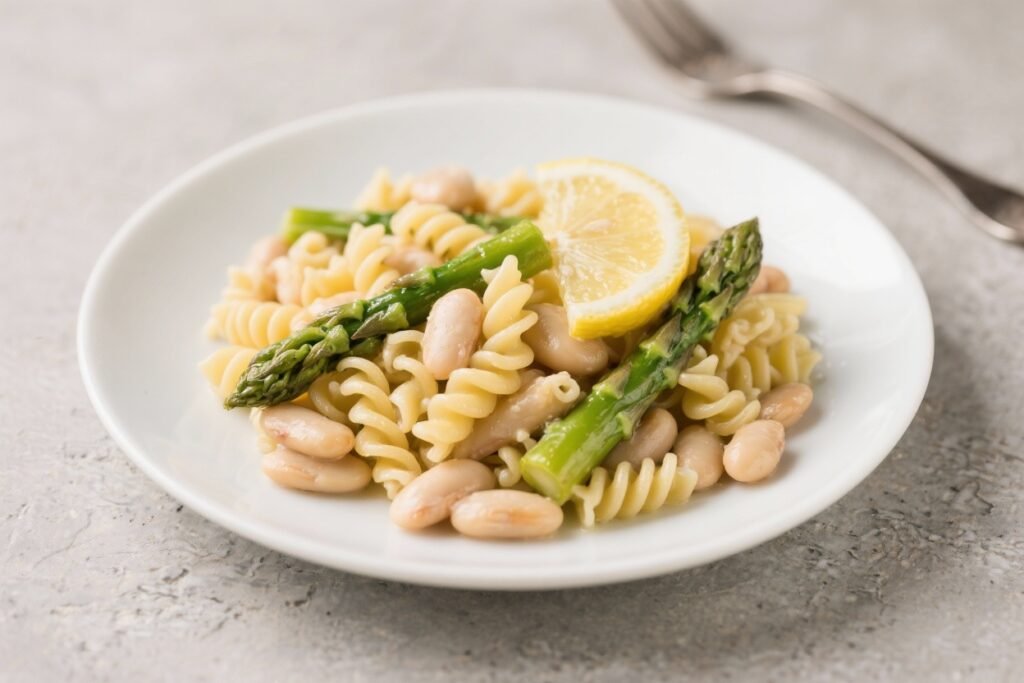
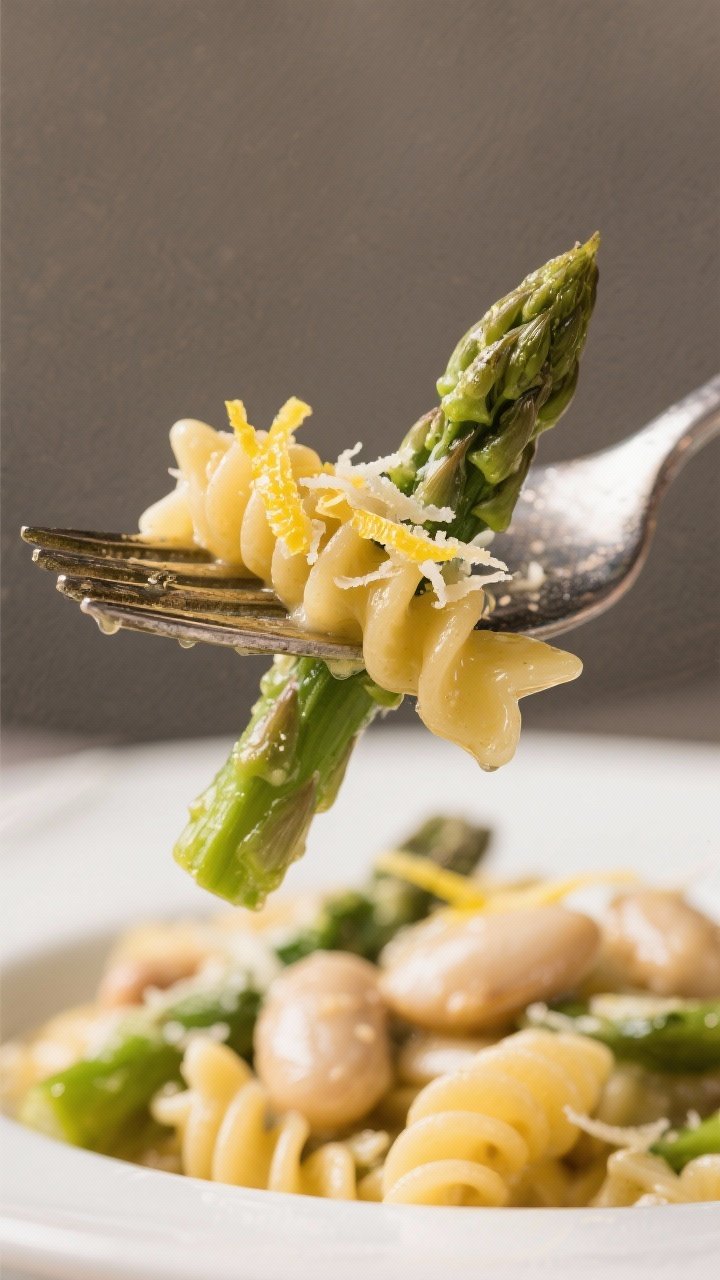
This is the kind of pasta you make when you want something bright and satisfying without spending all evening in the kitchen. Lemon keeps it light, asparagus adds a fresh bite, and creamy cannellini beans bring protein and body. Cavatappi’s twists catch every drop of the silky sauce.
It’s weeknight-friendly but still feels special. Serve it warm, top it with cheese if you like, and dinner’s done.
Why This Recipe Works
Lemon & Asparagus Cavatappi With Cannellini Beans - Bright, Comforting, and Easy
Ingredients
- 12 ounces cavatappi (or another short, ridged pasta)
- 1 bunch asparagus, trimmed and cut into 1-inch pieces
- 1 (15-ounce) can cannellini beans, drained and rinsed
- 1 large lemon (you’ll use zest and juice)
- 3 tablespoons extra-virgin olive oil
- 3 cloves garlic, thinly sliced
- 1/2 teaspoon red pepper flakes (optional, adjust to taste)
- 1/2 cup grated Parmesan or Pecorino Romano, plus more for serving
- 1/2 cup pasta cooking water (reserve more as needed)
- Salt and black pepper, to taste
- Fresh parsley or basil, chopped (optional, for garnish)
- 2 tablespoons butter (optional, for extra silkiness)
Instructions
- Prep the lemon and asparagus. Zest the lemon, then cut it in half and juice it. Trim woody ends from the asparagus and slice into 1-inch pieces. Rinse and drain the cannellini beans.
- Cook the pasta. Bring a large pot of salted water to a boil. Add cavatappi and cook until just shy of al dente. Reserve at least 1 cup of pasta water, then drain.
- Sauté the aromatics. In a large skillet, warm the olive oil over medium heat. Add garlic and red pepper flakes. Cook 30–60 seconds until fragrant, not browned.
- Cook the asparagus. Add asparagus to the skillet with a pinch of salt and pepper. Sauté 3–5 minutes, stirring, until bright green and just tender with a little snap left.
- Add the beans. Stir in cannellini beans and warm them through for 1–2 minutes. If the pan looks dry, splash in a bit of pasta water.
- Build the sauce. Add lemon zest, half the lemon juice, and 1/2 cup pasta water. Stir to combine and bring to a gentle simmer.
- Toss with pasta. Add the drained cavatappi to the skillet. Sprinkle in the cheese and toss vigorously. If using, add butter now. Adjust with pasta water a little at a time until the sauce clings and looks glossy.
- Season and brighten. Taste and add more lemon juice, salt, and pepper as needed. The flavor should be bright, savory, and balanced.
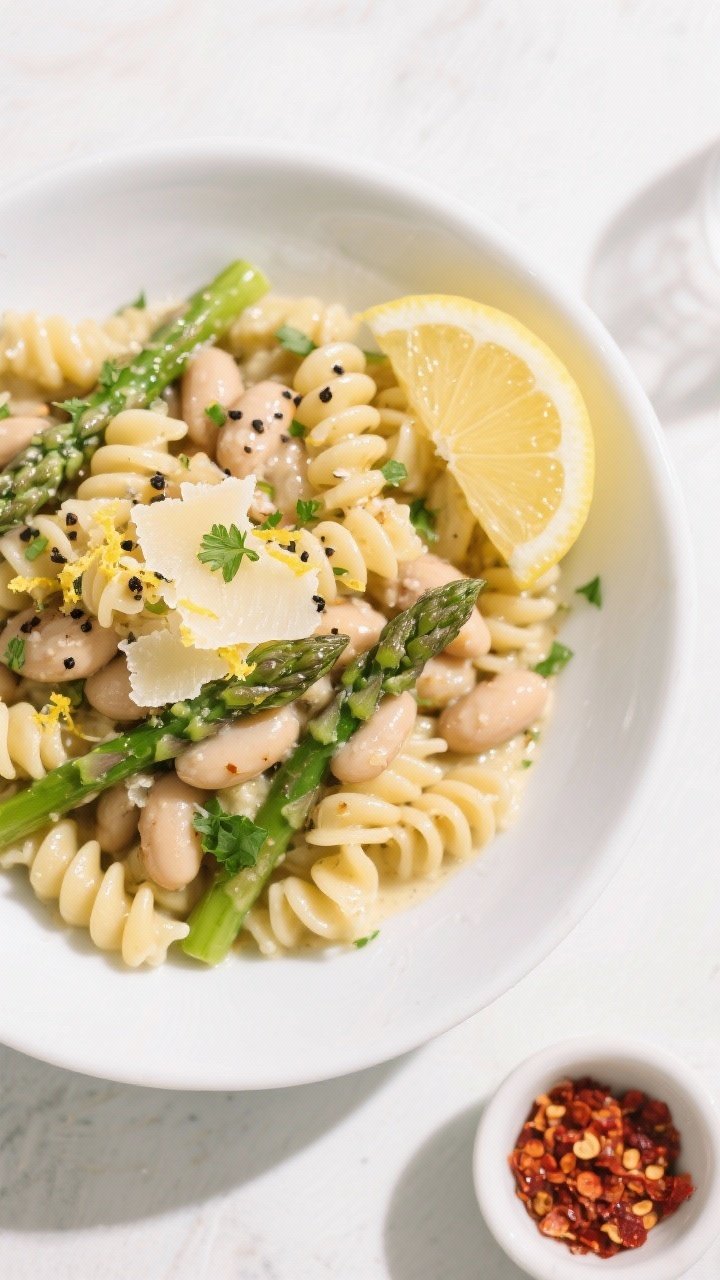
- Finish and serve. Top with more grated cheese and chopped herbs. Serve warm, with extra lemon wedges on the side if you like a bigger citrus punch.
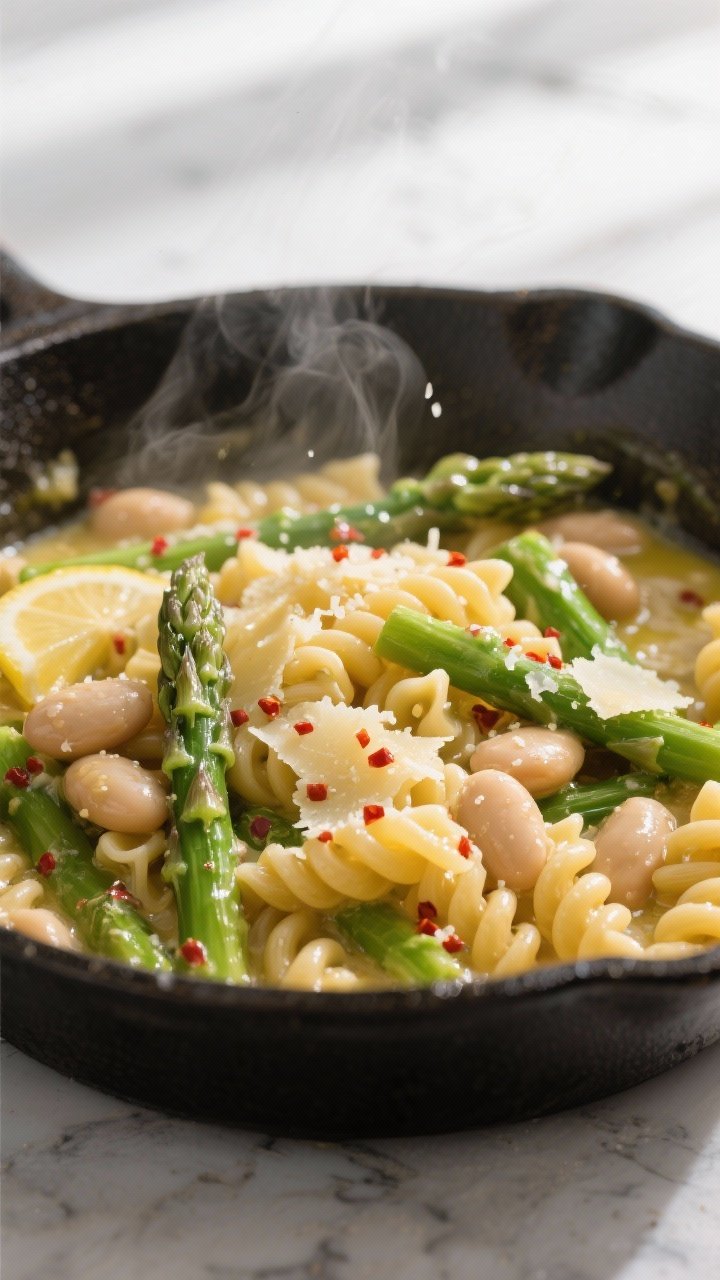
This dish balances fresh, citrusy flavors with cozy, pasta comfort. The lemon zest and juice cut through the richness of olive oil and cheese, making each bite vibrant instead of heavy.
Cannellini beans deliver gentle creaminess and protein without needing a separate meat component. Asparagus cooks quickly, keeping a tender-crisp texture that pairs well with curly cavatappi. Best of all, everything comes together in one pot and one pan, making cleanup simple.
Ingredients
- 12 ounces cavatappi (or another short, ridged pasta)
- 1 bunch asparagus, trimmed and cut into 1-inch pieces
- 1 (15-ounce) can cannellini beans, drained and rinsed
- 1 large lemon (you’ll use zest and juice)
- 3 tablespoons extra-virgin olive oil
- 3 cloves garlic, thinly sliced
- 1/2 teaspoon red pepper flakes (optional, adjust to taste)
- 1/2 cup grated Parmesan or Pecorino Romano, plus more for serving
- 1/2 cup pasta cooking water (reserve more as needed)
- Salt and black pepper, to taste
- Fresh parsley or basil, chopped (optional, for garnish)
- 2 tablespoons butter (optional, for extra silkiness)
How to Make It
- Prep the lemon and asparagus. Zest the lemon, then cut it in half and juice it.
Trim woody ends from the asparagus and slice into 1-inch pieces. Rinse and drain the cannellini beans.
- Cook the pasta. Bring a large pot of salted water to a boil. Add cavatappi and cook until just shy of al dente. Reserve at least 1 cup of pasta water, then drain.
- Sauté the aromatics. In a large skillet, warm the olive oil over medium heat.
Add garlic and red pepper flakes. Cook 30–60 seconds until fragrant, not browned.
- Cook the asparagus. Add asparagus to the skillet with a pinch of salt and pepper. Sauté 3–5 minutes, stirring, until bright green and just tender with a little snap left.
- Add the beans. Stir in cannellini beans and warm them through for 1–2 minutes.
If the pan looks dry, splash in a bit of pasta water.
- Build the sauce. Add lemon zest, half the lemon juice, and 1/2 cup pasta water. Stir to combine and bring to a gentle simmer.
- Toss with pasta. Add the drained cavatappi to the skillet. Sprinkle in the cheese and toss vigorously.
If using, add butter now. Adjust with pasta water a little at a time until the sauce clings and looks glossy.
- Season and brighten. Taste and add more lemon juice, salt, and pepper as needed. The flavor should be bright, savory, and balanced.
- Finish and serve. Top with more grated cheese and chopped herbs. Serve warm, with extra lemon wedges on the side if you like a bigger citrus punch.
Keeping It Fresh
This pasta is best the day it’s made, but leftovers still taste great.
Store in an airtight container in the fridge for up to 3 days. When reheating, add a splash of water or broth to loosen the sauce and warm gently on the stovetop or in the microwave. If you plan for leftovers, slightly undercook the asparagus so it keeps its texture after reheating.
A squeeze of fresh lemon just before serving brings the flavors back to life.
Benefits of This Recipe
- Fast and flexible: From start to finish, it’s ready in about 30 minutes, and you can swap ingredients to match what you have.
- Nutritious and satisfying: Cannellini beans add plant-based protein and fiber, while asparagus offers vitamins and a fresh crunch.
- Light but comforting: Lemon and olive oil keep the sauce bright, yet the pasta and beans make it filling.
- Budget-friendly: Pantry staples and a few fresh items go a long way here.
- Great for all seasons: Asparagus shines in spring, but frozen or broccolini works when out of season.
What Not to Do
- Don’t overcook the pasta. Aim for just shy of al dente before finishing in the pan so it absorbs flavor without turning mushy.
- Don’t skip reserving pasta water. It’s the key to a silky, emulsified sauce that clings to the cavatappi’s curves.
- Don’t scorch the garlic. Burned garlic tastes bitter; cook it gently until fragrant.
- Don’t drown it in lemon juice. Add gradually and taste. The goal is bright, not sour.
- Don’t forget salt and pepper. Seasoning the pasta water and adjusting at the end makes all the difference.
Recipe Variations
- Green upgrade: Toss in peas or spinach during the last minute of cooking for extra color and nutrients.
- Herby lemon: Add chopped basil, parsley, or mint at the end for a fresh finish.
- Creamy twist: Stir in a splash of cream or a dollop of mascarpone with the cheese for a richer sauce.
- Protein boost: Add grilled chicken, shrimp, or sautéed mushrooms for more heft.
- Vegan version: Skip the cheese and butter. Use a drizzle of good olive oil and a spoonful of nutritional yeast for savoriness.
- Gluten-free: Use gluten-free cavatappi and check your cheese and beans for labeled compliance.
- Citrus swap: Try Meyer lemon for a softer sweetness, or add a touch of orange zest for a floral note.
- Crunch factor: Top with toasted breadcrumbs or chopped almonds for texture.
FAQ
Can I use a different pasta shape?
Yes.
Short shapes with ridges work best, like fusilli, gemelli, or rigatoni. They grab the sauce and bits of asparagus and beans.
Do I need to blanch the asparagus first?
No. Sautéing in the skillet keeps things simple and gives you great flavor.
Just don’t overcook it—aim for crisp-tender.
How do I prevent a watery sauce?
Use reserved pasta water sparingly and add cheese gradually while tossing. The starch in the pasta water helps emulsify the sauce with the oil, lemon, and cheese.
What can I substitute for cannellini beans?
Great Northern beans or chickpeas work well. If using chickpeas, simmer them a minute longer so they soften slightly.
Can I make it ahead?
You can prep components ahead—zest and juice the lemon, trim asparagus, and rinse beans.
Cook and assemble just before serving for the best texture.
Is this good cold as a pasta salad?
It can be, but adjust seasoning. Add extra lemon, olive oil, and salt after chilling, and consider more herbs. Skip the butter if serving cold.
How can I make it spicier?
Increase red pepper flakes, or finish with a drizzle of chili oil or Calabrian chili paste.
Taste as you go so the heat doesn’t overshadow the lemon.
Can I add wine to the sauce?
Absolutely. Deglaze the pan with 1/4 cup dry white wine after sautéing the asparagus and before adding beans. Let it reduce by half, then continue.
Final Thoughts
Lemon & Asparagus Cavatappi with Cannellini Beans is proof that simple ingredients can deliver big flavor.
It’s bright, cozy, and adaptable to what’s in your kitchen. Keep pasta water on hand, taste as you go, and finish with fresh lemon and herbs. With those small steps, you’ll have a pasta that feels restaurant-worthy on a regular weeknight.
Printable Recipe Card
Want just the essential recipe details without scrolling through the article? Get our printable recipe card with just the ingredients and instructions.
Leave a Reply