10 Solo Picnic Set Up Ideas for a Spread That Looks Good Even for One
When I started picnicking solo, I learned the hard way that a pretty spread isn’t just about what you pack, but how you set it up. I want you to enjoy a stylish, satisfying spread without lugging extra gear or fuss. Here are ten practical setups you can replicate with common garden-center finds and a little planning.
1. The Minimalist Cheese-and-Charcuterie Jar Arrangement

The jar setup catches the eye and keeps everything contained, which is ideal when you’re flying solo. A single mason jar can hold crackers, cheese slices, and a few olives, while a small board prop holds sliced fruit for contrast.
Signs to Watch For
- Crackers become soggy if they’re exposed too long
- Cheese starts sweating in warm sun
- Fruit browns quickly when left uncovered
How to Fix It
- Keep crackers in a separate, airtight container and add them just before eating
- Wrap cheese in parchment to reduce surface sweating
- Pack citrus segments in a small sealable bag to keep fruit fresh
What to Use Instead
- Two small cutting boards, one for cheese and one for fruit
- A slim, airtight jar for crackers
- Reusable silicone bags for olives or pickles
Takeaway: Pack a dual-zone setup: dry crackers and moist cheese separately, then combine right before you eat.
2. One-Person Tapas Board with Bite-Sized Delights

A tapas-style spread turns small bites into a rich visual feast. Use a flat tray and arrange 6–8 tiny bowls with different textures and colors.
Signs to Watch For
- Mixing sauces creates a messy plate
- Some items arrive warm and lose texture
- Too many items crowd the board, hiding individual flavors
How to Fix It
- Choose 3–4 core items (olives, hummus, stuffed peppers, succkata) and add 2 sweets
- Household plate warmers or a small insulated sleeve keep items at a pleasant temp
- Use a simple garnish strategy: one herb sprig per section
What to Use Instead
- One flat serving board and two small ramekins
- Mini spoons for dipping sauces
- Foil-wrapped lemon wedges to brighten plates
Takeaway: Choose a cohesive trio of proteins, carbs, and a sweet bite, then add one bright accent per section.
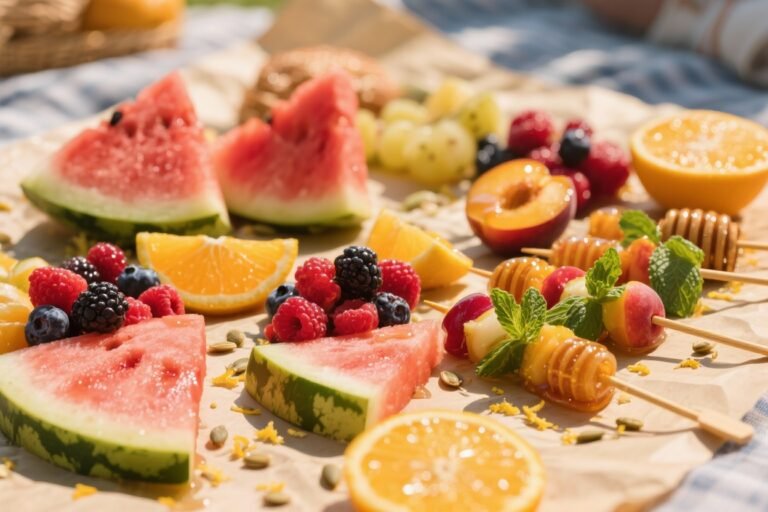
3. Sweet-and-Savory Fruit Tray with a Dip Duo

Fruit becomes a charming centerpiece when paired with a dip. A simple tray with a couple of bowls creates color, height, and structure.
Signs to Watch For
- Fruit browns quickly in heat
- Dip separates or becomes too thick
- Tray looks plain from a distance
How to Fix It
- Prep fruit slices and citrus wedges right before serving
- Stir dips well and add a touch of water or yogurt to adjust consistency
- Use a mint leaf or edible flower as a subtle accent
What to Use Instead
- Two small bowls for dips
- A rectangular tray with a slight lip to prevent spills
Takeaway: Build a color-balanced palette with two dips to anchor the fruit arrangement.
4. The All-in-One Board with Stackable Elements

Vertical interest makes a solo spread look professional. Use a board and one or two small risers (candle holders or empty spice jars) to create height.
Signs to Watch For
- Flat boards look dull from above
- Height is uneven, causing wobble or near-tip
- Items slide when carrying or setting up
How to Fix It
- Place risers under the corners of the board to level it
- Anchor heavier items with small, non-slip mats
- Balance colors by placing a bright fruit at the top of the height stack
What to Use Instead
- Two small cake stands or a couple of tall tumblers inverted as supports
- A single large board with a compact stackable setup
Takeaway: Elevate your spread with one tier of height to guide the eye and create a restaurant-ready look.
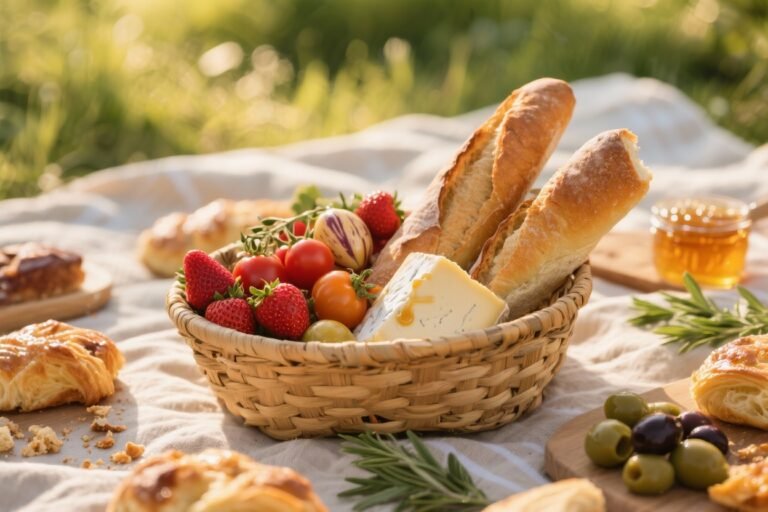
5. Rustic Picnic Box with Layered Snacks

A single, layered box feels intentional and portable. Layer crackers, cheese, fruit, and a small chocolate bar for a complete meal vibe.
Signs to Watch For
- Crackers crush under the weight of other items
- Cheese sweats onto the lid due to trapped moisture
- Flavors clash when items sit too long
How to Fix It
- Line the bottom with parchment and separate with wax paper sheets
- Place a damp towel under the box to act as a moisture buffer
- Use a citrus wedge to refresh the scent and flavor just before eating
What to Use Instead
- One rustic wooden box or a shallow basket
- A small sheet of parchment to keep items separated
Takeaway: Use a layered container to keep items organized and visually appealing with minimal space.
6. No-Fuss Charred Veg and Halloumi Skewers

Grilling small skewers outdoors creates a festive look without heavy preparation. Pre-soak skewers, grill until charred, then plate with a quick drizzle of oil and lemon.
Signs to Watch For
- Skewers stick to grill and break apart
- Veggies burn quickly without steady heat
- Skewers slide when moved or carried
How to Fix It
- Pre-soak skewers for 20 minutes before grilling
- Cut vegetables evenly and place halloumi separately to avoid sticking
- Use a grill pan or foil on a lower rack for even cooking
What to Use Instead
- Pre-seasoned halloumi cubes and cherry tomatoes
- A small portable grill or grill pan that travels easily
Takeaway: Grill compact skewers for flavor, color, and a centerpiece that travels well.
7. Simple Deli-Dose Picnic Wraps with Crunch

Wraps are fast, portable, and visually appealing when sliced into pinwheels. A couple of wraps cut into rounds adds movement to the plate.
Signs to Watch For
- Wraps dry out and crack
- Filling leaks or falls out when sliced
- Plate looks flat and lacks height
How to Fix It
- Brush wraps with a thin layer of mayo or cream cheese to seal
- Slice with a sharp knife and wipe blade between cuts
- Separate fillings with crisp lettuce leaves to prevent sogginess
What to Use Instead
- Two wraps, a small board, and a knife
- A tiny dipping bowl for a finishing sauce
Takeaway: Use crisp greens and a creamy sealant to keep wraps neat and flavorful.
8. A Nutritious Grab-and-Go Greens Box

Green-based picks lend freshness and color without heavy prep. Include baby greens, sliced cucumber, cherry tomatoes, nuts, and a simple vinaigrette.
Signs to Watch For
- Leafy greens wilt quickly in heat
- Nuts go rancid if exposed to air
- Salad dulls due to lack of dressing
How to Fix It
- Keep greens sealed and add dressing just before eating
- Use a tiny reusable bottle for dressing to avoid sogginess
- Add a squeeze of lemon to refresh greens when served
What to Use Instead
- A small, shallow lunch box with a separate dressing compartment
- Durable, non-slip base to keep tray steady
Takeaway: A greens box delivers nutrition and a light, fresh look with minimal fuss.
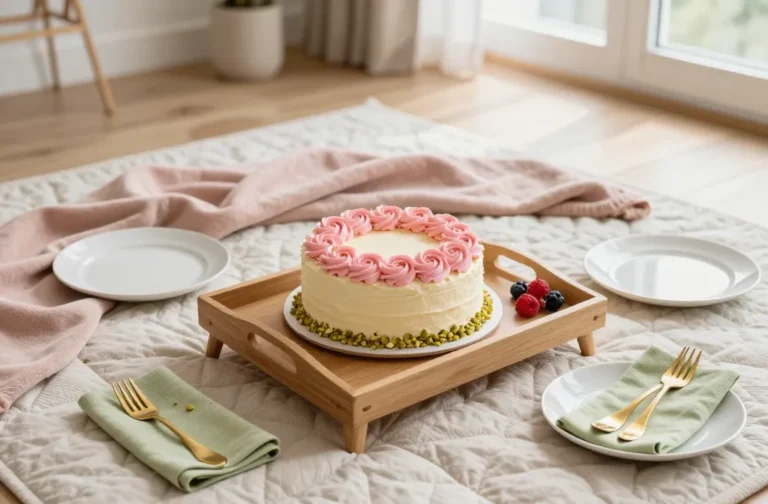
9. Sweet Treat Charm: Cupcake-Style Desserts on a Tray

A few mini cupcakes or brownie bites arranged on a tray can serve as a sweet finish without the need for extra plates.
Signs to Watch For
- Cakes crumble when moved
- Icing smears on packaging
- Arrangement looks crowded from above
How to Fix It
- Place cupcakes on a shallow, non-slip tray
- Wrap individual items in parchment cups to protect icing
- Space items evenly and add a single berry garnish for contrast
What to Use Instead
- Two-tiered dessert plate for height
- Edible decorations (mint sprigs, berries) to brighten each piece
Takeaway: Small, well-spaced desserts feel indulgent without heaviness.
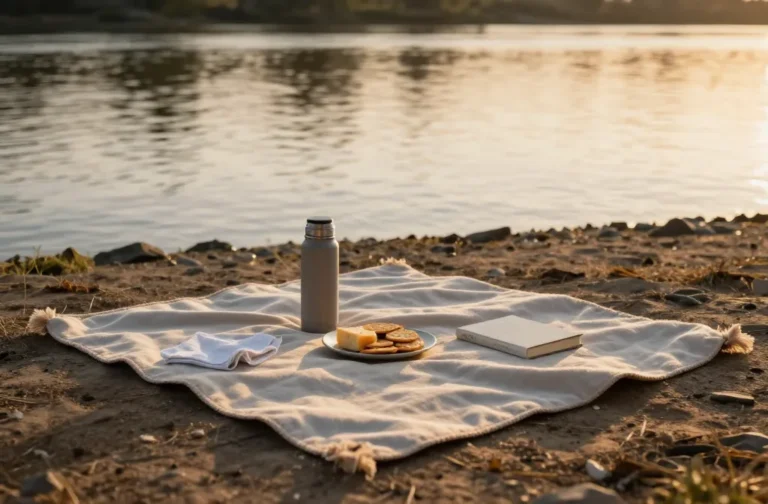
10. Tea-Time Cozy with a Single-Serve Thermos and Sweets

A hot beverage can be the anchor of a solo picnic. A thermos of tea or coffee with a small cookie pairings elevates the whole experience.
Signs to Watch For
- Thermos leaks during setup
- Liquid cools too quickly in open air
- Cookies lose crunch when exposed
How to Fix It
- Test the lid for leaks before packing
- Choose cookies that stay crisp in a sealed container
- Pre-warm the thermos to keep drinks hot longer
What to Use Instead
- A small insulated cup or mug and a compact thermos
- A cloth napkin wrap for a cozy touch
Takeaway: A warm drink anchors your spread and rounds out the solo picnic experience.
Frequently Asked Questions
What should I bring for a small, stylish solo picnic?
Focus on a single board or tray, two cold items, one hot element if possible, and a small dessert. Add a bottle of water and a cloth napkin for a complete, portable meal.
How do I keep food fresh without a fridge?
Choose items that travel well at room temperature: cheese, cured meats, dried fruit, nuts, and sturdy crackers. Pack perishable items in a small insulated bag with a cold pack if you’ll be out more than an hour.
What if I don’t have a picnic basket?
Use a shallow tray, a single cutting board, and a lid from a storage container to contain everything. A compact tote works as your transport and keeps items organized.
How can I make my presentation look professional?
Keep a simple color palette (three colors max), space items evenly, and use small bowls or ramekins to add texture. Height and balance go a long way toward a polished look.
What quick prep steps save time on the day?
Pre-slice items the night before, portion dips into small containers, and pre-assemble the fruit with removable citrus wedges for brightness. Pack in airtight containers to prevent sogginess.
Any tips for a windy or outdoor-friendly setup?
Choose a sturdy board, use non-slip mats under items, and keep everything within arm’s reach. Bring a light cloth or small umbrella to shield from sun and wind.
Conclusion
With these ten solo picnic setups, you can create a visually appealing, satisfying spread using common items from a garden center or hardware store. Try one idea this weekend, then tailor it to your space, weather, and appetite. Your next step could be planning a themed board for the season or exploring a second setup to keep picnics fresh and enjoyable.