Genius 11 Boho Picnic Blanket Edge Ideas That Frame Photos (Not Fray)
· Yasmine Taljaard
Your blanket’s edge is the unsung hero of every picnic photo. Nail it, and your feed looks curated; skip it, and hello fuzzy fray chaos. These boho-approved finishes add personality, durability, and that dreamy frame your camera loves. Ready to make your blanket look boutique-made without the stress?
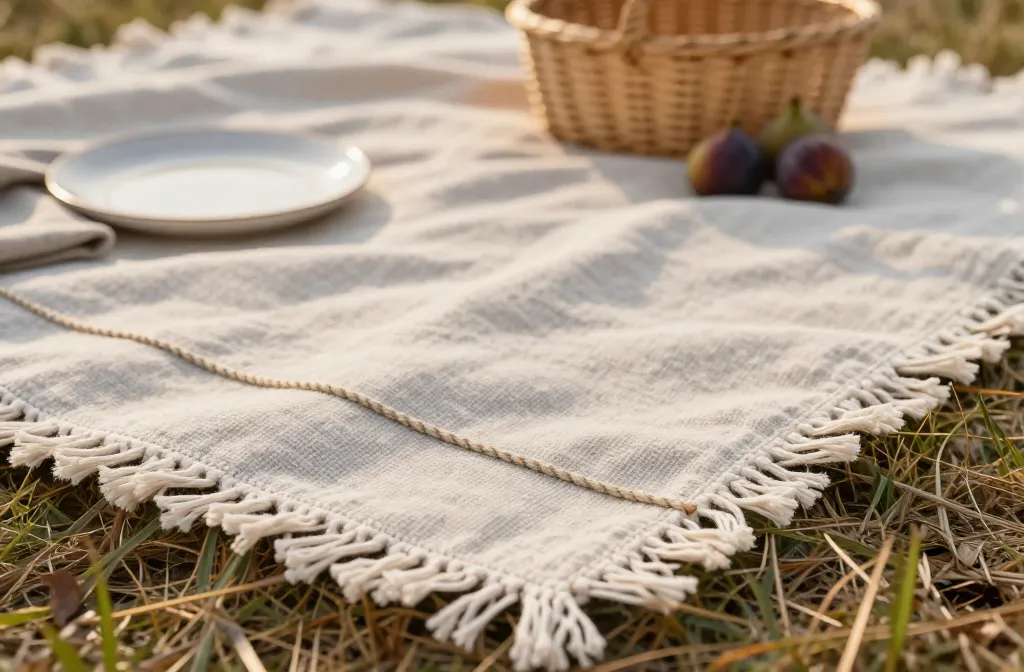
1. Macramé Fringe That Won’t Shed

Love the breezy look of fringe but hate the fluff everywhere? Go with a sturdy macramé fringe that knots into itself. It gives movement without sacrificing strength or letting threads escape mid-picnic.
Tips
- Use mercerized cotton cord for a smooth, photo-ready sheen.
- Anchor knots through a crocheted foundation row for zero pull-out.
- Keep fringe 3–5 inches for that swishy frame without tangling food.
This edge steals focus in photos and holds up to grass, sand, and spontaneous dance breaks.
2. Twisted Rope Binding With Hidden Stitching
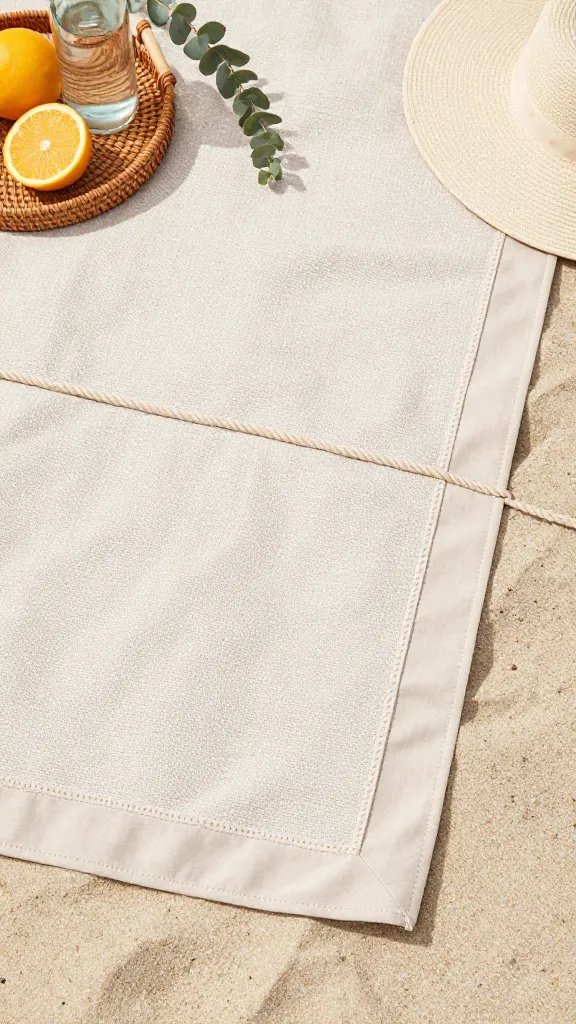
For a clean, coastal-boho vibe, wrap the perimeter in soft cotton rope. It frames your blanket like a picture and looks luxe without shouting. Hidden stitching keeps it seamless and seriously strong.
Materials
- 3/8-inch cotton rope (pre-washed to prevent shrinkage)
- Upholstery needle and heavy-duty thread
- Bias tape to encase raw edge before wrapping
Use this when you want durability and a crisp visual border that pops in flat lays.
3. Crochet Shell Border (No Hook Snags)
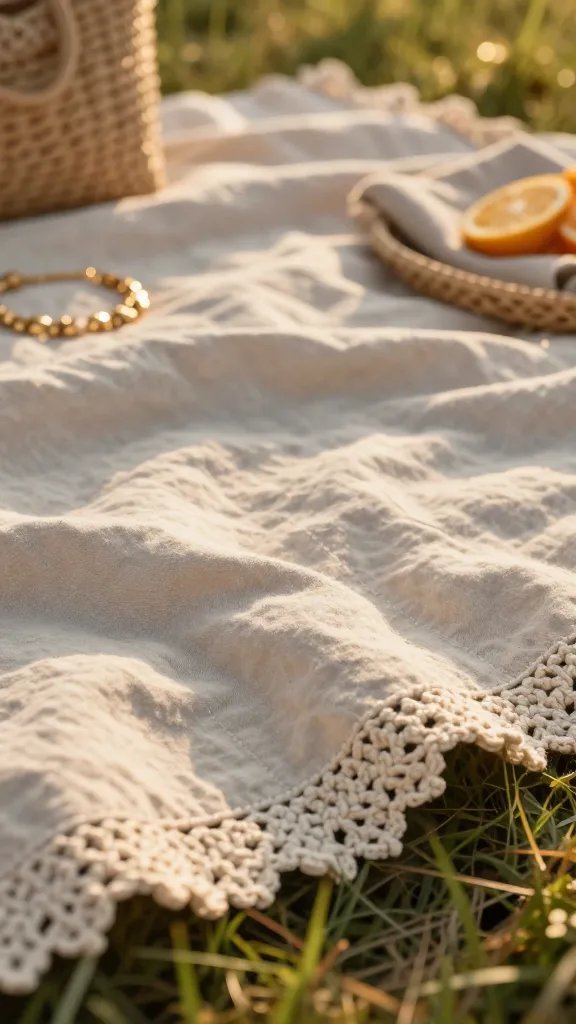
Shell stitches create that scalloped, sun-kissed edge you see on artisan throws. It’s soft, flexible, and has just enough detail for close-ups. Plus, it grabs the light beautifully in golden hour snaps.
Key Points
- Work a single-crochet foundation through a blanket stitch line first.
- Choose matte cotton yarn to avoid snagging jewelry or straw bags.
- Block the edge after to keep shells symmetrical.
Great for cotton or linen blankets that need a delicate, photogenic finish without fuss.
4. Pom-Pom Perimeter (But Make It Adult)
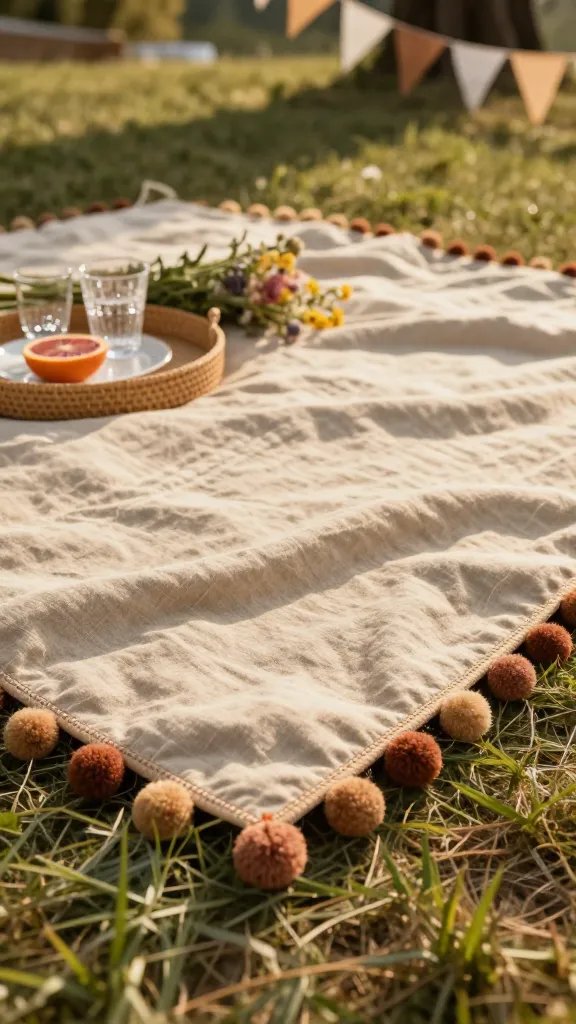
Pom-poms can go kitschy fast—unless you keep them uniform and refined. Space medium poms every 3–4 inches along a sturdy trim so they behave. The result? Playful, boho energy that frames photos like confetti.
Tips
- Use pom-pom trim instead of individual poms to prevent droop.
- Match or tone-on-tone for chic, not childish.
- Stitch twice: once to attach, once to topstitch for reinforcement.
Perfect for festival vibes and picnics where color makes the shot pop, IMO.
5. Kantha Stitch Edge With Mini Tassels

Hand-sewn running stitches along the border add artisanal charm without bulk. Pair with tiny corner tassels for just enough flair. It’s photo gold: textured, subtle, and totally traveler-chic.
Materials
- Embroidery floss or sashiko thread
- Embroidery needle and thimble
- Pre-made 1–2 inch tassels for corners
Use this when you want the “I found it at a market in Jaipur” feel without leaving your living room.
6. Woven Tape And Contrast Topstitch
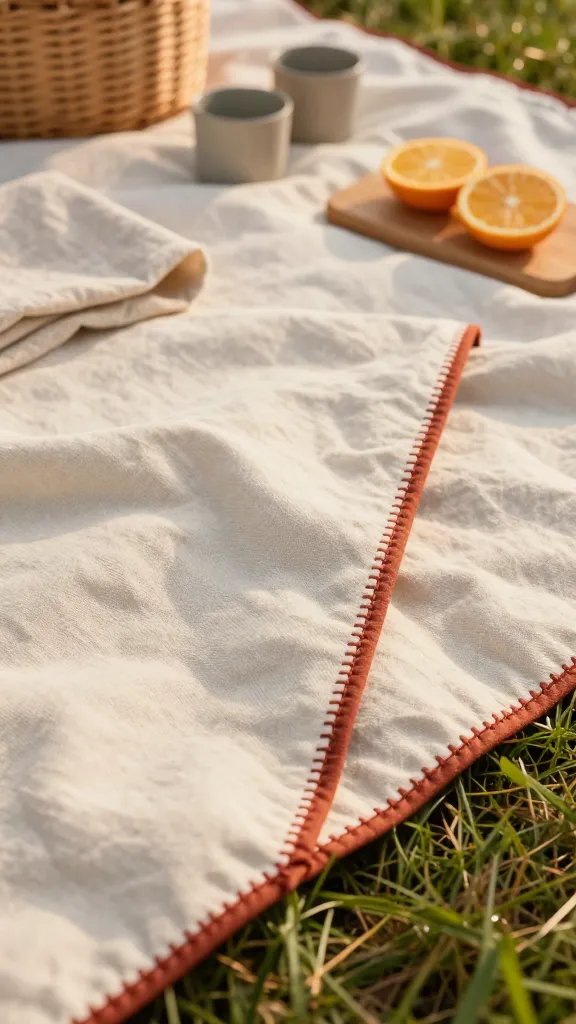
A flat woven band locks down raw edges and creates a graphic frame. Add a contrast topstitch for a crisp line that doubles as reinforcement. It looks designer and photographs sharp, even from above.
How-To Snapshot
- Sandwich raw edge in cotton twill tape.
- Stitch both sides with 1/8-inch seam allowance.
- Topstitch again in a bold color—terracotta on cream? Chef’s kiss.
Best for picnic blankets that need to survive many washes and still look intentional.
7. Bias-Bound With Mitered Corners (The Tailor’s Touch)
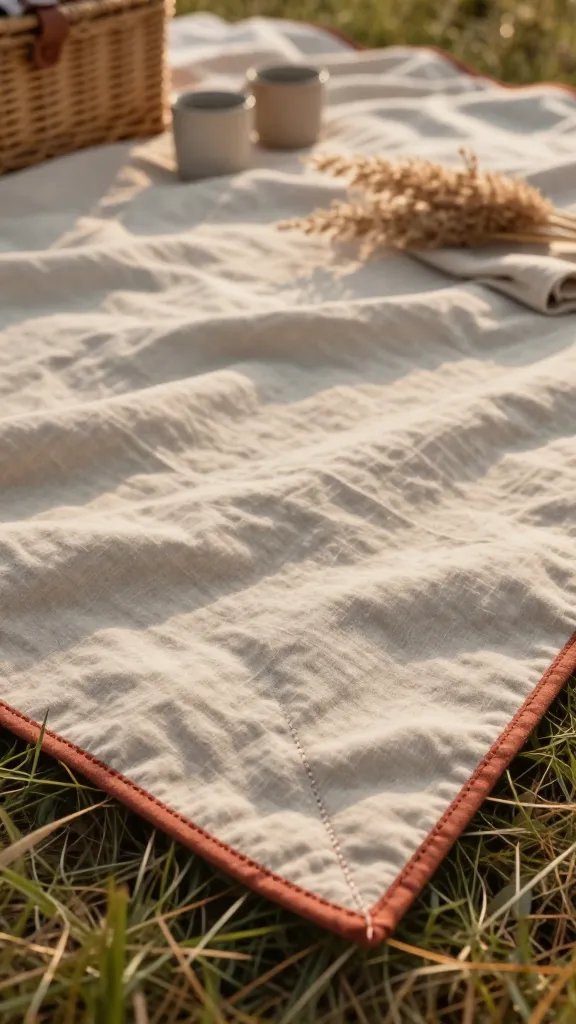
Bias binding keeps curves smooth and corners crisp—aka no puckering, no fray. Mitered corners add that wow moment when the camera catches details. It’s clean, versatile, and timeless-boho when you choose earthy hues.
Pro Moves
- Use double-fold bias tape for extra strength.
- Press as you go to avoid waves.
- Hand-stitch the final fold for invisible finish on the front.
Great for minimalists who still want a handmade feel and a flawless photo edge.
8. Blanket Stitch With Braided Accent
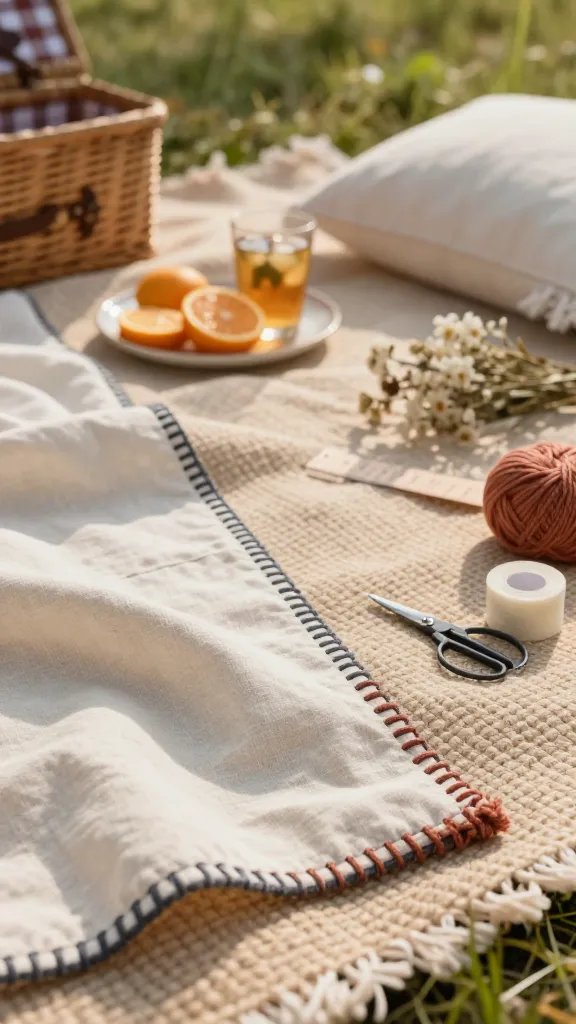
Old-school blanket stitch never fails, but add a slim braided yarn on top for texture. It gives that cottage-core-meets-boho energy and anchors the blanket like a frame. Also, it’s a calming couch project—zero stress.
Key Points
- Stabilize edge with fusible tape first for clean perforations.
- Space stitches evenly—use a ruler if you must.
- Whipstitch the braid over the seam line for a raised detail.
Choose when you want visible handiwork that reads sturdy and artsy in photos.
9. Fabric Ruffle With Raw-Look Hem (That Doesn’t Fray)
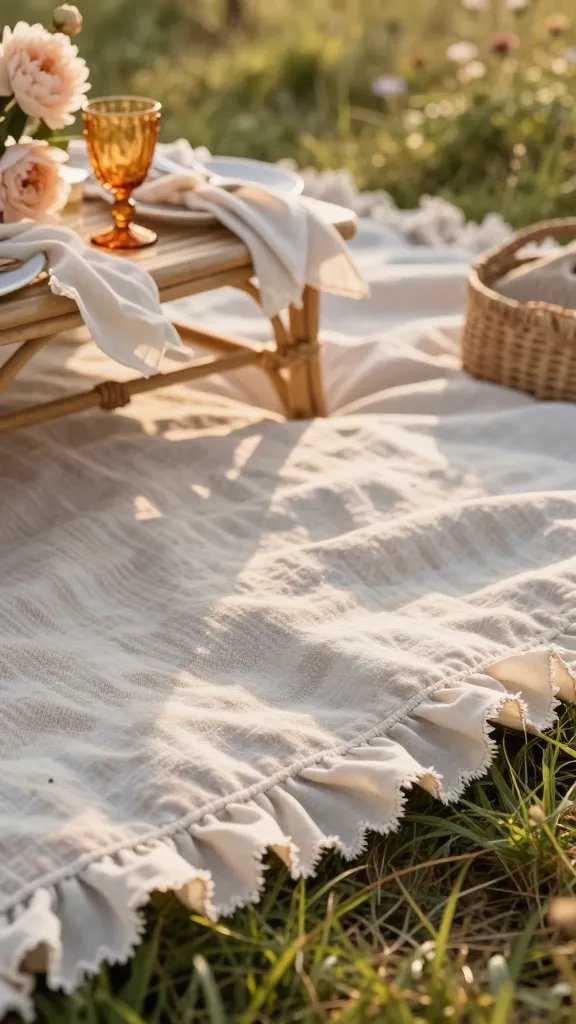
You can fake a raw hem look and still avoid shedding. Use a ruffle strip with a narrow serged edge or zig-zag finish that peeks out. It adds movement and drama that catches wind and light beautifully.
Materials
- Lightweight cotton voile or double gauze
- Fray-check or serger for edges
- Gathering foot or long basting stitch
Fantastic for romantic setups and picnics that lean dreamy rather than rustic, trust me.
10. Leather (Or Faux) Corner Guards And Edge Tabs
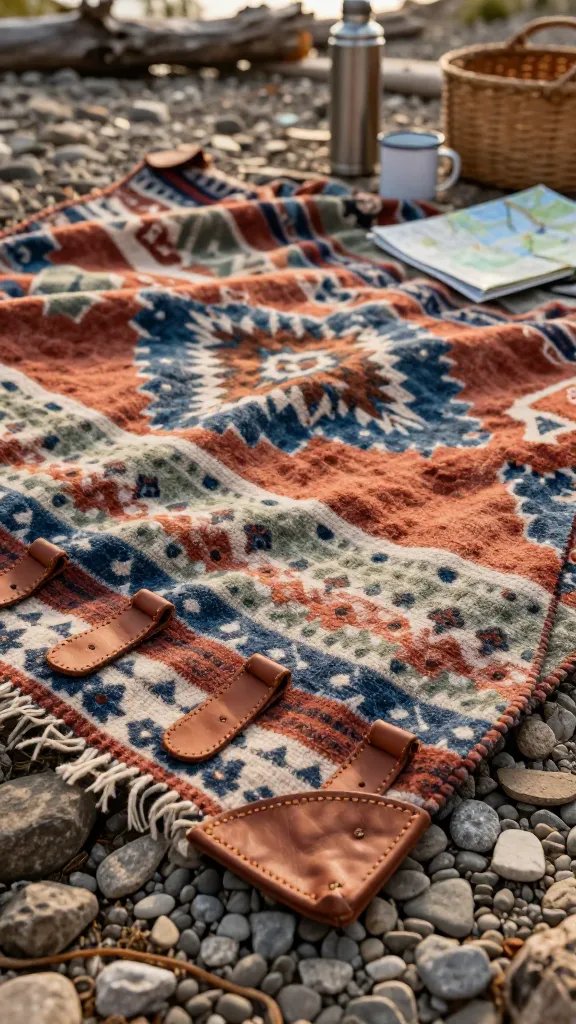
Mix boho textiles with rugged leather tabs for durability and contrast. Corner guards protect the high-wear spots and add a luxe, road-trip-ready vibe. Small stitched edge tabs every foot add structure without stiffness.
Tips
- Use veg-tan or faux leather with pre-punched holes.
- Hand-sew with waxed thread for longevity.
- Round the corners of guards so they don’t curl.
Ideal for outdoor warriors who picnic on gravel, driftwood, or basically anywhere that’s not gentle.
11. Beaded Ladder Trim With Boho Charms
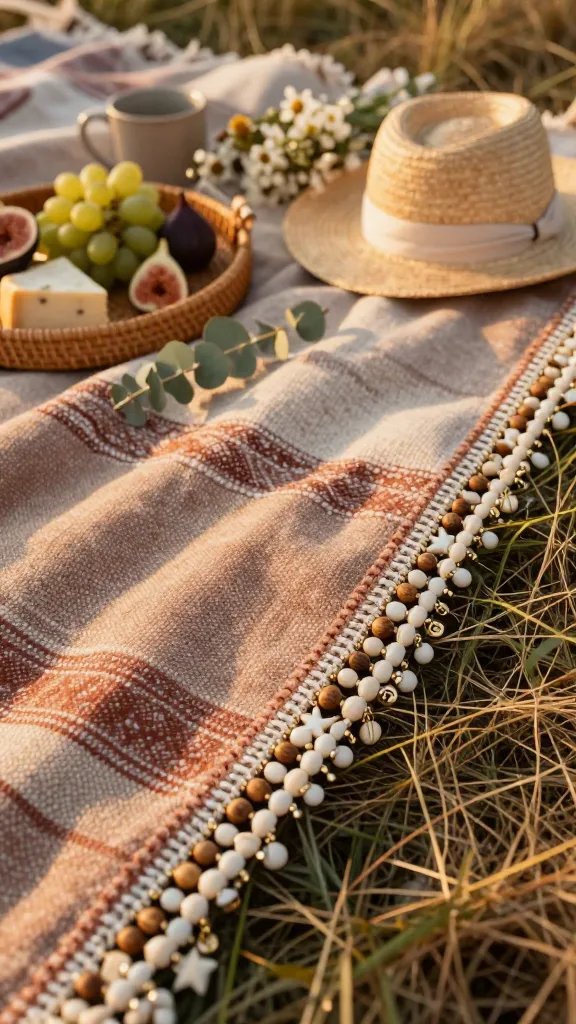
For the maximalists: a slim ladder trim with wooden or bone beads says festival chic. Keep beads lightweight and spaced to avoid bulk. The sparkle and texture turn every edge into a photogenic border.
Key Points
- Stitch ladder trim first, then hand-add beads for control.
- Seal knots with a dab of clear fabric glue.
- Keep corners bead-free so the blanket lays flat.
Use it when your blanket doubles as a stage for snacks, flowers, and your best hat selfie—seriously.
Pick one finish or mash up two for a signature look—no blanket gatekeeping here. Your edges will stay tight, your photos will hit different, and your picnic game will feel downright artisanal. Now grab some thread and make that blanket camera-ready.
Leave a Reply