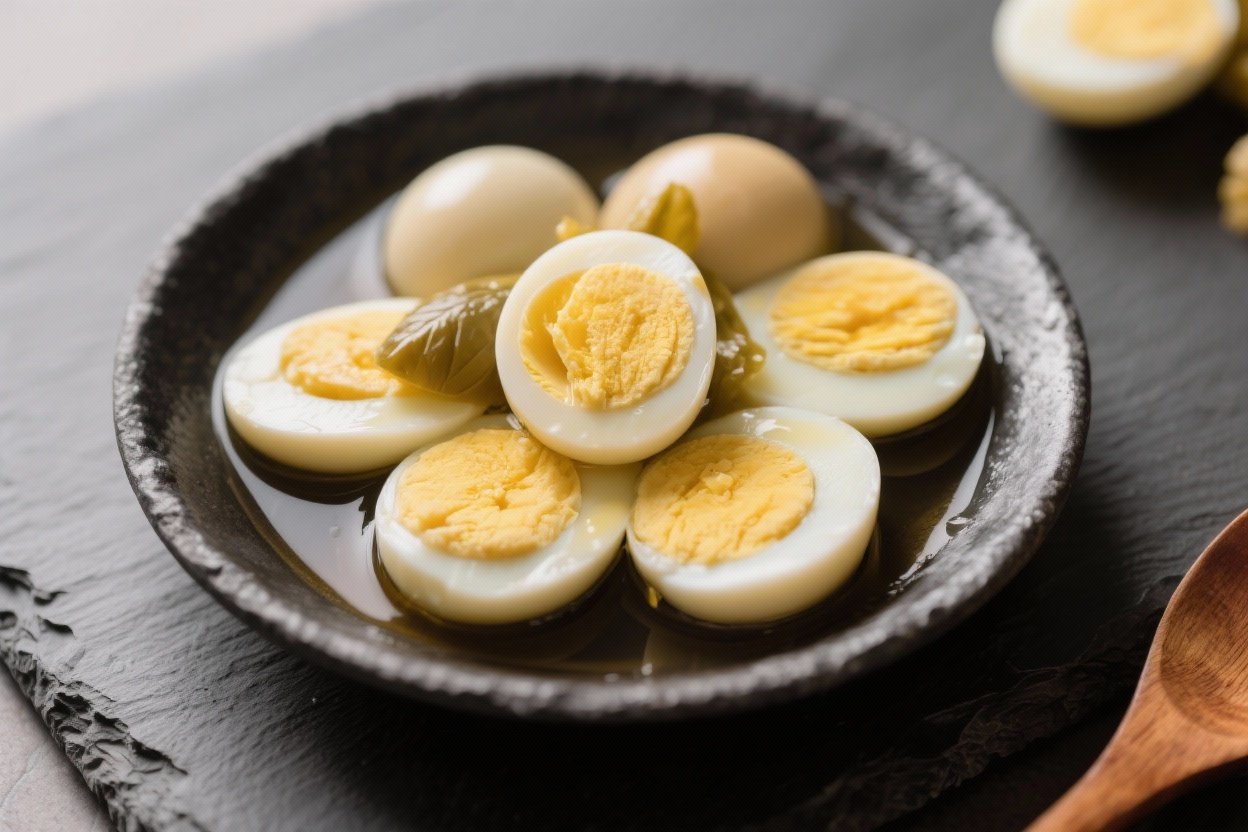
Homemade Pickled Eggs – Easy, Tangy, and Perfect for Snacking
Pickled eggs are the kind of snack that makes you feel prepared. They’re protein-packed, flavorful, and surprisingly simple to make at home. Whether you love them straight from the jar or sliced onto salads and sandwiches, a good batch can last you weeks.
This recipe leans classic but leaves plenty of room to personalize. If you like a little heat or a hint of garlic, you’ll have options. Grab a dozen eggs, a clean jar, and a pot—this comes together fast.
What Makes This Special

Homemade Pickled Eggs – Easy, Tangy, and Perfect for Snacking
Ingredients
- Eggs: 12 large
- Vinegar: 2 cups distilled white vinegar (or apple cider vinegar for a softer tang)
- Water: 1 cup
- Sugar: 2–3 tablespoons (adjust to taste)
- Salt: 2 teaspoons (non-iodized pickling or kosher salt preferred)
- Garlic: 2–3 cloves, lightly crushed
- Onion: 1 small red or yellow onion, thinly sliced
- Whole spices: 1 teaspoon black peppercorns, 1 teaspoon mustard seeds
- Bay leaves: 2
- Optional heat: 1–2 small dried chiles or 1 teaspoon red pepper flakes
- Optional extras: Fresh dill, a few slices of beet for color, or 1 teaspoon pickling spice
- Equipment: 1 large pot, ice bath, clean 1-quart glass jar with tight lid
Instructions
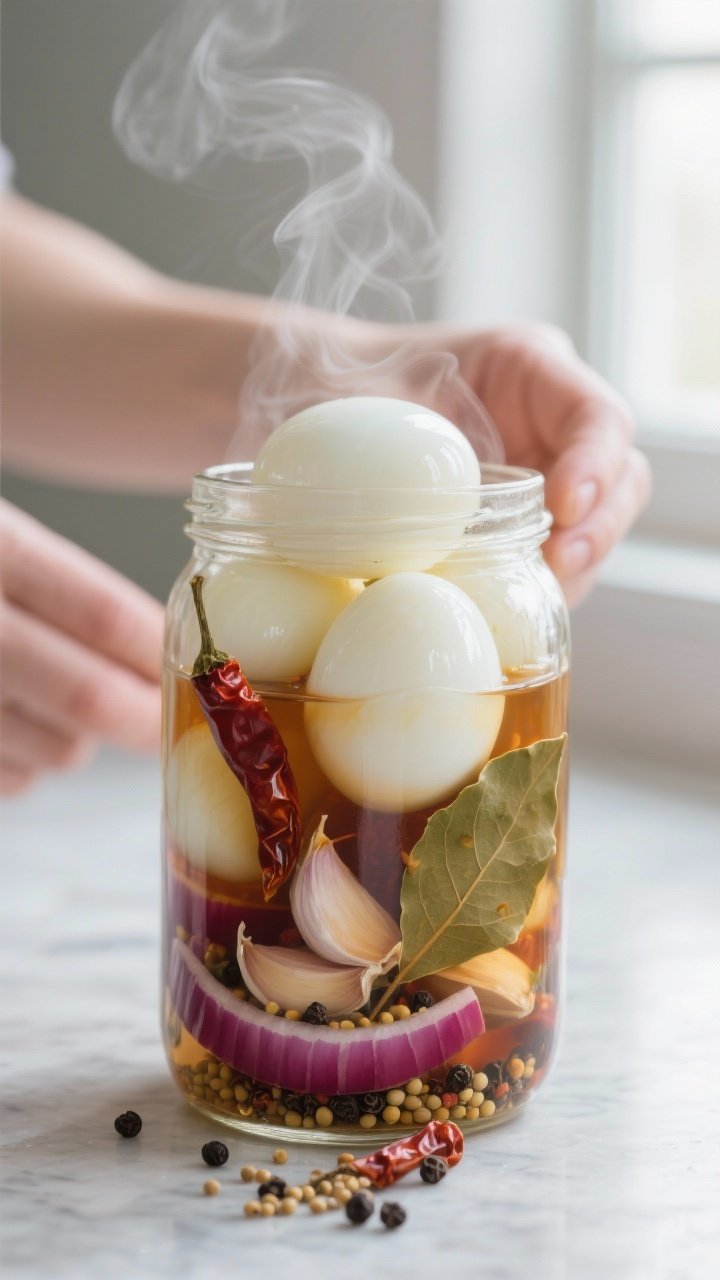
- Boil the eggs: Place eggs in a pot and cover with cold water by about an inch. Bring to a gentle boil over medium-high heat, then reduce to a simmer and cook for 10 minutes. Don’t boil aggressively or the whites can toughen.
- Shock and peel: Transfer eggs to an ice bath and let them chill for 10–15 minutes. Tap each egg around its middle, roll gently to crack, and peel under running water. Aim for smooth, intact whites.
- Prep the jar: Clean your jar and lid with hot, soapy water and rinse well. For best results, pour boiling water into the jar, let sit a minute, then empty and air-dry. This helps keep things tidy and reduces off flavors.
- Make the brine: In a small pot, combine vinegar, water, sugar, salt, garlic, onion, peppercorns, mustard seeds, bay leaves, and any optional heat or herbs. Bring to a simmer over medium heat, stirring to dissolve sugar and salt. Simmer 2–3 minutes to infuse flavors.
- Cool slightly: Turn off the heat and let the brine rest for 5 minutes. You want it hot, but not boiling when it hits the eggs. This helps preserve texture.
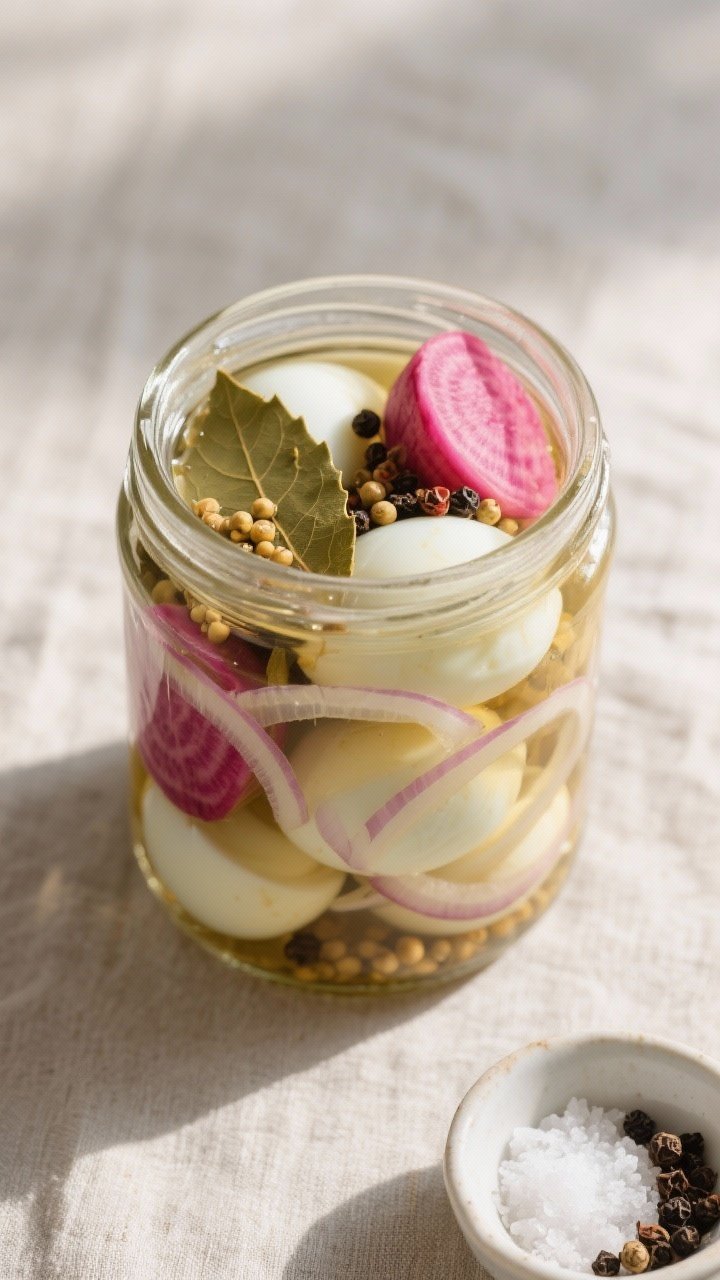
- Pack the jar: Add the peeled eggs to the jar, layering with the softened onion and garlic. Pour the hot brine over the eggs, making sure everything is submerged. Leave about 1/2 inch of headspace at the top.
- Seal and chill: Wipe the rim, close the lid, and let the jar cool to room temperature on the counter for about 1 hour. Then refrigerate.
- Wait for flavor: For best taste, wait at least 3 days before eating. Peak flavor usually lands between day 5 and day 10. The longer they sit, the deeper the flavor.
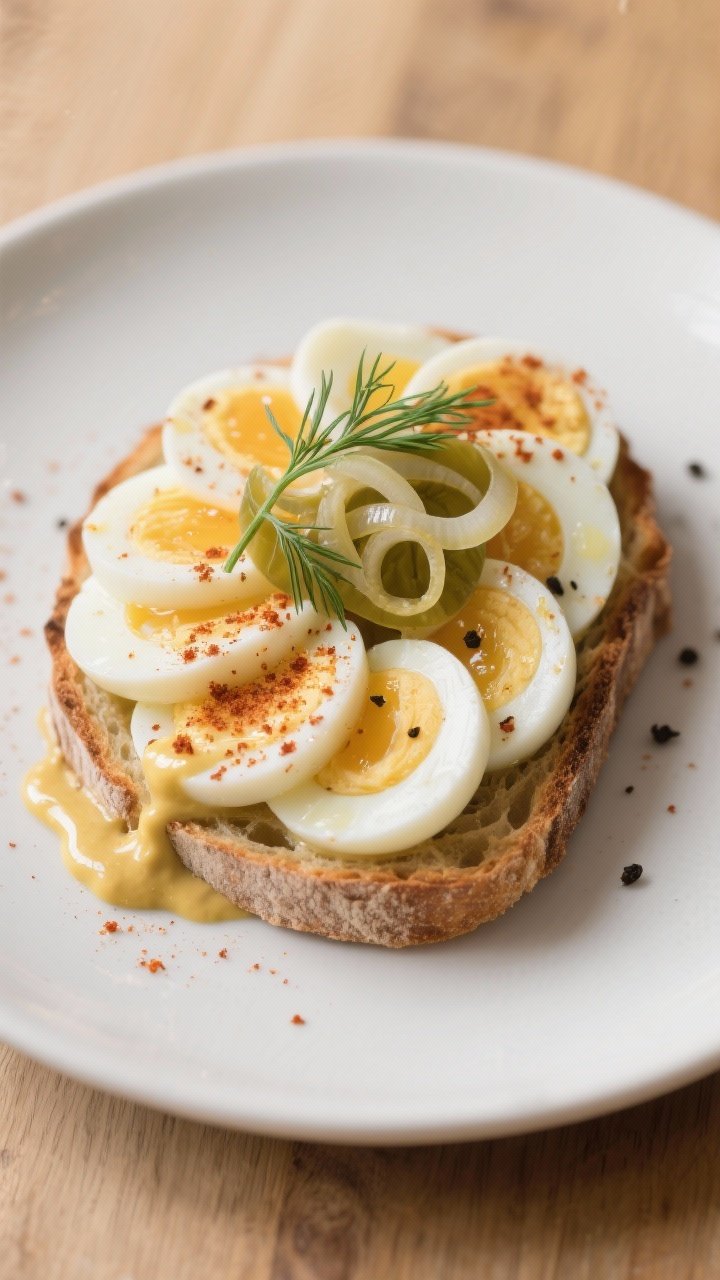
- Serve: Enjoy cold, straight from the jar, or slice onto toast, grain bowls, salads, or charcuterie boards. Sprinkle with black pepper or paprika for a simple finish.
This version balances tangy vinegar with a touch of sweetness and warm spices.
The brine is clean and bright, not overly harsh, so the eggs don’t taste sharp or rubbery. A quick simmer extracts flavor from spices like peppercorns and mustard seeds, while onion and garlic add a savory backbone. It’s simple enough for beginners and flexible for seasoned cooks.
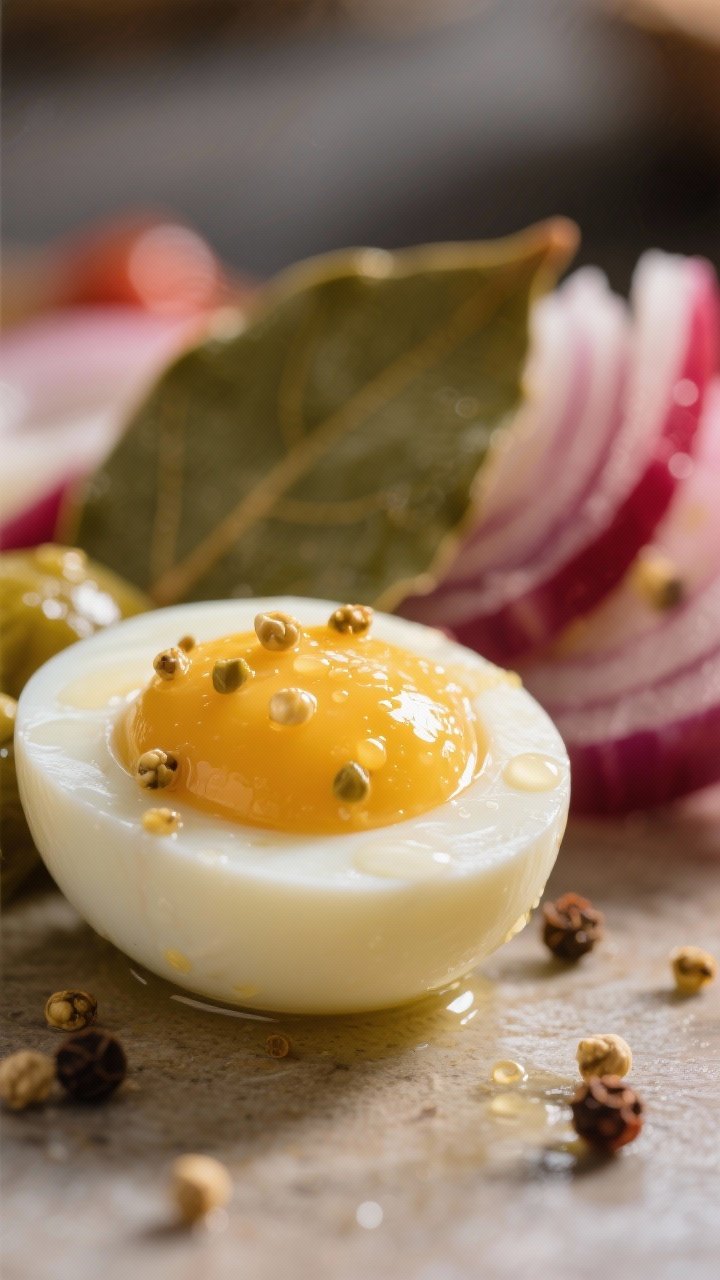
Most importantly, the texture is spot-on: tender whites and creamy yolks that don’t dry out.
With a little patience in the fridge, the eggs take on a beautiful blush of flavor from the brine. You’ll have a snack that’s reliable, portable, and loaded with character.
Shopping List
- Eggs: 12 large
- Vinegar: 2 cups distilled white vinegar (or apple cider vinegar for a softer tang)
- Water: 1 cup
- Sugar: 2–3 tablespoons (adjust to taste)
- Salt: 2 teaspoons (non-iodized pickling or kosher salt preferred)
- Garlic: 2–3 cloves, lightly crushed
- Onion: 1 small red or yellow onion, thinly sliced
- Whole spices: 1 teaspoon black peppercorns, 1 teaspoon mustard seeds
- Bay leaves: 2
- Optional heat: 1–2 small dried chiles or 1 teaspoon red pepper flakes
- Optional extras: Fresh dill, a few slices of beet for color, or 1 teaspoon pickling spice
- Equipment: 1 large pot, ice bath, clean 1-quart glass jar with tight lid
Instructions
- Boil the eggs: Place eggs in a pot and cover with cold water by about an inch. Bring to a gentle boil over medium-high heat, then reduce to a simmer and cook for 10 minutes.
Don’t boil aggressively or the whites can toughen.
- Shock and peel: Transfer eggs to an ice bath and let them chill for 10–15 minutes. Tap each egg around its middle, roll gently to crack, and peel under running water. Aim for smooth, intact whites.
- Prep the jar: Clean your jar and lid with hot, soapy water and rinse well.
For best results, pour boiling water into the jar, let sit a minute, then empty and air-dry. This helps keep things tidy and reduces off flavors.
- Make the brine: In a small pot, combine vinegar, water, sugar, salt, garlic, onion, peppercorns, mustard seeds, bay leaves, and any optional heat or herbs. Bring to a simmer over medium heat, stirring to dissolve sugar and salt.
Simmer 2–3 minutes to infuse flavors.
- Cool slightly: Turn off the heat and let the brine rest for 5 minutes. You want it hot, but not boiling when it hits the eggs. This helps preserve texture.
- Pack the jar: Add the peeled eggs to the jar, layering with the softened onion and garlic.
Pour the hot brine over the eggs, making sure everything is submerged. Leave about 1/2 inch of headspace at the top.
- Seal and chill: Wipe the rim, close the lid, and let the jar cool to room temperature on the counter for about 1 hour. Then refrigerate.
- Wait for flavor: For best taste, wait at least 3 days before eating. Peak flavor usually lands between day 5 and day 10.
The longer they sit, the deeper the flavor.
- Serve: Enjoy cold, straight from the jar, or slice onto toast, grain bowls, salads, or charcuterie boards. Sprinkle with black pepper or paprika for a simple finish.
How to Store
Keep the jar in the refrigerator at all times. Use a clean fork or spoon to remove eggs so no stray crumbs or fingers touch the brine. Shelf life is typically up to 3–4 weeks in the fridge when handled cleanly and kept submerged.
If the brine turns cloudy, smells off, or you see mold, discard the batch.
Don’t can pickled eggs for room-temperature storage—this is a refrigerator pickle only. Store the jar toward the back of the fridge, where the temperature is most stable.
Why This is Good for You
Eggs offer high-quality protein, B vitamins, and minerals like selenium and choline. They help keep you full and support brain and muscle function.
The small amount of sugar in the brine balances flavor without turning this into a sweet snack.
Vinegar brings acidity that can perk up any meal and may support appetite control for some people. Plus, if pickled eggs help you reach for a satisfying snack instead of something ultra-processed, that’s a win.
Common Mistakes to Avoid
- Overcooking the eggs: This leads to rubbery whites and chalky yolks. Keep the simmer gentle and stick to the timing.
- Peeling too soon: Skip the ice bath and you’ll fight the shells.
Cooling helps the membrane release.
- Pouring boiling brine on eggs: Scalding-hot brine can toughen the whites. Let it rest a few minutes first.
- Using dirty tools: Any contamination can shorten shelf life. Keep jar and utensils clean, and don’t fish eggs out with fingers.
- Not fully submerging: Eggs should stay under the brine to pickle evenly and stay safe.
Add a bit more brine if needed.
- Impatience: They need a few days. Tasting early is fine, but flavor improves with time.
Variations You Can Try
- Beet Pickled Eggs: Add a few slices of cooked beet or 1/2 cup beet juice to the brine. The eggs turn a vibrant pink with a gentle earthiness.
- Dill and Garlic: Swap mustard seeds for dill seeds, and tuck in a few sprigs of fresh dill.
Bright and herby.
- Smoky Paprika: Stir 1 teaspoon smoked paprika into the brine and add a bay leaf. Warm, savory notes that pair well with cheese boards.
- Sweet and Spicy: Increase sugar to 4 tablespoons and add sliced jalapeño. Tangy-sweet with a kick.
- Curry Style: Add 1 teaspoon curry powder and a few coriander seeds.
Great for grain bowls or quick lunches.
FAQ
How long do pickled eggs need before they’re ready to eat?
They’re edible after 24 hours, but the flavor is mild. For the best taste, wait 3–5 days. By day 7, the seasoning has usually penetrated well.
Do I have to use white vinegar?
No.
Apple cider vinegar gives a softer, fruitier tang. White vinegar is classic and clean. Avoid balsamic or very dark vinegars, which can overpower and muddy the brine.
Can I reuse the brine?
It’s best not to.
Once you finish a jar, discard the old brine. If you want another batch, make fresh brine to keep flavor bright and safety on point.
Why are my eggs rubbery?
They were likely overcooked or shocked with boiling-hot brine. Keep the simmer gentle, use an ice bath, and let the brine cool a few minutes before pouring.
Can I pickle soft-boiled eggs?
Stick to fully hard-boiled for safety and structure.
Soft yolks don’t hold up well in the brine and can impact storage time.
How do I make them spicier?
Add more dried chiles, red pepper flakes, or a few slices of fresh jalapeño. You can also add a splash of hot sauce to the brine.
What should I serve them with?
They’re great with crackers, cheese, pickles, and cured meats. Try them on avocado toast, chopped into potato salad, or sliced over greens with a mustard vinaigrette.
Wrapping Up
Homemade pickled eggs are easy, affordable, and endlessly customizable.
With a clean jar, a balanced brine, and a few days of patience, you’ll have a reliable snack ready whenever you are. Keep a batch in the fridge for quick breakfasts, midday bites, or a pop of flavor on your favorite dishes. Once you make them at home, the store-bought versions won’t stand a chance.
Printable Recipe Card
Want just the essential recipe details without scrolling through the article? Get our printable recipe card with just the ingredients and instructions.