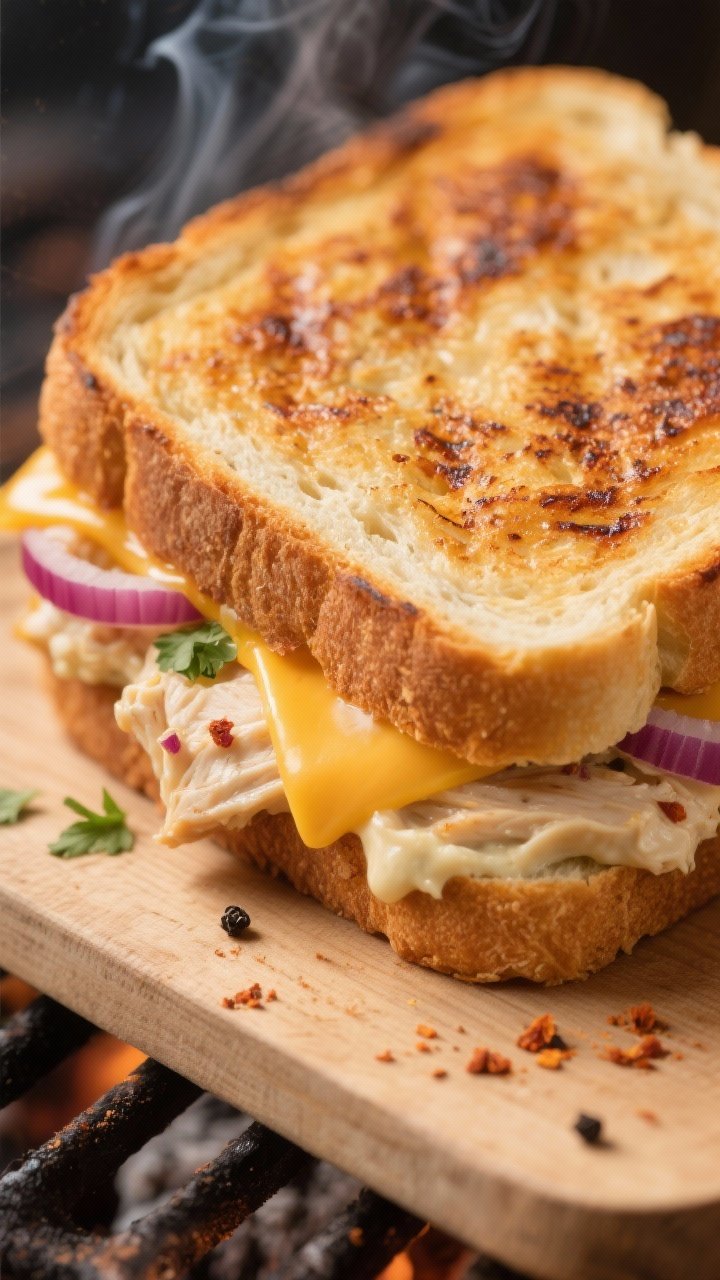
Chicken Mayo Braaibroodjie – A Toasted South African Favorite
If you love simple comfort food with big flavor, this Chicken Mayo Braaibroodjie will win you over. It’s a South African-style toasted sandwich cooked over the coals, with creamy chicken mayo, melty cheese, and a little tang. Think grilled cheese meets picnic vibes, but better.
The filling is quick to mix, and the bread toasts to golden perfection with a gentle smokiness from the braai. It’s easy, satisfying, and ideal for lazy weekends or a casual get-together.
What Makes This Recipe So Good

Chicken Mayo Braaibroodjie - A Toasted South African Favorite
Ingredients
- 8 slices of white or brown sandwich bread (thick-cut works best)
- 2 cups cooked chicken, shredded or finely chopped
- 1/2 cup mayonnaise (add more if you like it creamier)
- 1 teaspoon Dijon or mild mustard
- 1 tablespoon lemon juice
- 1 small red onion, very finely diced (or 2 spring onions)
- 1 small celery stalk, finely diced (optional, for crunch)
- 1/4 cup grated cheddar or gouda (plus extra for layering)
- 8–10 slices of tomato (optional but classic)
- 2 tablespoons butter, softened (for spreading on the outsides)
- Salt and black pepper, to taste
- Pinch of paprika or chilli flakes (optional)
- Chopped parsley or chives, for freshness (optional)
Instructions
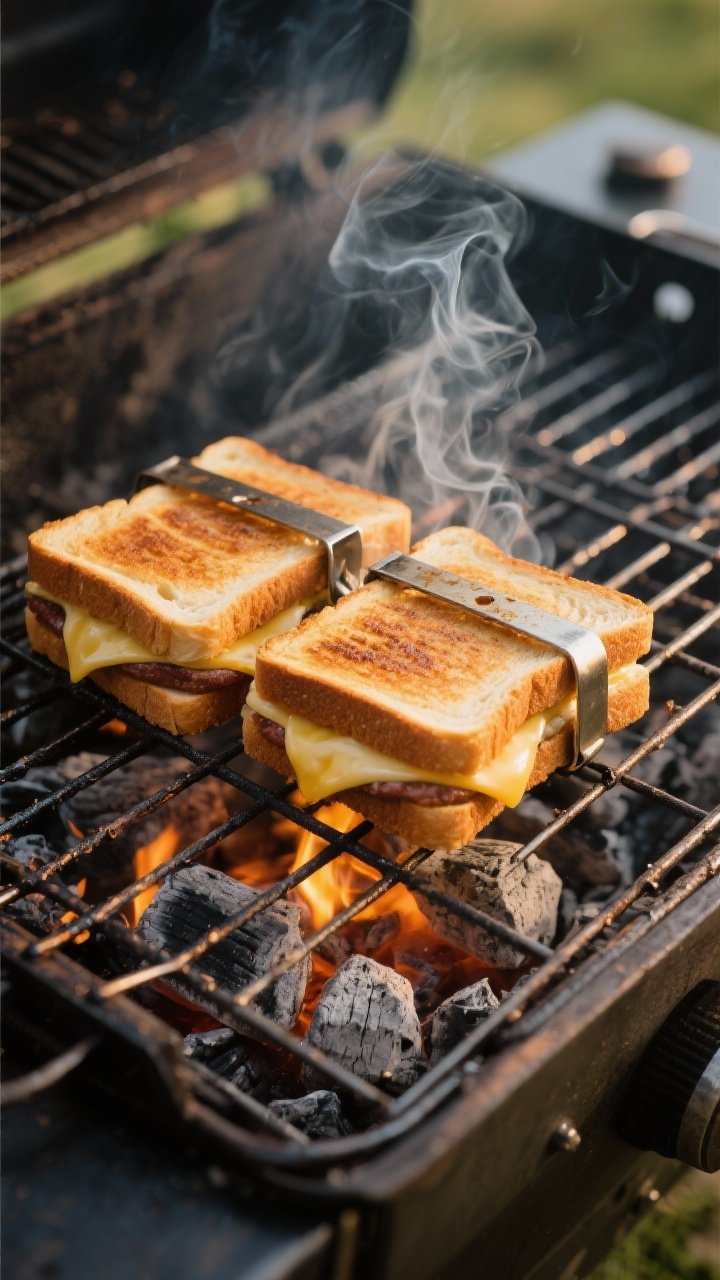
- Get the braai ready: You want medium, steady coals. Not raging flames, not dying embers. If using a grill pan or sandwich press, preheat to medium.
- Mix the filling: In a bowl, combine chicken, mayonnaise, mustard, lemon juice, onion, celery, grated cheese, and herbs if using. Season with salt, pepper, and a pinch of paprika or chilli flakes.
- Taste and adjust: Add more mayo for creaminess or lemon for brightness. The mixture should hold together but not feel dry.
- Assemble the sandwiches: Lay out the bread slices. Spread a thin layer of butter on one side of each slice. The buttered side will face out for toasting.
- Layer the filling: Flip four slices so the unbuttered side faces up. Add a thin layer of grated cheese, then a generous scoop of chicken mayo. Add tomato slices if using, and finish with a bit more cheese. Top with the remaining bread, buttered side facing out.
- Use a braai grid or basket: Place the sandwiches in a hinged braai grid to keep them together and make flipping easier. If you don’t have one, a flat grill and gentle flipping with a spatula will do.
- Braai low and slow: Toast over medium coals for 3–5 minutes per side, until the bread is golden and crisp and the cheese is melted. Keep the grid slightly raised to avoid burning.
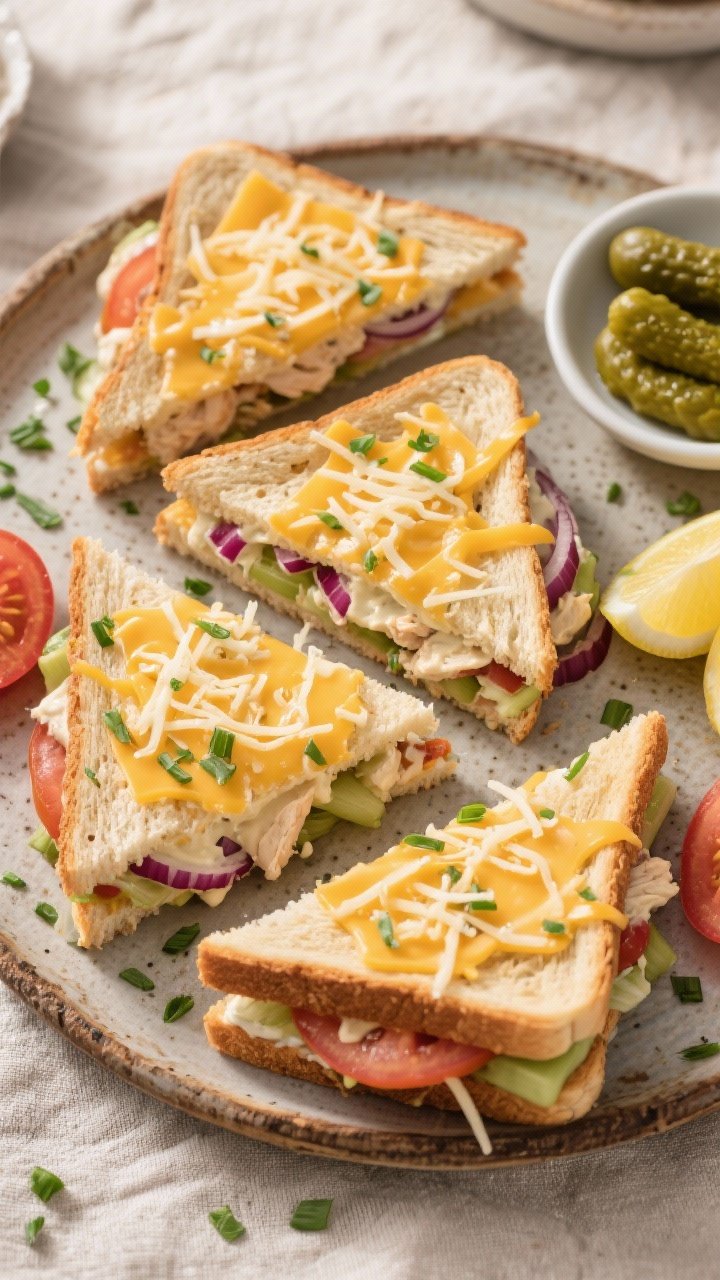
- Rest briefly, then slice: Let the sandwiches sit for 1–2 minutes so the filling settles. Slice in halves or quarters.
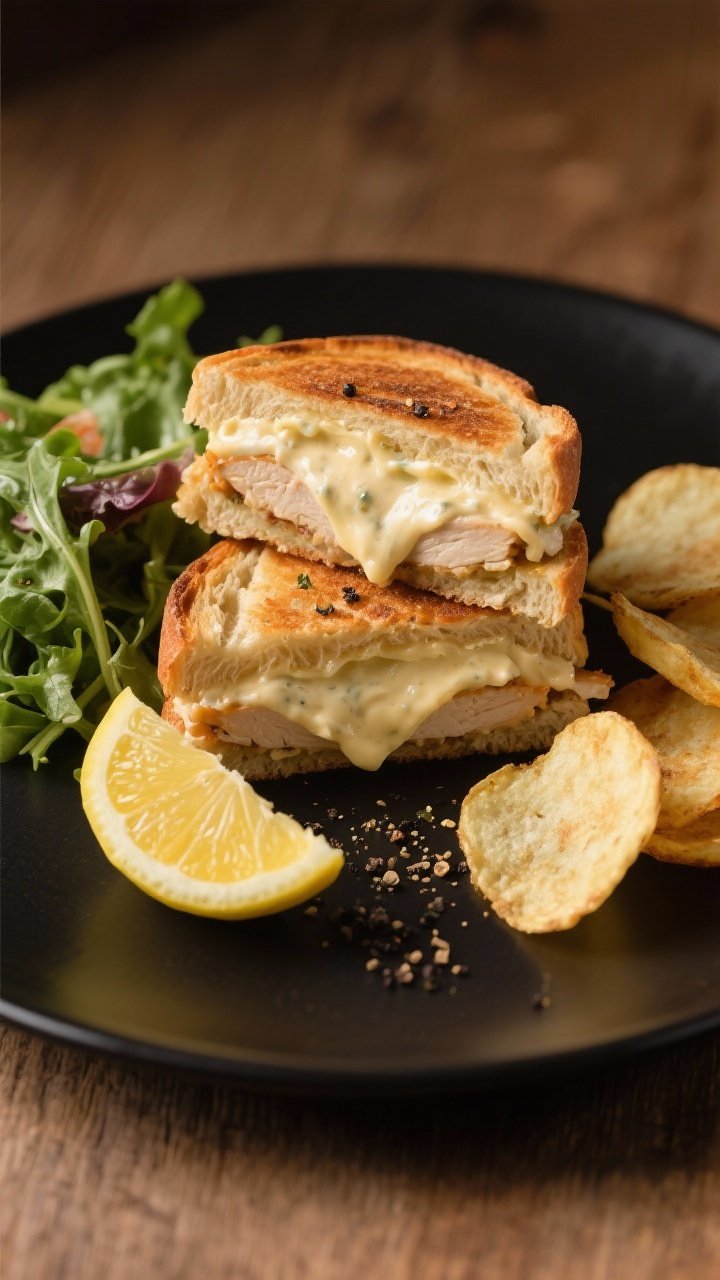
- Serve hot: Best enjoyed immediately, with extra lemon wedges, pickles, or a simple green salad.
- It’s quick and fuss-free: Use leftover roast chicken or rotisserie chicken for a speedy filling.
- Perfectly balanced flavors: Creamy mayo, a touch of tang from lemon, and mild sweetness from onion or relish.
- That braai magic: Cooking over the coals adds gentle smoke and irresistible crispness to the bread.
- Flexible and crowd-friendly: Easy to scale up, and you can tweak it to suit your taste.
- Comfort you can hold: It’s warm, crunchy, cheesy, and creamy all at once.
Ingredients
- 8 slices of white or brown sandwich bread (thick-cut works best)
- 2 cups cooked chicken, shredded or finely chopped
- 1/2 cup mayonnaise (add more if you like it creamier)
- 1 teaspoon Dijon or mild mustard
- 1 tablespoon lemon juice
- 1 small red onion, very finely diced (or 2 spring onions)
- 1 small celery stalk, finely diced (optional, for crunch)
- 1/4 cup grated cheddar or gouda (plus extra for layering)
- 8–10 slices of tomato (optional but classic)
- 2 tablespoons butter, softened (for spreading on the outsides)
- Salt and black pepper, to taste
- Pinch of paprika or chilli flakes (optional)
- Chopped parsley or chives, for freshness (optional)
Instructions
- Get the braai ready: You want medium, steady coals. Not raging flames, not dying embers.
If using a grill pan or sandwich press, preheat to medium.
- Mix the filling: In a bowl, combine chicken, mayonnaise, mustard, lemon juice, onion, celery, grated cheese, and herbs if using. Season with salt, pepper, and a pinch of paprika or chilli flakes.
- Taste and adjust: Add more mayo for creaminess or lemon for brightness. The mixture should hold together but not feel dry.
- Assemble the sandwiches: Lay out the bread slices.
Spread a thin layer of butter on one side of each slice. The buttered side will face out for toasting.
- Layer the filling: Flip four slices so the unbuttered side faces up. Add a thin layer of grated cheese, then a generous scoop of chicken mayo.
Add tomato slices if using, and finish with a bit more cheese. Top with the remaining bread, buttered side facing out.
- Use a braai grid or basket: Place the sandwiches in a hinged braai grid to keep them together and make flipping easier. If you don’t have one, a flat grill and gentle flipping with a spatula will do.
- Braai low and slow: Toast over medium coals for 3–5 minutes per side, until the bread is golden and crisp and the cheese is melted.
Keep the grid slightly raised to avoid burning.
- Rest briefly, then slice: Let the sandwiches sit for 1–2 minutes so the filling settles. Slice in halves or quarters.
- Serve hot: Best enjoyed immediately, with extra lemon wedges, pickles, or a simple green salad.
How to Store
- Before braaing: The chicken mayo filling can be made up to 2 days ahead and kept covered in the fridge. Assemble just before cooking so the bread doesn’t get soggy.
- After braaing: Leftover sandwiches can be wrapped and refrigerated for up to 24 hours.
Reheat in a skillet or air fryer to crisp them back up.
- Freezing: Freeze the chicken mayo filling (without tomato) for up to 1 month. Thaw overnight in the fridge, stir, and freshen with a squeeze of lemon before assembling.
Benefits of This Recipe
- Uses leftovers smartly: A great way to turn extra roast chicken into something special.
- Budget-friendly: Everyday ingredients, big payoff.
- Portable and party-ready: Easy to serve for braais, picnics, game day, or school lunches.
- Balanced texture: Crunchy toast meets creamy filling, with optional fresh tomato for juiciness.
- Customizable: Adjust the richness, heat, and add-ins to match your mood.
Pitfalls to Watch Out For
- Too hot a fire: High heat burns the bread before the cheese melts. Stick to medium, steady coals.
- Soggy bread: Wet tomatoes or overstuffed filling can make the bread soggy.
Pat tomato slices dry and keep fillings even.
- Under-seasoning: Chicken mayo needs salt, pepper, and acid. Taste and adjust before assembling.
- Dry filling: If the chicken is very lean, add a touch more mayo or a drizzle of olive oil to keep it creamy.
- Skipping the butter: Butter on the outside ensures crisp, even browning. Don’t be shy, but don’t overdo it either.
Recipe Variations
- Spicy Peri-Peri: Add a teaspoon of peri-peri sauce to the filling and use smoked cheddar for extra punch.
- Bacon and Avocado: Layer crispy bacon and thin slices of avocado with the chicken mayo.
Skip the tomato to avoid excess moisture.
- Herby Lemon: Stir in chopped parsley, dill, and extra lemon zest for a bright, fresh twist.
- Curry Mayo: Mix in 1/2 to 1 teaspoon mild curry powder, a pinch of sugar, and a handful of raisins for a Cape Malay-inspired flavor.
- Cheese Lover’s: Combine cheddar with mozzarella or gouda for maximum melt and stretch.
- Greek-Style: Swap mayo for thick Greek yogurt, add a little garlic and cucumber, and use feta for a tangy, lighter version.
- No-Braai Option: Use a cast-iron skillet, grill pan, or sandwich press. Cook on medium heat and press gently for an even toast.
FAQ
Can I use canned chicken?
Yes. Drain it well and break it up with a fork before mixing.
You may need a touch more mayo to get a smooth, creamy texture.
What bread works best?
Thick-cut white or brown sandwich bread is classic. Sourdough also works well, but make sure the slices aren’t too dense or the filling may squeeze out when pressing.
Do I have to add tomato?
No. Tomato is traditional in many braaibroodjies, but it’s optional.
If you use it, slice thinly and pat dry to avoid sogginess.
How do I stop the sandwiches from sticking?
Make sure the outside of the bread is lightly buttered and the braai grid is clean. If using a pan, a small knob of butter or a wipe of oil helps.
Can I make these ahead?
You can mix the filling ahead and keep it chilled. Assemble just before cooking, or the bread may absorb moisture and soften too much.
How do I know the heat is right?
Hold your hand above the grill, about 5 inches up.
If you can keep it there for 5–6 seconds, it’s about medium heat—ideal for braaibroodjies.
What sides go well with this?
A crisp green salad, tangy pickles, coleslaw, or a simple tomato-and-onion salad are great. Potato crisps also make an easy, fun pairing.
In Conclusion
Chicken Mayo Braaibroodjie is everything you want from a toasted sandwich: crispy edges, a creamy center, and just enough smoke to make it feel special. It’s quick to prepare, easy to customize, and always a hit at a braai.
Whether you’re feeding a crowd or treating yourself, this simple classic brings comfort with every bite. Light the coals, mix the filling, and enjoy a warm, satisfying sandwich that never disappoints.
Printable Recipe Card
Want just the essential recipe details without scrolling through the article? Get our printable recipe card with just the ingredients and instructions.