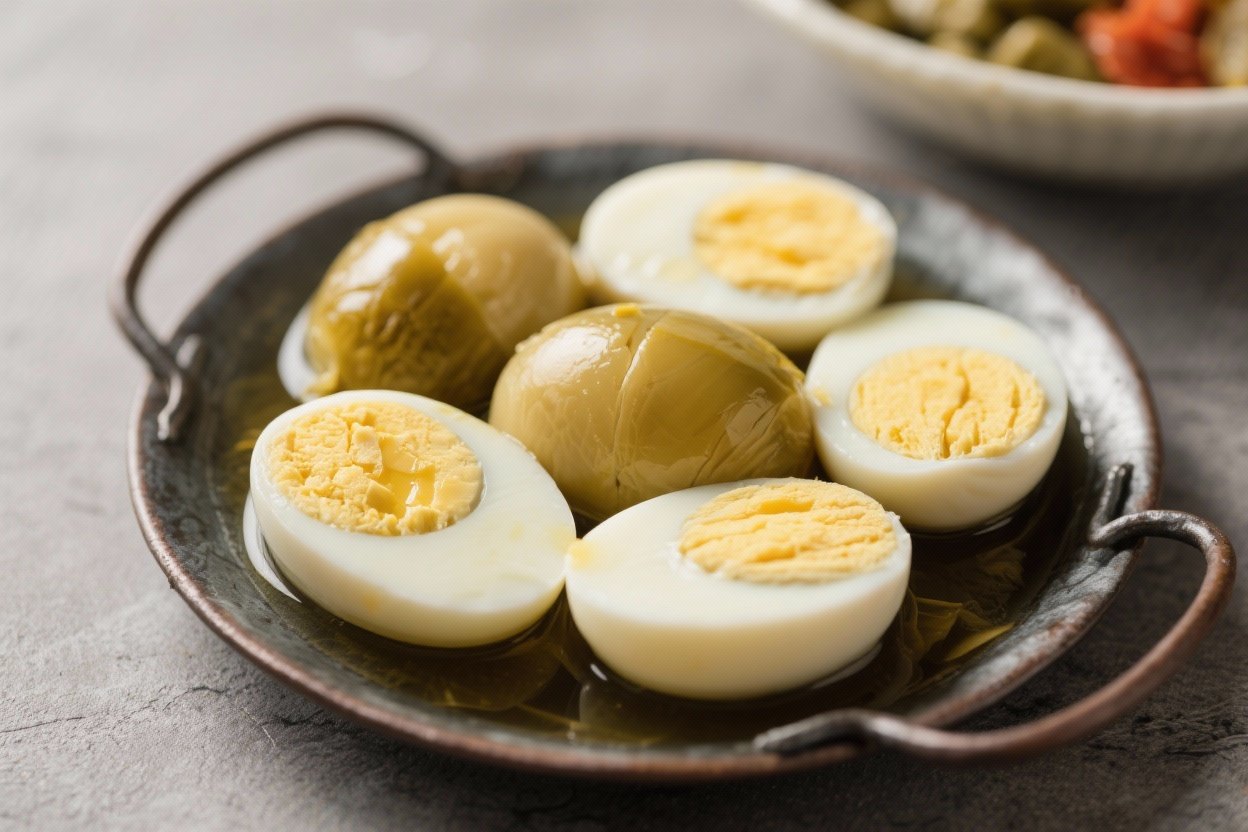
Homemade Pickled Eggs – Tangy, Easy, and Perfect for Snacking
Pickled eggs are old-school in the best way: simple ingredients, bold flavor, and a jar you can snack from all week. They’re sharp, a little sweet, and endlessly customizable. If you’ve only had them at a bar or deli, you’ll be surprised how easy they are to make at home.
This version gives you a clean, balanced brine and a bright tang that works with everything from sandwiches to snack boards. You’ll only need pantry staples, a handful of spices, and about 30 minutes of active time.
What Makes This Special
This recipe is built around a classic, dependable brine that’s neither too sweet nor too harsh. It’s flexible enough for add-ins like beets, jalapeños, or dill without losing its balance.
The texture stays tender, not rubbery, and the flavor develops evenly throughout the egg.
It also uses a straightforward method that fits your schedule. You can make it mild or punchy, and the spice level is easy to adjust. Most importantly, it tastes like something you’ll actually want to reach for every day.
Shopping List
- 12 large eggs
- 2 cups white distilled vinegar (5% acidity)
- 1 cup water
- 1/3 cup granulated sugar (adjust to taste)
- 1 tablespoon kosher salt
- 2 garlic cloves, sliced
- 1 small yellow onion, thinly sliced
- 2 teaspoons whole black peppercorns
- 2 teaspoons mustard seeds
- 1 teaspoon coriander seeds (optional)
- 1/2 teaspoon crushed red pepper flakes (optional, for heat)
- 2 bay leaves
- Optional add-ins: a few fresh dill sprigs, 1 small cooked beet (for pink eggs), or 1 jalapeño, sliced
- Equipment: 1 large saucepan, slotted spoon, large bowl, ice, clean 1-quart glass jar with lid (or two pint jars)
Step-by-Step Instructions
- Cook the eggs. Place eggs in a saucepan and cover with cold water by an inch.
Bring to a gentle boil over medium heat, then reduce to a low simmer and cook for 10 minutes for firm yolks.
- Cool and peel. Transfer eggs to an ice bath and chill for at least 10 minutes. Gently crack and peel under running water. Set aside on a clean towel.
- Sterilize the jar. Wash your jar and lid with hot, soapy water, then rinse well.
Pour boiling water into the jar and over the lid to sanitize. Drain and air-dry.
- Make the brine. In a saucepan, combine vinegar, water, sugar, and salt. Add garlic, onion, peppercorns, mustard seeds, coriander seeds, red pepper flakes, and bay leaves.
Bring to a simmer, stirring until sugar and salt dissolve, then turn off the heat.
- Pack the jar. Add peeled eggs to the jar. Tuck in the onion slices from the brine and any add-ins like dill, beet slices, or jalapeño.
- Add hot brine. Carefully pour the hot brine over the eggs, making sure they’re fully submerged. Leave a little headspace at the top.
If needed, top up with a splash of vinegar and water (2:1 ratio).
- Cool and chill. Let the jar cool to room temperature without the lid, about 30 minutes. Seal and refrigerate.
- Wait for flavor. For best taste, wait at least 48 hours. The flavor deepens over 3–7 days.
If you used beets, the color will intensify with time.
- Serve. Enjoy straight from the jar, sliced on toast, chopped into salads, or paired with sharp cheddar and crackers.
Storage Instructions
- Refrigeration is non-negotiable. Keep pickled eggs in the fridge at all times. Do not store at room temperature.
- Shelf life: Up to 3–4 weeks for best quality. Flavor holds, but texture can firm up slightly after that.
- Use clean utensils. Always use a clean fork or spoon to remove eggs.
Avoid touching brine with your fingers.
- Keep eggs submerged. If they peek out of the brine, top up with a quick mix of vinegar and water (2:1) plus a pinch of salt and sugar.
- Watch for off smells. If it smells strange or looks cloudy with slime, discard it.
Why This is Good for You
Eggs offer high-quality protein, B vitamins, and minerals like selenium and iodine. The vinegar brine adds a tangy, low-calorie punch that can help you feel satisfied between meals. You also control the sugar and salt, which means a cleaner ingredient list than many store-bought snacks.
Pickled eggs are a smart add-on for salads and grain bowls.
They bring acid and richness, so you can use less dressing and still get big flavor. Plus, they’re an easy on-the-go option when you need something fast and filling.
Common Mistakes to Avoid
- Undercooking or overcooking the eggs. Soft yolks can break in the brine, while overcooked eggs turn rubbery. Aim for firm but tender.
- Skipping the ice bath. Rapid cooling stops carryover cooking and makes peeling far easier.
- Using dirty jars or utensils. This invites spoilage.
Keep everything clean and sanitized.
- Not enough brine. Eggs must be fully submerged to pickle evenly and safely.
- Too much sugar or salt. Over-seasoning can overpower the eggs. Start with the amounts listed, then adjust in future batches.
- Room-temperature storage. Old bar lore aside, homemade pickled eggs need refrigeration.
Alternatives
- Vinegar swap: Use apple cider vinegar for a rounder, fruitier tang. Rice vinegar makes a softer, slightly sweet brine.
Avoid balsamic; it will dominate.
- Heat variations: Add more red pepper flakes, sliced jalapeños, or a dried chili. For gentle warmth, toss in a few pink peppercorns.
- Herb twist: Fresh dill, tarragon, or a sprig of rosemary adds fragrance. Use sparingly so it doesn’t taste medicinal.
- Beet-pickled eggs: Add a few slices of cooked beet to tint the eggs a rosy pink and add light earthiness.
- Sweet-and-sour: Increase sugar to 1/2 cup for a classic deli-style profile.
- Onion-forward: Double the onion and add a few slices of shallot for a sweeter bite.
The onions make a great topping on their own.
FAQ
How long do pickled eggs need to sit before eating?
They taste good after 24 hours but are best after 2–3 days. The flavor continues to deepen for about a week.
Can I use farm-fresh eggs?
Yes, but they can be tougher to peel when very fresh. If possible, use eggs that are a few days old, or steam the eggs to make peeling easier.
Do I have to boil the brine?
Heating helps dissolve sugar and salt and extracts flavor from the spices.
It also warms the onions and garlic, softening their bite. Let the brine come to a gentle simmer, then pour it hot over the eggs.
Why are my eggs rubbery?
Overcooked eggs can turn tough. Stick to the timing, cool them quickly, and don’t leave them in a very acidic brine for months.
Within 3–4 weeks, they should stay tender.
Is canning necessary?
No. These are refrigerator pickles, not shelf-stable. Canning methods aren’t recommended for eggs at home.
Keep them cold and eat within a few weeks.
Can I reuse the brine?
It’s best not to. The brine dilutes as eggs release moisture, and repeated use raises safety concerns. If you love the flavor, make a fresh batch.
What if I don’t have mustard or coriander seeds?
Use what you have.
Peppercorns, bay leaves, garlic, and onion will still deliver great flavor. A pinch of dried dill or celery seed can add character.
Can I halve the recipe?
Yes. Use 6 eggs and halve all brine ingredients.
Use a pint jar or two smaller jars to keep the eggs fully submerged.
Wrapping Up
Homemade pickled eggs are simple, bold, and endlessly useful. With a clean, balanced brine and a few pantry spices, you get a jar that’s ready for snacks, salads, and quick lunches. Start with the base recipe, then tweak the vinegar, heat, and herbs to match your taste.
Keep them cold, give them a couple of days to develop, and enjoy that bright, tangy bite all week long.
Printable Recipe Card
Want just the essential recipe details without scrolling through the article? Get our printable recipe card with just the ingredients and instructions.