10 Minimalist Picnic Setups That Make Al Fresco Eating Look Effortless
You don’t need a trunkful of gear or a chef’s pantry to picnic like a pro. These 10 minimalist picnic setups are low-lift, high-reward, and seriously delicious. We’re talking quick prep, easy packing, and food that holds up outdoors—no soggy salads or melty messes. Grab a blanket, a small cooler, and let’s make the park your dining room.
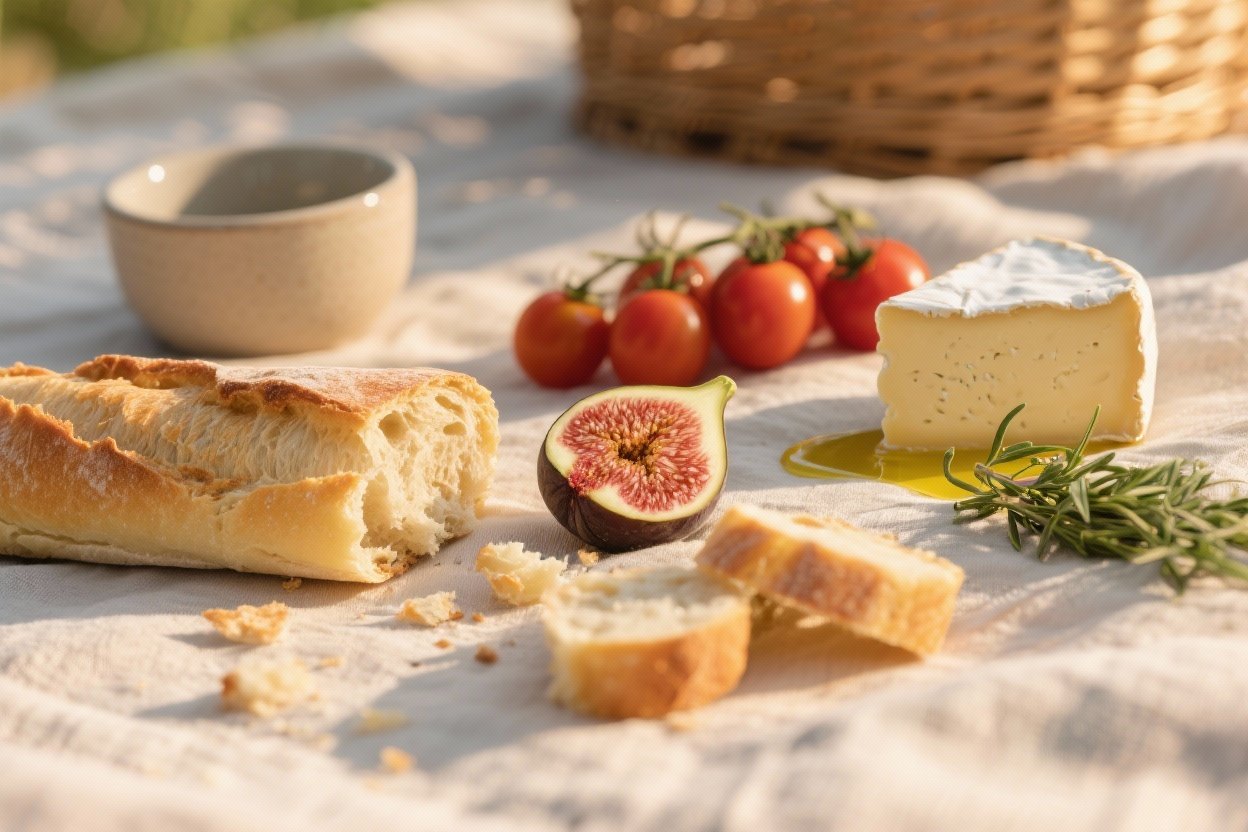
1. No-Cook Mediterranean Mezze Board That Travels Like a Dream

This setup is the definition of easy: no stove, no oven, just vibrant flavors and sturdy bites that don’t wilt. It’s perfect for sun-soaked afternoons when you want to nibble and linger. Everyone can mix and match, which keeps it fun and flexible.
Ingredients:
- 1 cup hummus (store-bought or homemade)
- 1/2 cup tzatziki
- 1/2 cup olive tapenade
- 1 cup cherry tomatoes
- 1 cucumber, sliced into spears
- 1 red bell pepper, sliced
- 12 pitted olives (mixed colors)
- 6 oz feta, cut into cubes
- 2 pita breads, quartered (or 1 baguette, sliced)
- 2 tbsp extra-virgin olive oil
- 1 tsp dried oregano
- Lemon wedges, for squeezing
- Pinch of flaky salt and black pepper
Instructions:
- Pack dips (hummus, tzatziki, tapenade) in small lidded containers.
- Rinse and dry the tomatoes; cut the cucumber and pepper into sturdy pieces for dipping.
- Toss feta cubes with olive oil, oregano, a pinch of salt, and pepper.
- Wrap pita or baguette in a clean towel to keep it from drying out.
- At the picnic, assemble on a board or napkins: dips, veggies, olives, feta. Finish with lemon squeezes over the feta and hummus.
Serve with crisp white wine or sparkling water. Try adding marinated artichokes or grilled halloumi if you’ve got time. Pro tip: bring a small knife for last-minute slicing and a spare container for leftovers.
2. Herbed Chickpea Salad Pitas That Won’t Sog Out
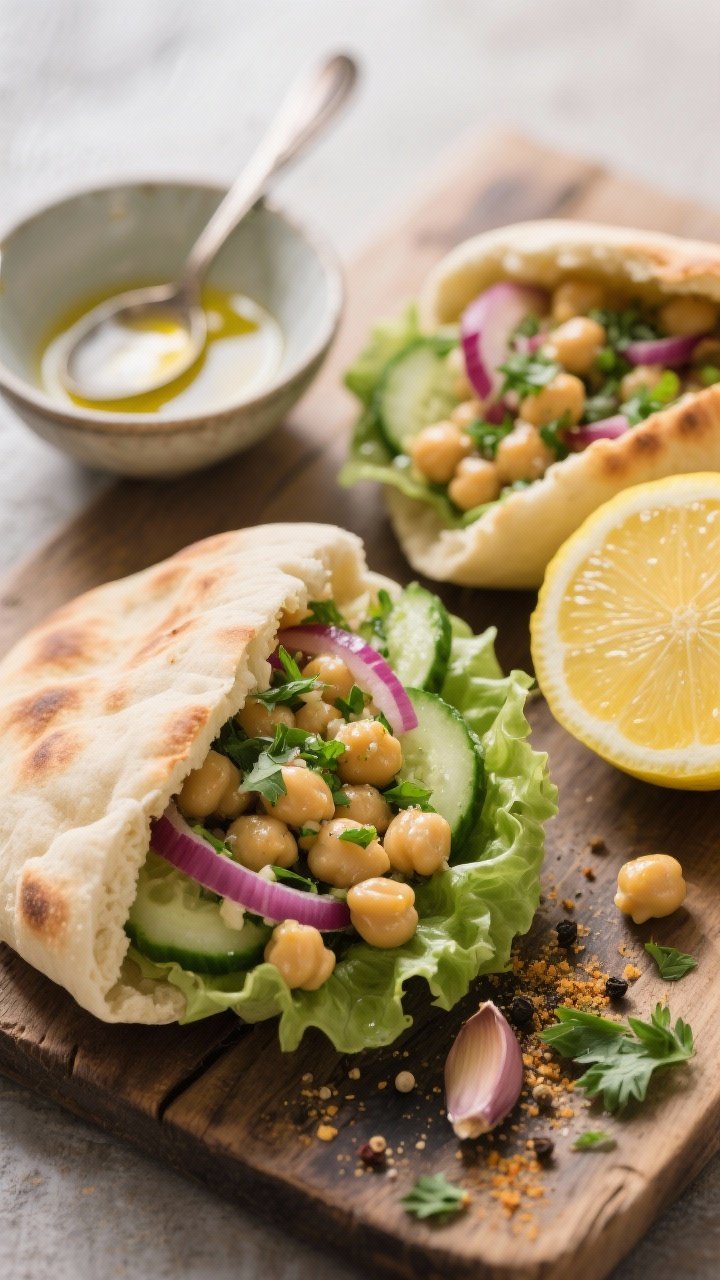
These are protein-packed, budget-friendly, and hold their texture for hours. The trick is keeping the filling separate and stuffing the pitas right before eating—goodbye soggy bread. It’s the kind of hands-off sandwich you’ll make on repeat.
Ingredients:
- 1 (15 oz) can chickpeas, drained and rinsed
- 2 tbsp olive oil
- 1 tbsp lemon juice
- 1 tsp Dijon mustard
- 1/2 tsp kosher salt
- 1/4 tsp black pepper
- 1/4 tsp garlic powder
- 1/4 cup finely chopped parsley
- 2 tbsp chopped dill (or mint)
- 1/4 cup finely diced red onion
- 1/2 cup diced cucumber
- 4 whole-wheat pitas, halved
- 1/2 cup crumbled feta (optional)
- 2 cups baby spinach or arugula
Instructions:
- In a bowl, mash chickpeas lightly with the back of a fork—leave some texture.
- Whisk olive oil, lemon juice, Dijon, salt, pepper, and garlic powder; pour over chickpeas.
- Fold in parsley, dill, red onion, and cucumber. Chill 20 minutes if you can.
- Pack the chickpea mixture in one container, greens in another, and pitas wrapped in a towel.
- At the picnic, stuff pitas with greens, chickpea mix, and feta if using.
These are great with chili crisp or a drizzle of tahini. Swap herbs based on what’s in your fridge—mint makes it extra fresh. For gluten-free, use lettuce cups or GF wraps.
3. Lemon-Pepper Rotisserie Chicken Wraps With Crunchy Slaw

Rotisserie chicken is the minimalist’s best friend—no cooking, tons of flavor. These wraps use a zesty lemon-pepper yogurt toss for a creamy vibe without heaviness. They’re sturdy, travel well, and taste even better under the sun.
Ingredients:
- 3 cups shredded rotisserie chicken
- 1 cup plain Greek yogurt
- 1 tbsp mayonnaise (optional for richness)
- 2 tsp lemon zest
- 1 tbsp lemon juice
- 1 tsp freshly cracked black pepper
- 1/2 tsp kosher salt
- 1 tsp honey
- 2 cups shredded cabbage (coleslaw mix works)
- 1 small carrot, julienned
- 1/4 cup chopped scallions
- 4 large tortillas (flour or whole-wheat)
- 1/2 cup thinly sliced cucumbers
Instructions:
- In a large bowl, whisk yogurt, mayo, lemon zest and juice, pepper, salt, and honey.
- Fold in chicken, cabbage, carrot, and scallions until coated.
- Lay tortillas on a board; add cucumber slices, then pile on the chicken slaw.
- Tightly roll into burrito-style wraps; halve and wrap each portion in parchment or foil.
- Keep chilled until serving; they’re picnic-ready and mess-contained.
Add chopped pickles for tang or a sprinkle of smoked paprika. If you’re dairy-free, swap yogurt for a plant-based alternative. Pro tip: pack extra lemon wedges for a fresh squeeze right before eating.
4. Jammy Tomato Confit Sandwiches With Basil Whip
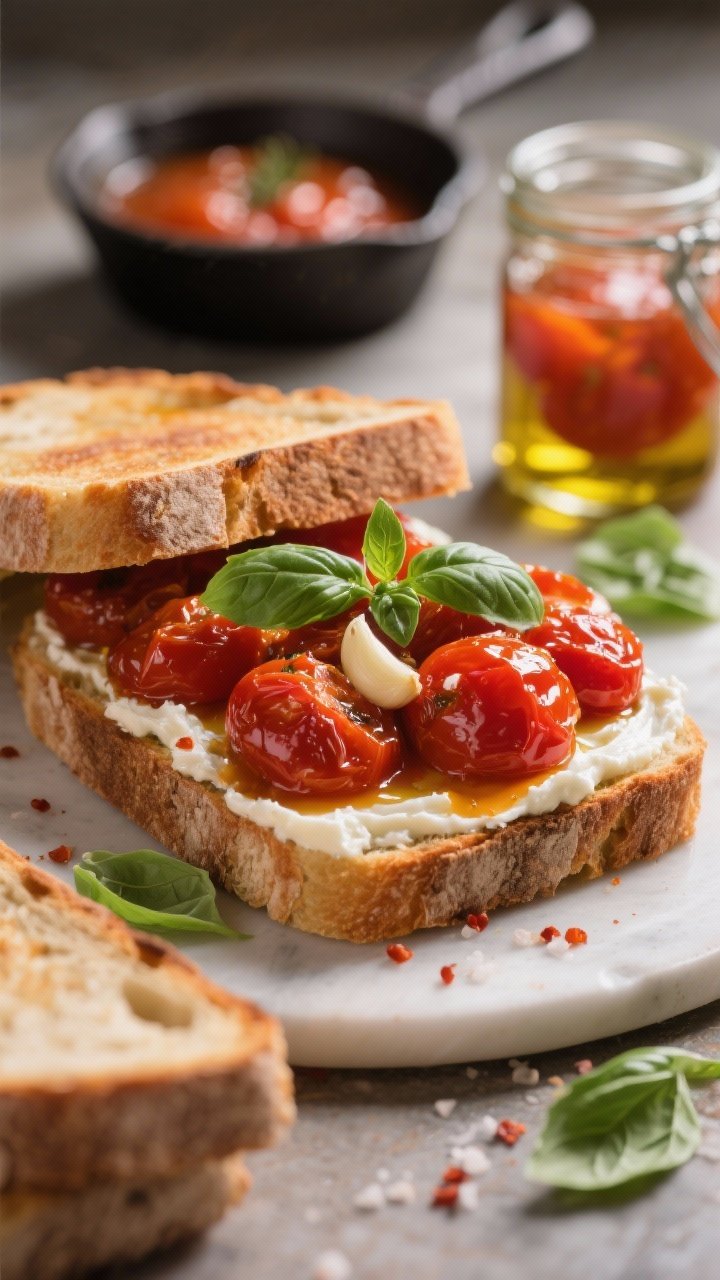
These sandwiches taste like a fancy café special but pack like a champ. Slow-cooked cherry tomatoes turn jammy and sweet, and the basil whip adds herby brightness. Great for late-summer picnics when tomatoes are showing off.
Ingredients:
- 2 pints cherry tomatoes
- 1/3 cup olive oil
- 4 garlic cloves, smashed
- 1/2 tsp kosher salt
- 1/4 tsp red pepper flakes
- 1 small bunch basil, divided
- 1/2 cup ricotta
- 1/4 cup cream cheese (softened)
- 1 tsp lemon zest
- 1 tsp lemon juice
- 1 baguette, split lengthwise
- 1/2 cup arugula
Instructions:
- Preheat oven to 300°F (150°C). Toss tomatoes with olive oil, garlic, salt, red pepper flakes, and a handful of torn basil leaves in a baking dish.
- Roast 60–75 minutes until soft and jammy. Cool completely; pack in a sealed container.
- Blend ricotta, cream cheese, lemon zest and juice, and remaining basil leaves until smooth and green. Season to taste.
- At the picnic, spread basil whip on both sides of the baguette, add arugula, and spoon on the tomato confit. Close and slice into portions.
Make the confit a day ahead—it only gets better. Add prosciutto or mozzarella if you want extra richness. Keep napkins handy; it’s messy in the best way.
5. Crisp-Pear, Aged Cheddar, and Walnut Salad With Maple-Mustard Vinaigrette
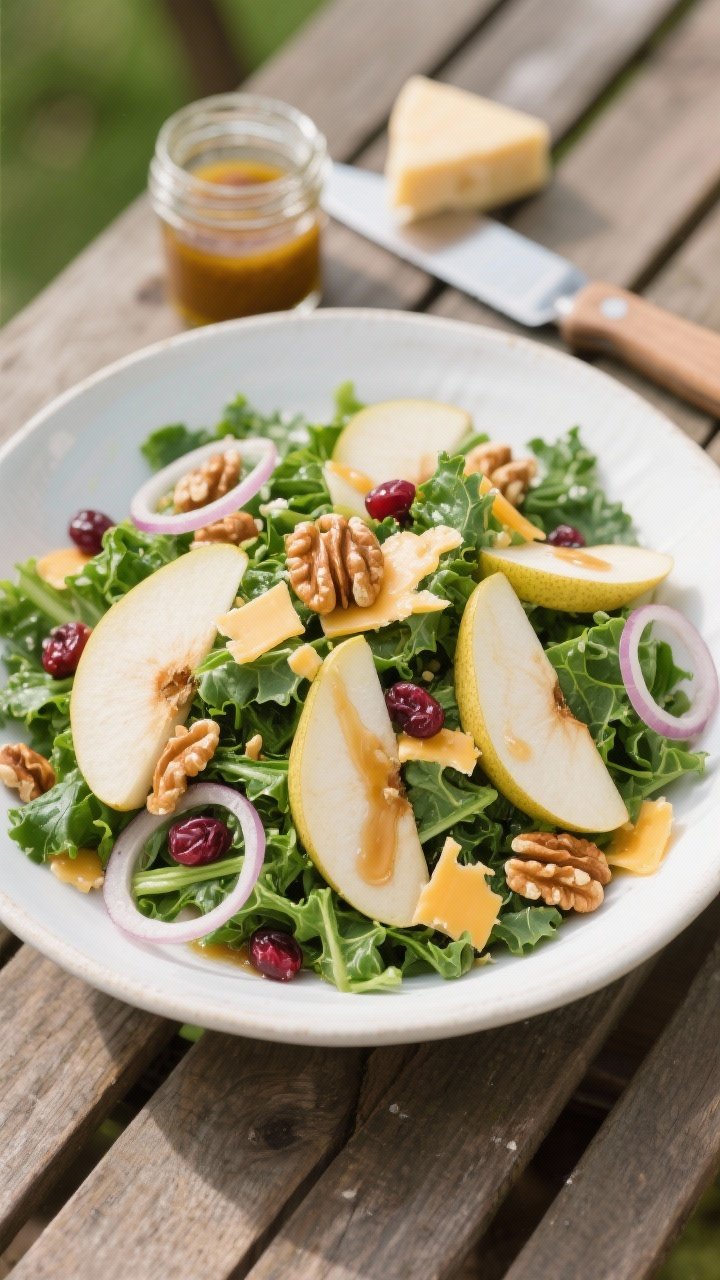
This salad is crunchy, sweet-savory, and built to last—no soggy lettuce here. The trick is sturdy greens and packing the dressing separately. It feels fancy without a lot of fuss, and it pairs with just about everything.
Ingredients:
- 5 oz baby kale or chopped romaine
- 2 firm pears, thinly sliced
- 4 oz aged cheddar, shaved or cubed
- 1/3 cup toasted walnuts
- 2 tbsp dried cranberries (optional)
- 1 small shallot, thinly sliced
- 2 tbsp olive oil
- 1 tbsp apple cider vinegar
- 1 tsp Dijon mustard
- 1 tsp maple syrup
- Pinch of kosher salt and black pepper
- Lemon wedge, for tossing pears
Instructions:
- In a jar, shake olive oil, vinegar, Dijon, maple, salt, and pepper until emulsified.
- Toss pear slices with a squeeze of lemon to prevent browning.
- Pack greens, pears, cheddar, walnuts, cranberries, and shallot separately or layer gently in a large container.
- At the picnic, pour on dressing and toss just before serving.
Add grilled chicken or chickpeas to make it a meal. Swap walnuts for pistachios or almonds. Pro tip: keep a microplane in your basket for last-second Parmesan over the top.
6. Savory Tartine Trio: Smoked Salmon, Pea Smash, and Roasted Pepper
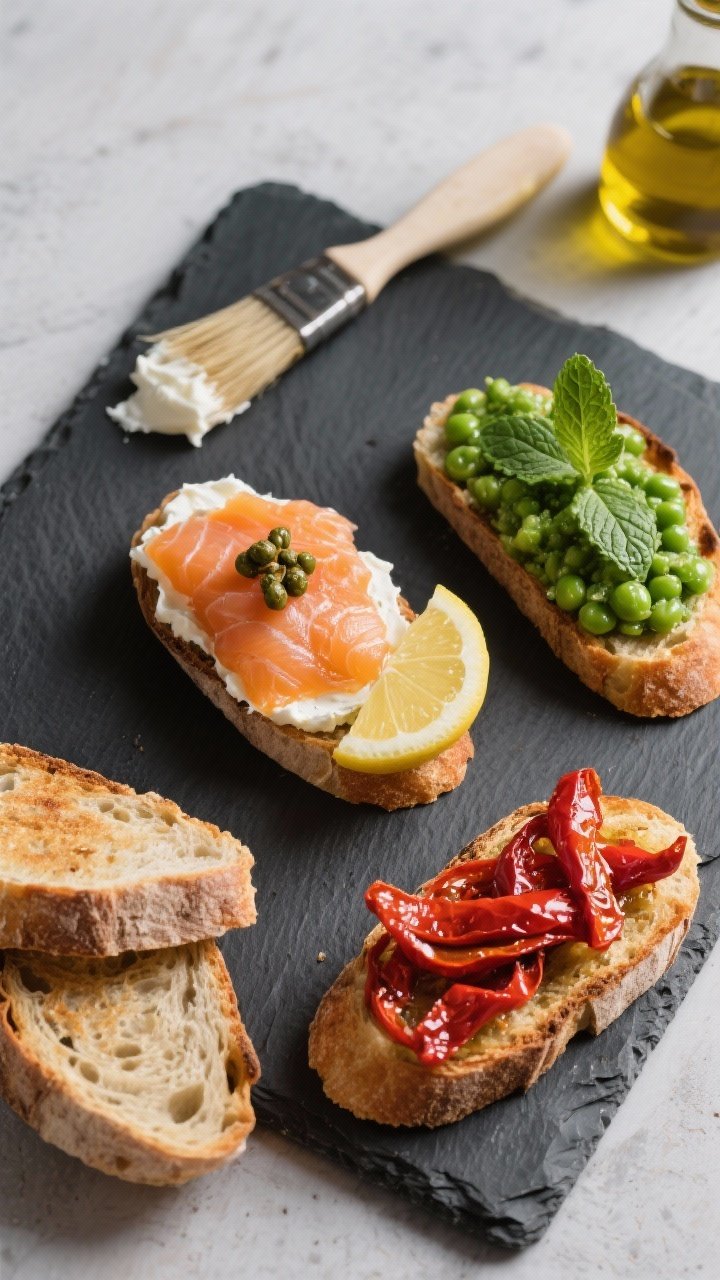
Open-faced sandwiches are picnic glam with minimal effort. Bring a small loaf, prepped toppings, and let everyone build their own. It’s interactive, pretty, and surprisingly filling.
Ingredients: (Makes 6–8 tartines)
- 1 small rustic loaf or sourdough, sliced
- 2 tbsp olive oil (for brushing)
- 4 oz cream cheese
- 4 oz smoked salmon
- 1 tbsp capers
- 1/2 lemon, cut in wedges
- 1 cup thawed frozen peas
- 1 tbsp olive oil (for pea smash)
- 1 tbsp lemon juice
- 2 tbsp grated Parmesan
- Salt and pepper to taste
- 1 jar roasted red peppers, drained and sliced
- 1 garlic clove, halved
- Fresh dill and basil, for topping
Instructions:
- Toast bread slices lightly at home or pack fresh—brush with olive oil and rub with garlic for extra flavor.
- For pea smash, mash peas with olive oil, lemon juice, Parmesan, salt, and pepper until chunky.
- Pack cream cheese, smoked salmon, capers, lemon, pea smash, roasted peppers, and herbs separately.
- At the picnic, assemble combos: cream cheese + salmon + capers + lemon; pea smash + Parmesan + dill; roasted peppers + basil + olive oil drizzle.
Bring a small knife for spreading. Add burrata if you’re feeling indulgent. For gluten-free picnicking, use sturdy GF crackers or rice cakes.
7. Chill-Sesame Soba Noodle Box With Crisp Veg and Tofu
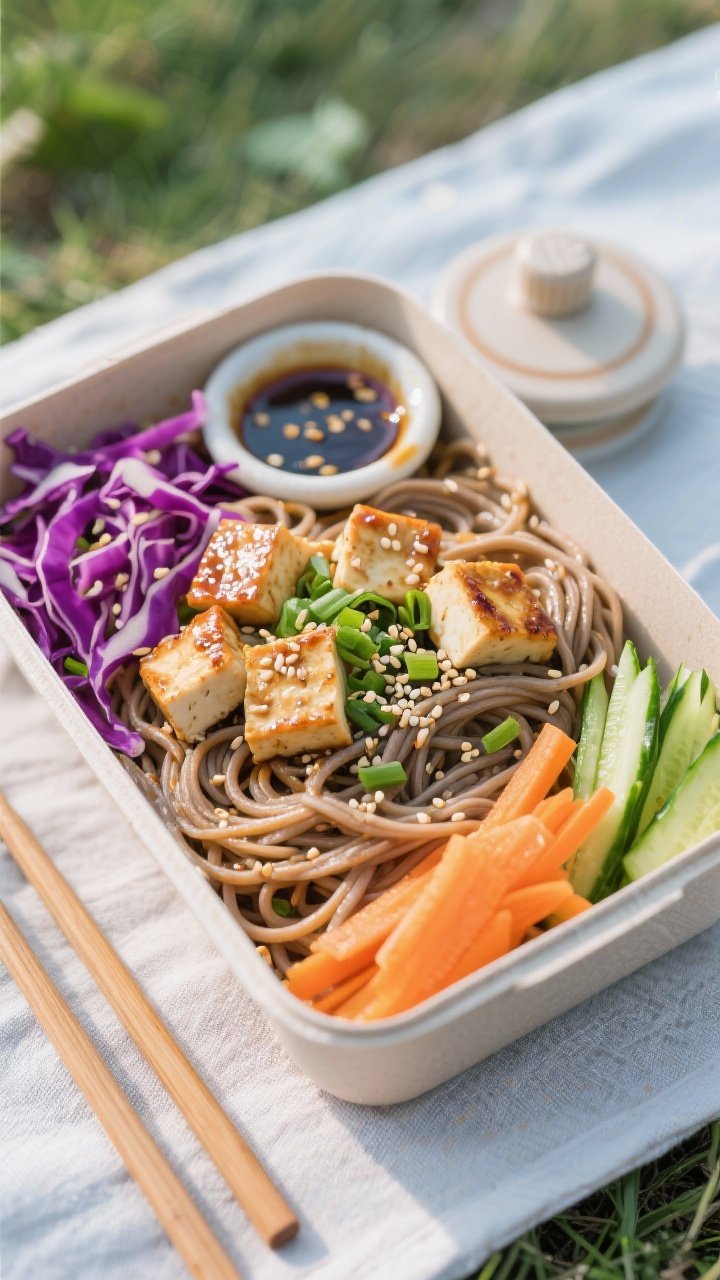
Cold noodles are picnic royalty: slurpable, layered with flavor, and delicious straight from the container. The sesame dressing clings to the soba, and baked tofu adds satisfying protein. This one’s equally good at room temp.
Ingredients:
- 8 oz soba noodles
- 7 oz firm tofu, patted dry and cubed
- 1 tbsp soy sauce (for tofu)
- 1 tsp sesame oil (for tofu)
- 1 cup shredded red cabbage
- 1 carrot, julienned
- 1 cucumber, seeded and matchsticked
- 2 scallions, thinly sliced
- 2 tbsp toasted sesame seeds
- 1/4 cup chopped cilantro (optional)
- 3 tbsp soy sauce or tamari
- 1 tbsp rice vinegar
- 1 tbsp lemon or lime juice
- 1 tbsp sesame oil
- 1 tbsp neutral oil
- 1 tsp honey or maple syrup
- 1 tsp grated fresh ginger
- 1/2 tsp chili flakes or chili crisp (optional)
Instructions:
- Toss tofu with soy sauce and sesame oil; bake at 400°F (205°C) for 20 minutes, flipping halfway, until edges are golden. Cool.
- Cook soba according to package, rinse in cold water to stop cooking, and drain well.
- Whisk dressing: soy, rice vinegar, citrus, sesame oil, neutral oil, honey, ginger, and chili.
- Combine soba, tofu, cabbage, carrot, cucumber, and scallions. Toss with dressing; top with sesame seeds and cilantro.
- Pack in a shallow container so it’s easy to serve with chopsticks or forks.
Add edamame or sliced radishes for extra crunch. This keeps beautifully for a day, so make it ahead. Pro tip: rinse soba thoroughly to remove starch and keep strands from clumping.
8. Farmer’s Market Frittata Squares With Zippy Herb Salad
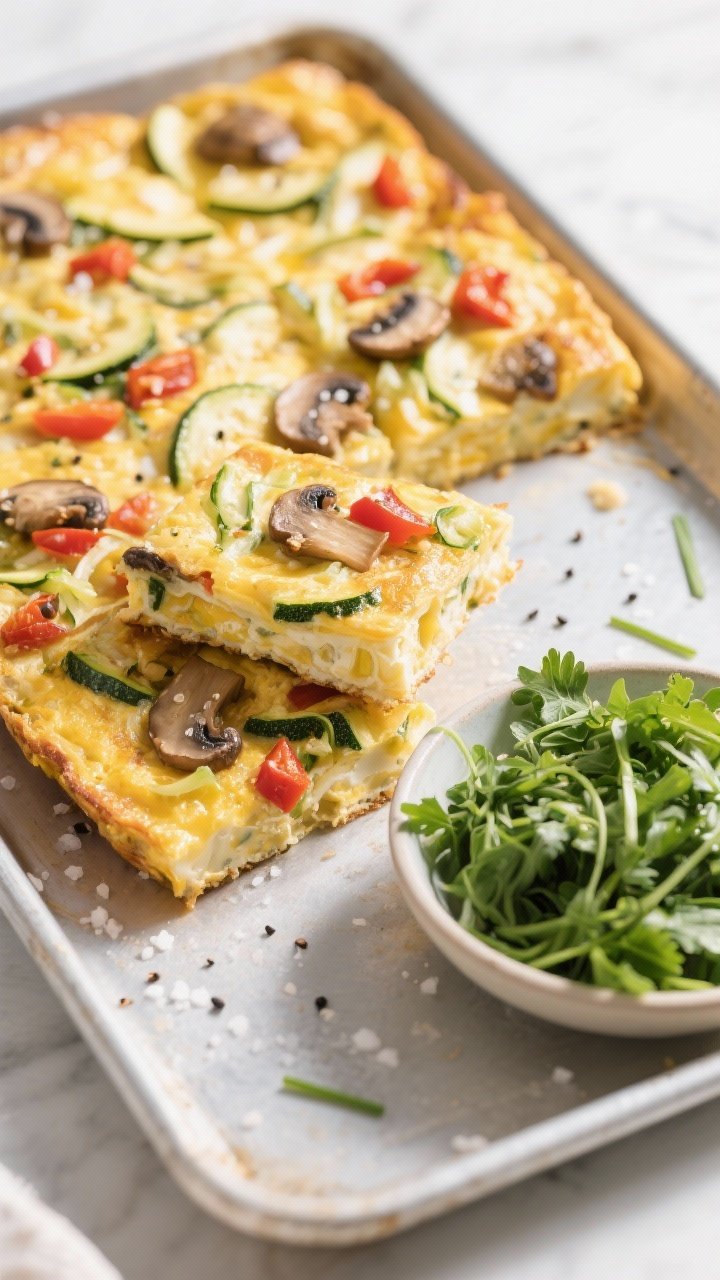
Frittata is the ultimate packable protein: sliceable, sturdy, and good warm or cold. Bake it in a sheet pan for easy squares and pair with a quick herb salad for brightness. It’s brunch energy in picnic form.
Ingredients:
- 10 large eggs
- 1/2 cup milk or half-and-half
- 1 tsp kosher salt
- 1/4 tsp black pepper
- 1 cup shredded zucchini (squeezed dry)
- 1 cup chopped roasted red peppers
- 1/2 cup sautéed mushrooms (optional)
- 1/2 cup crumbled goat cheese or feta
- 2 tbsp olive oil (for pan)
- 1 cup mixed soft herbs (parsley, dill, basil), roughly chopped
- 1 tbsp lemon juice
- 1 tbsp olive oil (for salad)
- Pinch of flaky salt
Instructions:
- Preheat oven to 350°F (175°C). Brush a quarter sheet pan or 9×13-inch dish with olive oil.
- Whisk eggs, milk, salt, and pepper. Fold in zucchini, peppers, mushrooms, and cheese.
- Pour into pan and bake 18–22 minutes until set. Cool and cut into squares.
- Toss herbs with lemon juice, olive oil, and salt right before serving.
- Layer frittata squares in a container with parchment between layers; pack herb salad separately.
Serve with crusty bread or a side of olives. Swap veggies with whatever’s in season—spinach, asparagus, or tomatoes all work. For dairy-free, skip the cheese and add sautéed onions for sweetness.
9. Spiced Couscous Jars With Roasted Veg and Lemon-Tahini Drizzle
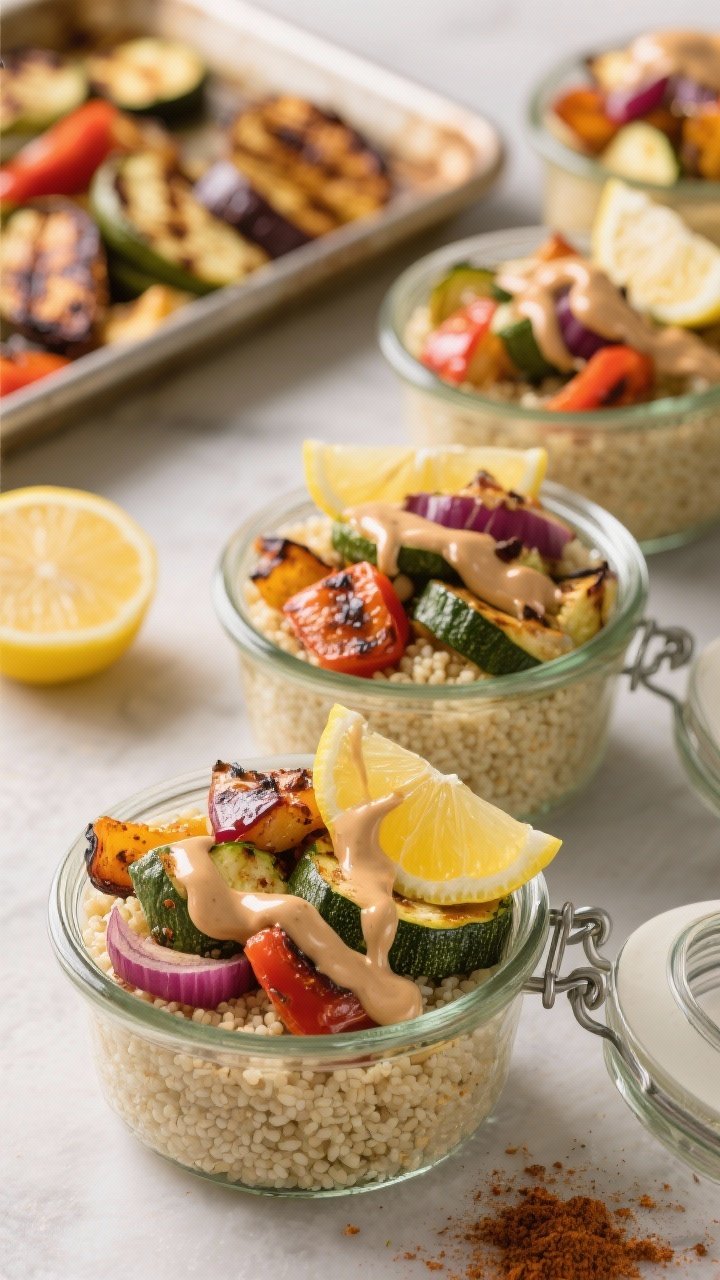
These layered jars are visually gorgeous and perfectly portioned. Fluffy couscous, caramelized veggies, and a tangy tahini drizzle make a complete meal. They’re ideal when you want something hearty but still picnic-friendly.
Ingredients:
- 1 cup couscous
- 1 cup boiling water
- 1/2 tsp kosher salt
- 1 tsp olive oil (for couscous)
- 2 cups mixed vegetables (zucchini, bell peppers, red onion), chopped
- 1 tbsp olive oil (for roasting)
- 1/2 tsp ground cumin
- 1/2 tsp smoked paprika
- Pinch of chili flakes
- 1/3 cup chickpeas (optional)
- 1/4 cup chopped parsley
- 2 tbsp toasted pumpkin seeds
- 3 tbsp tahini
- 2 tbsp lemon juice
- 1 tbsp water, plus more as needed
- 1 tsp honey or maple
- Salt and pepper to taste
Instructions:
- Toss chopped vegetables with olive oil, cumin, smoked paprika, chili flakes, salt, and pepper. Roast at 425°F (220°C) for 18–22 minutes until caramelized. Cool.
- Combine couscous, boiling water, salt, and 1 tsp olive oil in a bowl; cover 5 minutes, then fluff with a fork.
- Whisk tahini, lemon juice, water, honey, salt, and pepper until smooth. Add more water for a drizzleable consistency.
- Layer in jars: couscous, roasted veg, chickpeas, parsley, pumpkin seeds. Pack dressing in a separate small container.
- At the picnic, drizzle tahini sauce over the top and shake the jar lightly to mix.
Swap couscous for quinoa to go gluten-free. Add feta or a dollop of yogurt for creaminess. These keep well, so make extras for weekday lunches—trust me, future you will be thrilled.
10. Five-Ingredient Fruit & Cheese Dessert Box With Honeyed Nuts
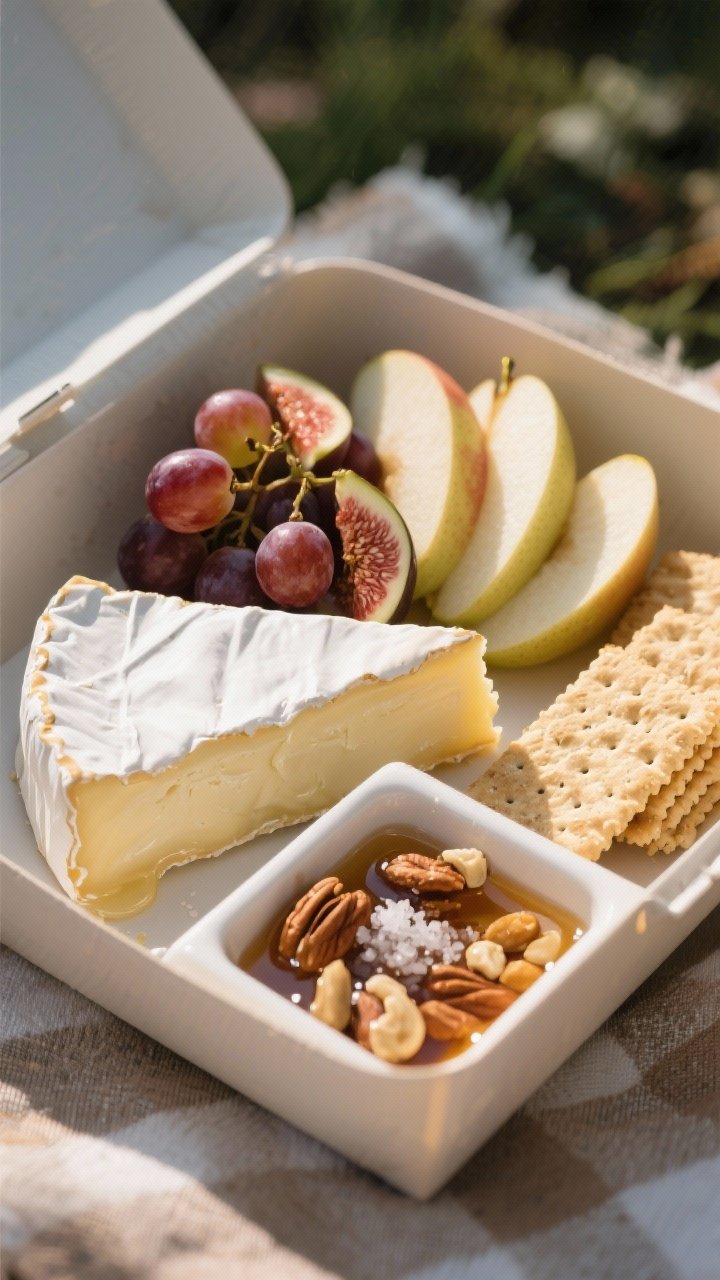
End on a sweet-salty high note with zero baking. This box feels a little luxe but takes minutes to assemble. It’s picnic dessert without the melty chaos.
Ingredients:
- 1 cup seedless grapes or sliced figs
- 1 crisp apple or pear, sliced
- 6 oz wedge of brie or camembert (or a tangy goat cheese log)
- 1/3 cup mixed nuts
- 1 tbsp honey
- 1 pinch flaky salt
- Crackers or thin slices of baguette
- Optional: a few squares of dark chocolate
Instructions:
- Warm honey slightly and toss with nuts plus a pinch of flaky salt; let cool so it sets a bit.
- Slice fruit and cheese. Keep apple or pear slices from browning with a quick lemon dip.
- Pack cheese wrapped in parchment, fruit in a lidded box, and nuts in a small container.
- Add crackers and optional chocolate to round it out.
Swap brie for sharp cheddar if you prefer salty over creamy. A tiny jar of fig jam or cherry preserves is a power move. This setup doubles as a picnic birthday “cake”—stick a candle in the cheese and celebrate.
Packing Smarter, Not Harder
– Bring a lightweight blanket, a sharp pocket knife, a small cutting board, and a few cloth napkins.
– Use stackable containers and mason jars for leak-proof transport.
– Keep a tiny kit: salt, pepper, lemon wedges, and a mini bottle of olive oil. Those final touches make everything pop.
That’s your minimalist picnic playbook—10 setups that travel well, taste amazing, and keep prep blissfully simple. Pick one or mix a few, invite a friend, and claim your favorite patch of grass. The sun’s out, your basket’s packed, and lunch just got a whole lot more fun.
Printable Recipe Card
Want just the essential recipe details without scrolling through the article? Get our printable recipe card with just the ingredients and instructions.