10 Finger Foods for Picnics That Disappear Before the Blanket’s Down
· Yogi
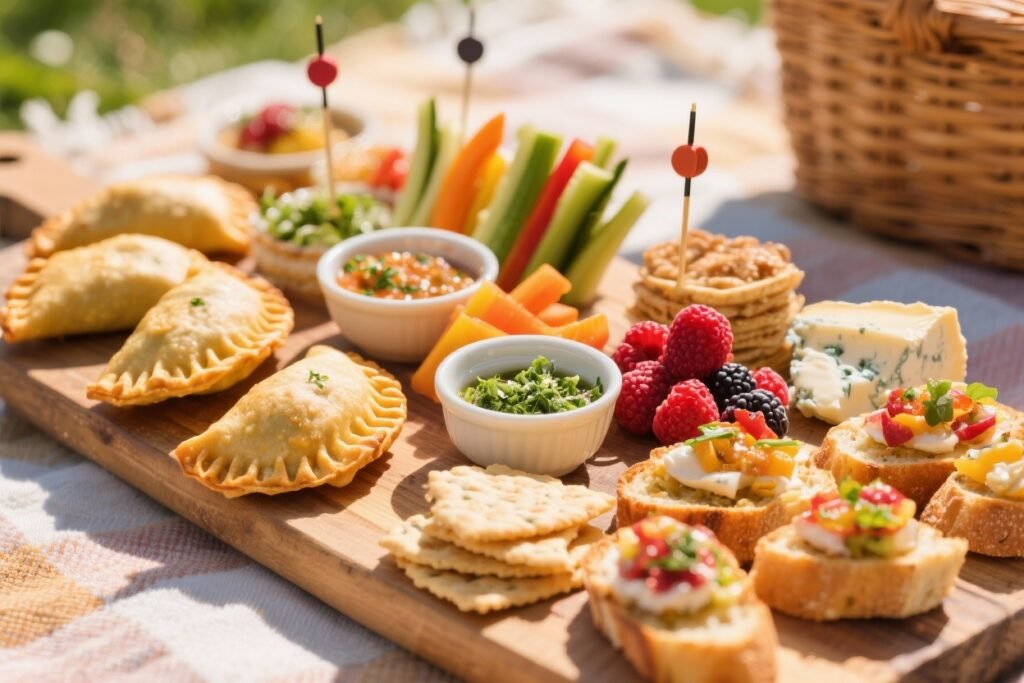
You know that moment at a picnic when everyone says, “I’ll just have a little bite,” and then, poof—everything’s gone? That’s the magic of great finger foods. They’re easy to grab, fun to eat, and somehow taste even better outdoors. These 10 recipes are sunshine-friendly, travel well, and have just enough personality to make your picnic spread feel seriously special.
No forks. No fuss. Just bold flavors, smart shortcuts, and food that makes people linger. Let’s pack that basket.
1. Crispy Prosciutto Caprese Skewers With Basil Drizzle
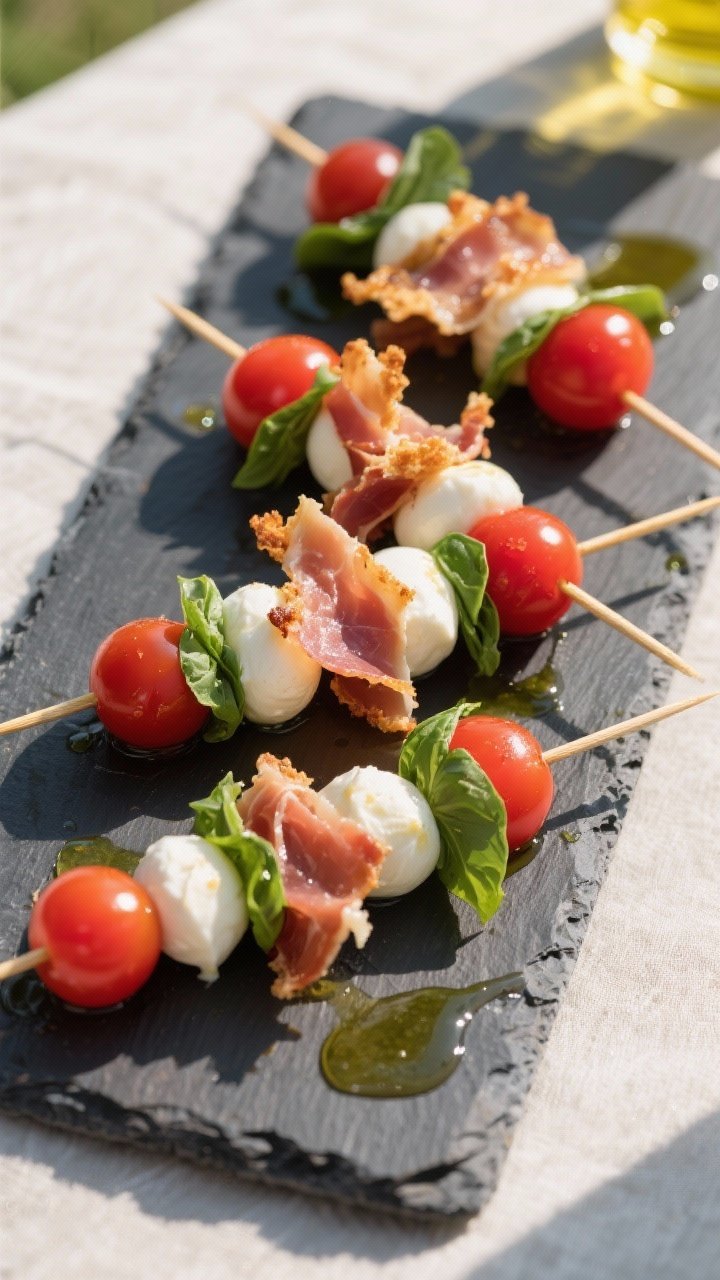
Caprese salad gets a party trick: skewers! These bite-sized beauties keep the tomato-juice mess off your blanket and deliver all the flavor. The crispy prosciutto adds a salty crunch that makes these vanish fast.
Ingredients:
- 24 cherry tomatoes
- 8 ounces mini mozzarella balls (bocconcini), drained
- 24 small fresh basil leaves
- 6 slices prosciutto, baked until crisp and broken into shards
- 2 tablespoons extra-virgin olive oil
- 1 tablespoon balsamic glaze
- 1 teaspoon honey
- 1 small garlic clove, very finely grated
- Pinch of red pepper flakes (optional)
- Kosher salt and black pepper, to taste
- 20–24 small skewers or toothpicks
Instructions:
- Preheat oven to 375°F (190°C). Lay prosciutto on a parchment-lined sheet and bake 8–10 minutes until crisp. Cool and break into bite-sized shards.
- In a small bowl, whisk olive oil, balsamic glaze, honey, garlic, red pepper flakes, salt, and pepper.
- Thread onto skewers: tomato, basil leaf, mozzarella, and a piece of crispy prosciutto.
- Drizzle lightly with the dressing just before serving, or pack dressing separately and toss on-site.
Serve chilled with extra basil on top. Variation: swap prosciutto for roasted chickpeas to keep it vegetarian. Pro tip: pat mozzarella dry so the drizzle clings better.
2. Everything Bagel Cucumber Bites With Whipped Feta
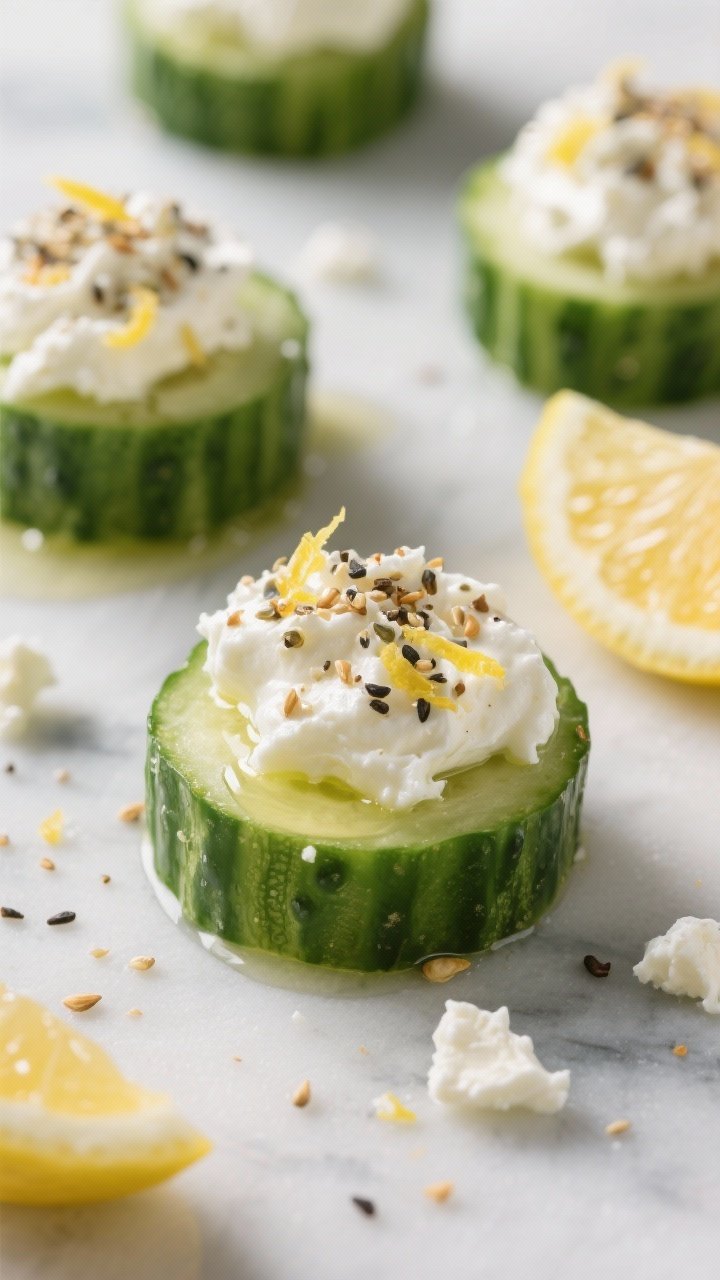
These are the refreshing, crunchy bites your picnic needs. A creamy, tangy whipped feta on a cucumber “cracker,” dusted with everything bagel seasoning—like brunch met the snack table and fell in love.
Ingredients:
- 1 large English cucumber, sliced into 1/2-inch rounds
- 6 ounces feta cheese, crumbled
- 4 ounces cream cheese, softened
- 1 tablespoon lemon juice
- 1 teaspoon lemon zest
- 1 tablespoon extra-virgin olive oil
- 2 tablespoons everything bagel seasoning
- 1 tablespoon chopped fresh dill
- Black pepper, to taste
Instructions:
- In a food processor, blend feta, cream cheese, lemon juice, zest, and olive oil until fluffy. Add black pepper and dill to taste.
- Lay cucumber slices on a platter and pat dry.
- Pipe or spoon a dollop of whipped feta onto each slice. Sprinkle generously with everything bagel seasoning.
Serve right away or chill up to 2 hours. Variation: top with smoked salmon or capers for extra flair. Pro tip: bring extra seasoning for last-minute sprinkles—picnics love a refresh.
3. Sweet Corn Fritters With Chili-Lime Yogurt
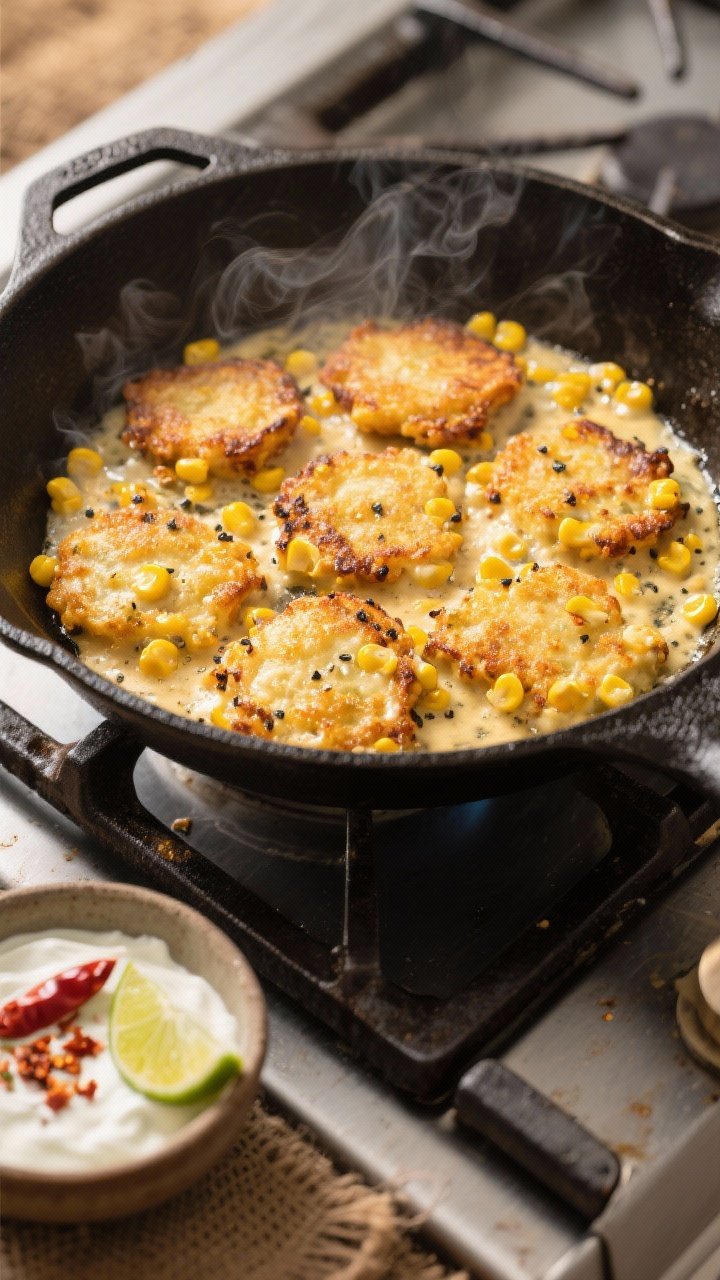
Golden, crispy edges, pockets of sweet corn, and a zippy yogurt dip—these travel like champs and taste great warm or room temp. They’re the kind of picnic food that makes people hover near the basket.
Ingredients:
- 2 cups fresh or frozen corn kernels (thawed if frozen)
- 1/2 cup all-purpose flour
- 1/4 cup cornmeal
- 1 teaspoon baking powder
- 1/2 teaspoon kosher salt
- 1/4 teaspoon black pepper
- 1/4 teaspoon smoked paprika
- 2 eggs, lightly beaten
- 1/4 cup milk
- 2 scallions, thinly sliced
- 2 tablespoons chopped cilantro (optional)
- Neutral oil for frying
Chili-Lime Yogurt:
- 1/2 cup Greek yogurt
- 1 teaspoon lime zest
- 1 tablespoon lime juice
- 1/2 teaspoon chili powder
- Pinch of cayenne (optional)
- Salt to taste
Instructions:
- Whisk flour, cornmeal, baking powder, salt, pepper, and smoked paprika. Stir in eggs and milk until just combined; fold in corn, scallions, and cilantro.
- Heat 1/4 inch oil in a skillet over medium heat. Drop batter by heaping tablespoons and flatten slightly.
- Cook 2–3 minutes per side until golden and cooked through. Drain on paper towels.
- Mix yogurt with lime zest, juice, chili powder, cayenne, and salt.
Pack fritters and yogurt separately; dip on the blanket. Variation: add crumbled bacon or diced jalapeños. Pro tip: re-crisp in a hot pan before heading out if you made them earlier.
4. Roast Beef Horseradish Pinwheels With Arugula Crunch
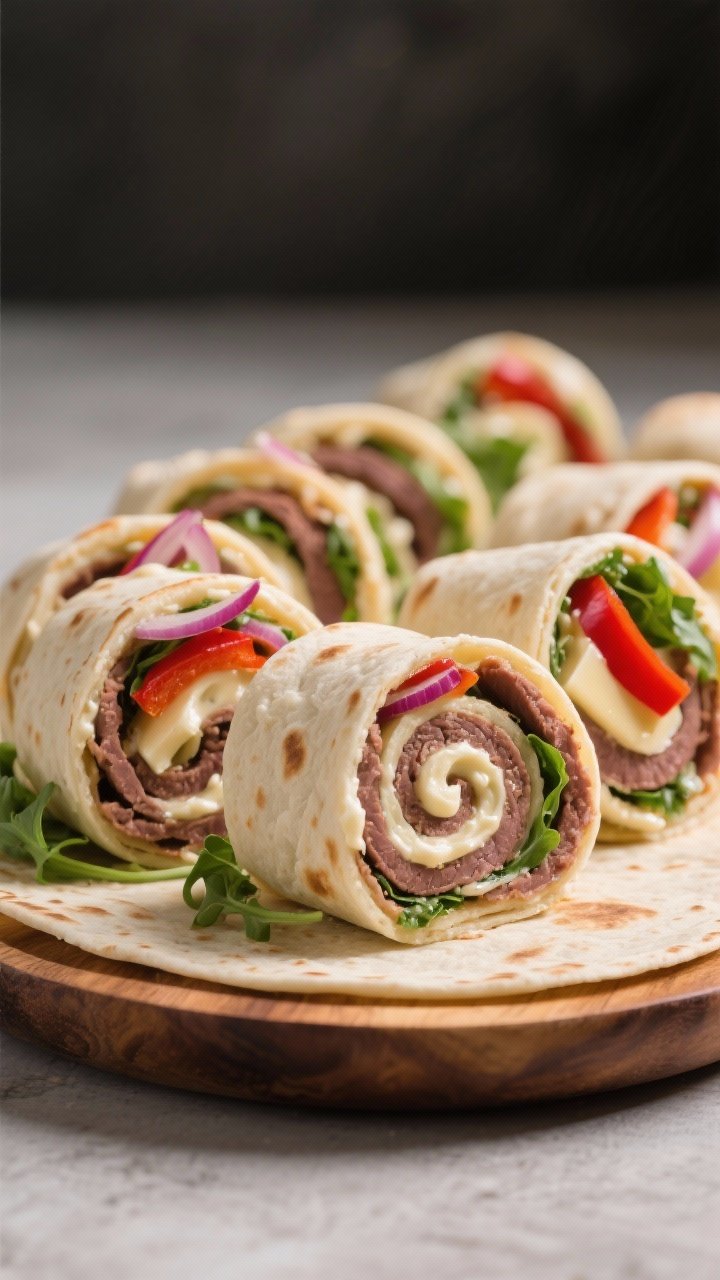
These pinwheels are bold without being fussy. The creamy horseradish spread wakes up deli roast beef, and arugula adds peppery bite. They’re handheld, stackable, and very picnic-friendly.
Ingredients:
- 4 large flour tortillas (10-inch)
- 8 ounces thinly sliced roast beef
- 1 cup baby arugula
- 4 slices provolone or Swiss cheese
- 1/2 red onion, very thinly sliced
- 1 roasted red pepper, patted dry and sliced
Horseradish Spread:
- 1/2 cup mayonnaise
- 2 tablespoons prepared horseradish
- 1 teaspoon Dijon mustard
- 1 teaspoon lemon juice
- Salt and pepper, to taste
Instructions:
- Mix mayo, horseradish, Dijon, lemon juice, salt, and pepper.
- Spread each tortilla with the horseradish mixture, edge to edge.
- Layer cheese, roast beef, arugula, red onion, and roasted red pepper.
- Tightly roll each tortilla. Wrap in plastic and chill 20–30 minutes to set.
- Slice into 1-inch pinwheels with a sharp knife.
Pack with a side of pickles. Variation: swap beef for smoked turkey and use pesto instead of horseradish for a milder vibe. Pro tip: dry greens well so pinwheels don’t slip.
5. Herbed Goat Cheese Stuffed Peppadews
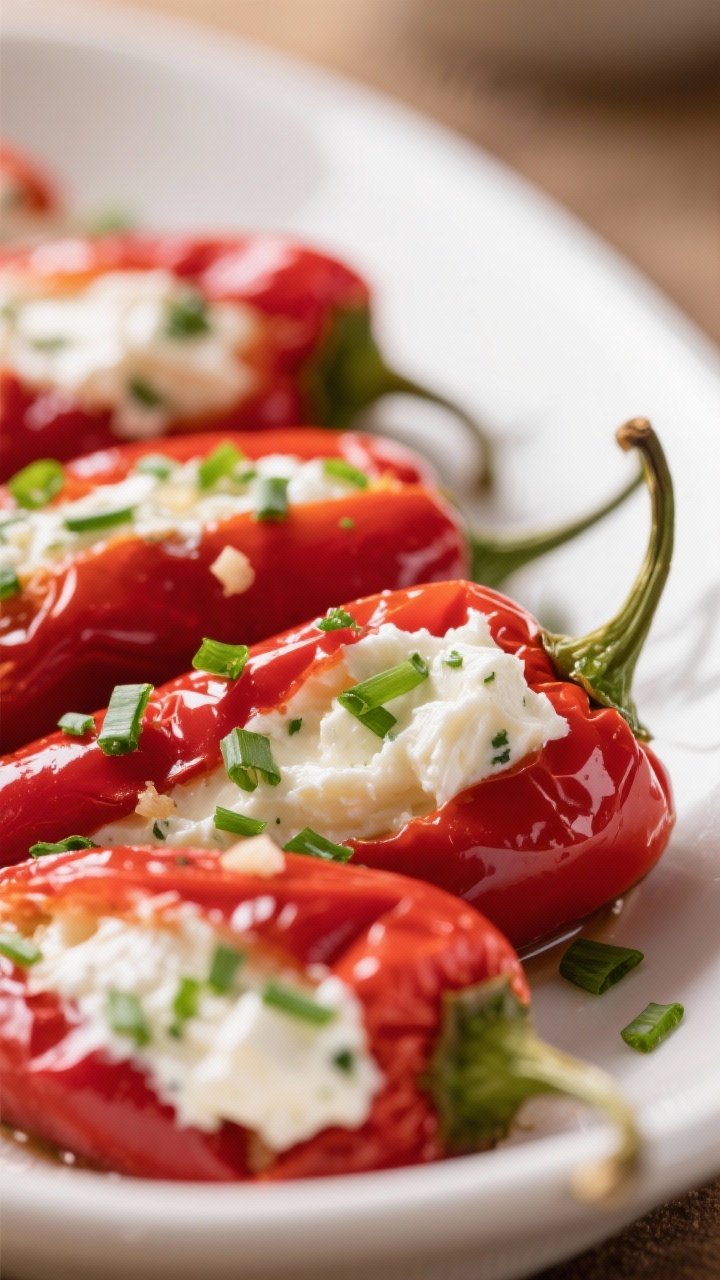
Tiny peppers, big flavor. These sweet-and-tangy peppadews get stuffed with a garlicky, herby goat cheese filling. They look fancy but take minutes—and they’re exactly the small bite people keep reaching for.
Ingredients:
- 24 peppadew peppers (sweet piquanté peppers), drained
- 8 ounces goat cheese, softened
- 2 tablespoons cream cheese
- 1 small garlic clove, finely grated
- 2 tablespoons chopped fresh chives
- 1 tablespoon chopped fresh parsley
- 1 teaspoon lemon zest
- 1 tablespoon olive oil
- Black pepper, to taste
Instructions:
- Mix goat cheese, cream cheese, garlic, chives, parsley, lemon zest, olive oil, and black pepper until smooth.
- Transfer to a piping bag or zip-top bag with a corner snipped.
- Pipe filling into each peppadew until just full, not overflowing.
Chill until firm. Variation: roll the stuffed tops in toasted crushed pistachios for crunch. Pro tip: blot peppers dry before filling to keep the cheese from slipping out.
6. Smoky Paprika Chickpea Phyllo Cups

Crunchy, flaky phyllo meets a smoky, lemony chickpea salad. These bites are light but satisfying—and they hold up well even after a little travel time. Great for vegetarians and anyone who loves bold spice.
Ingredients:
- 24 mini phyllo shells (store-bought)
- 1 can (15 ounces) chickpeas, drained and rinsed
- 2 tablespoons mayonnaise or Greek yogurt
- 1 tablespoon olive oil
- 1 teaspoon smoked paprika
- 1/2 teaspoon ground cumin
- 1 teaspoon lemon zest
- 1 tablespoon lemon juice
- 2 tablespoons finely diced red onion
- 2 tablespoons chopped parsley
- Salt and black pepper, to taste
Instructions:
- In a bowl, lightly smash chickpeas with a fork so some are chunky.
- Stir in mayo or yogurt, olive oil, smoked paprika, cumin, lemon zest and juice, onion, parsley, salt, and pepper.
- Spoon mixture into phyllo shells just before serving to keep them crisp.
Top with extra paprika or parsley for color. Variation: add diced roasted red pepper or crumbled feta. Pro tip: bring filling in a container and shell them at the picnic—takes two minutes and guarantees crunch.
7. Garlic-Herb Pull-Apart Bread Bombs
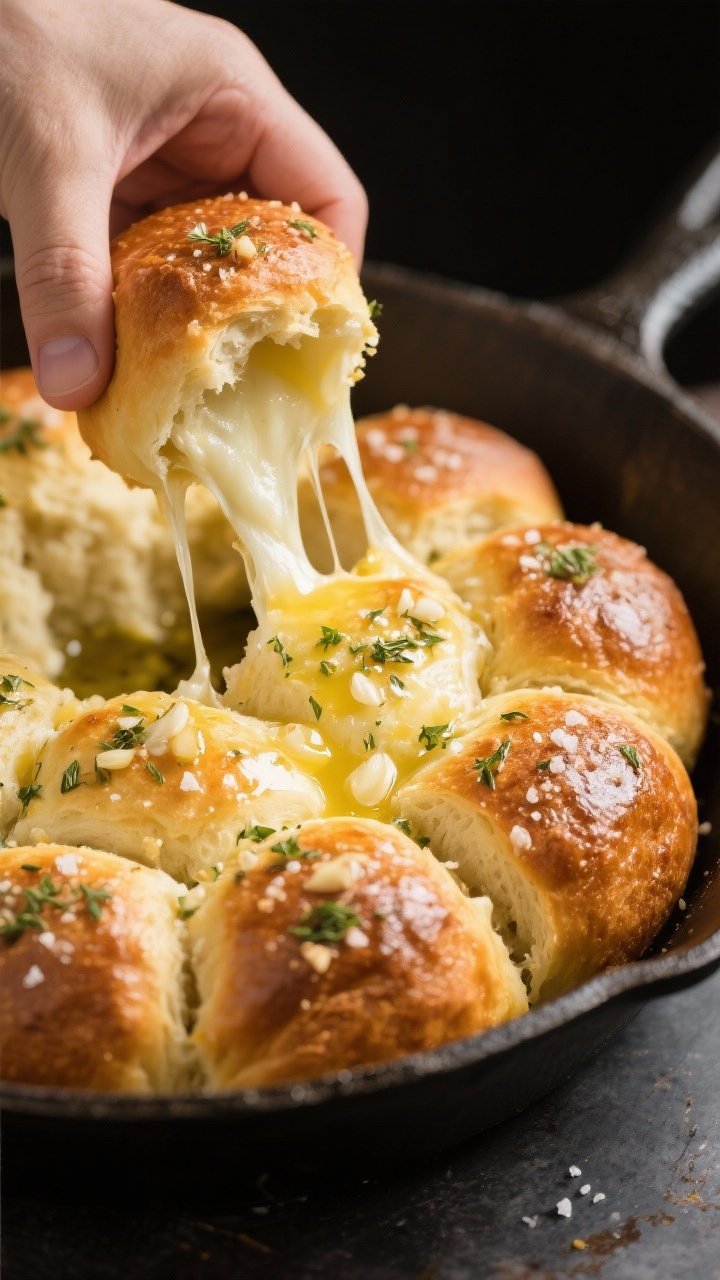
Is there anything more picnic-perfect than tear-and-share bread? These soft, buttery rolls hide gooey mozzarella and a punchy garlic-herb butter. People will circle like seagulls (in a good way).
Ingredients:
- 1 pound pizza dough (store-bought is fine)
- 8 ounces low-moisture mozzarella, cut into 20 small cubes
- 3 tablespoons unsalted butter, melted
- 2 tablespoons olive oil
- 2 garlic cloves, minced
- 2 tablespoons chopped parsley
- 1 tablespoon chopped basil
- 1/2 teaspoon dried oregano
- 1/2 teaspoon kosher salt
- Crushed red pepper flakes (optional)
- Grated Parmesan, for topping
Instructions:
- Preheat oven to 400°F (200°C). Line a baking sheet with parchment.
- Cut dough into 20 pieces. Flatten each, place a mozzarella cube in the center, and pinch to seal into a ball.
- Arrange seam-side down, close together.
- Mix butter, olive oil, garlic, parsley, basil, oregano, salt, and red pepper flakes. Brush generously over dough balls.
- Bake 16–20 minutes until golden. Sprinkle with Parmesan.
Serve warm or at room temp with marinara for dipping. Variation: stuff with pesto or sun-dried tomatoes. Pro tip: transport wrapped in foil; it keeps the bread soft.
8. Maple-Mustard Chicken Salad Endive Boats
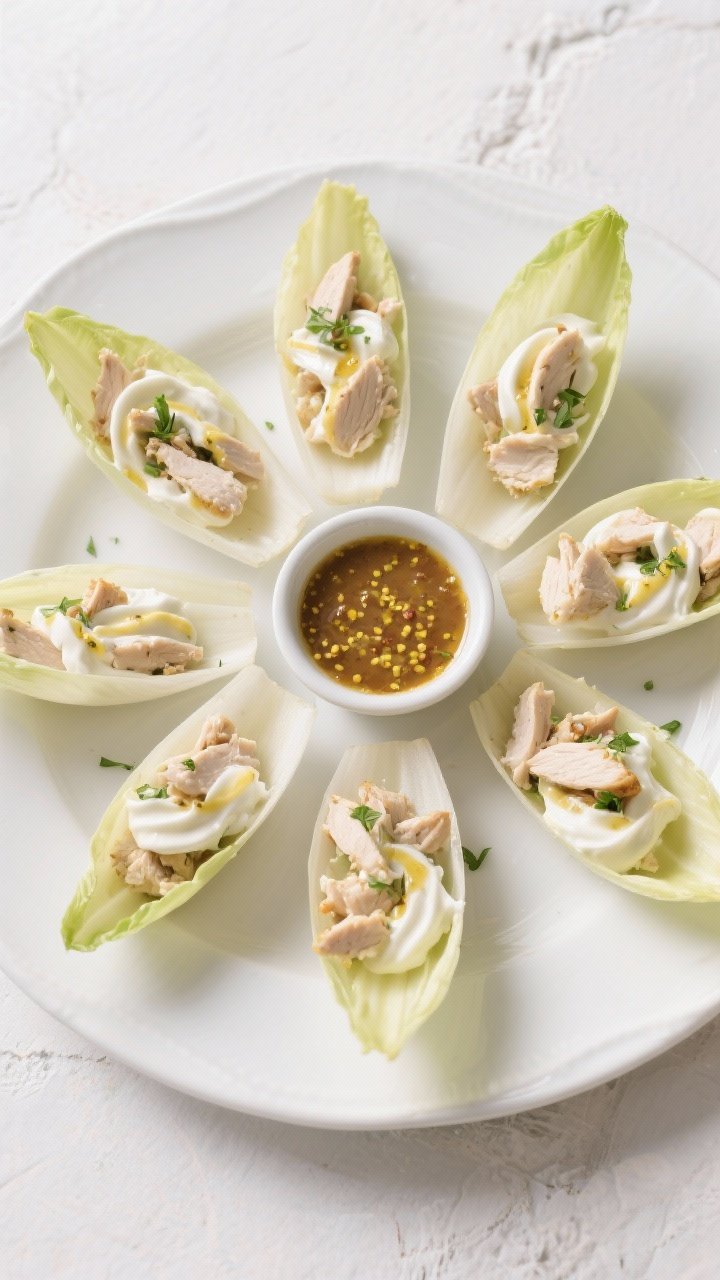
Crunchy endive leaves are the perfect edible “scoops.” This chicken salad is bright, sweet-tangy, and way lighter than mayo-heavy versions—still creamy, still satisfying, just fresher.
Ingredients:
- 2 cups cooked chicken, chopped or shredded
- 2 heads Belgian endive, leaves separated
- 1/3 cup Greek yogurt
- 2 tablespoons mayonnaise
- 1 tablespoon Dijon mustard
- 1 tablespoon whole-grain mustard
- 1 tablespoon maple syrup
- 1 tablespoon lemon juice
- 1 small celery stalk, finely diced
- 2 tablespoons finely chopped red apple
- 2 tablespoons chopped toasted pecans or almonds
- Salt and black pepper, to taste
- Chives, for garnish
Instructions:
- Whisk yogurt, mayo, Dijon, whole-grain mustard, maple syrup, and lemon juice. Season with salt and pepper.
- Stir in chicken, celery, apple, and nuts.
- Spoon into endive leaves and sprinkle with chives.
Keep endive and filling separate until serving for maximum crunch. Variation: swap chicken for chickpeas to make it vegetarian. Pro tip: a tiny pinch of salt on the endive leaves wakes up the whole bite.
9. Zesty Tomato-Peach Bruschetta Jars
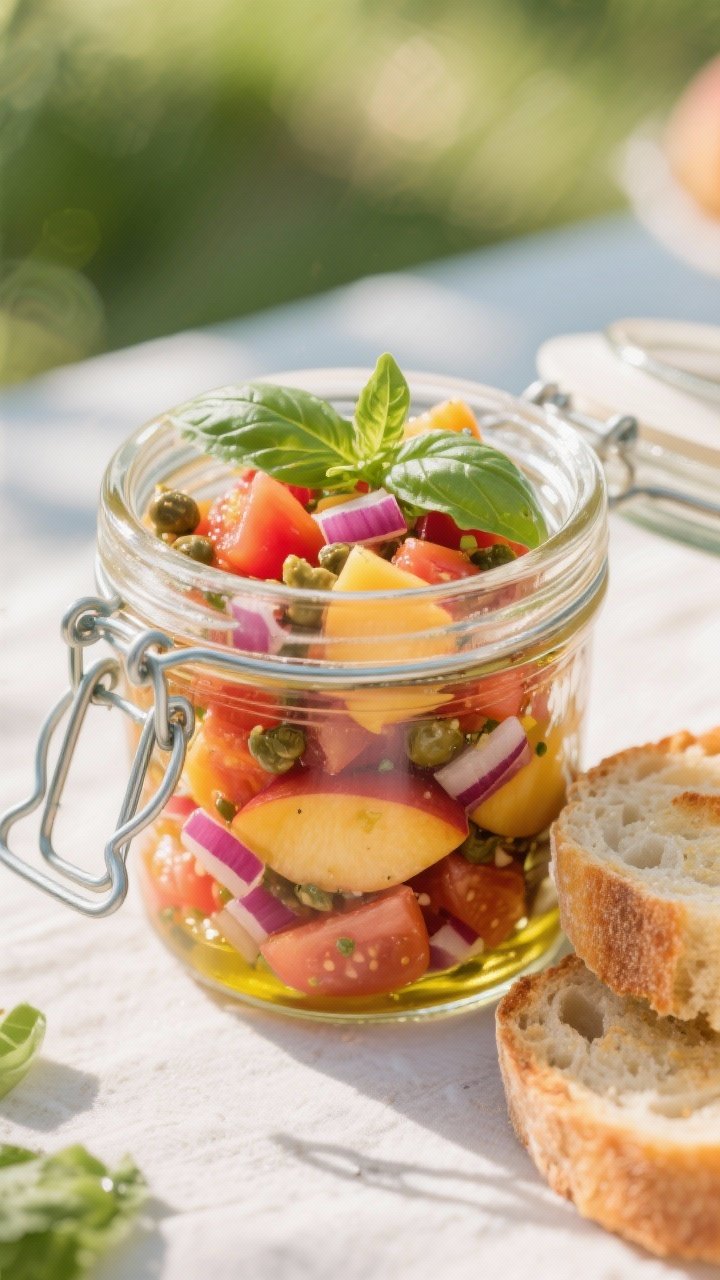
Bruschetta, but picnic-proof. Pack the juicy topping in jars and bring toasted baguette separately. The combo of tomatoes and peaches is sweet-savory magic that tastes like peak summer.
Ingredients:
- 2 ripe tomatoes, seeded and diced
- 2 ripe peaches, diced (peeled if you prefer)
- 2 tablespoons finely chopped red onion
- 1 tablespoon capers, rinsed and chopped
- 2 tablespoons chopped fresh basil
- 1 tablespoon chopped fresh mint
- 2 tablespoons extra-virgin olive oil
- 1 tablespoon balsamic vinegar
- 1 teaspoon honey
- Salt and black pepper, to taste
- 1 baguette, sliced and toasted
- 1 garlic clove, halved (for rubbing toast)
Instructions:
- Toss tomatoes, peaches, red onion, capers, basil, mint, olive oil, balsamic, honey, salt, and pepper. Let sit 10 minutes.
- Rub toasted baguette slices with cut garlic.
- Pack topping in jars and bread in a bag. Spoon over toast at the picnic.
Variation: add diced fresh mozzarella for a caprese twist. Pro tip: strain a little liquid before packing so the topping doesn’t get soupy.
10. No-Bake Chocolate Peanut Butter Oat Squares
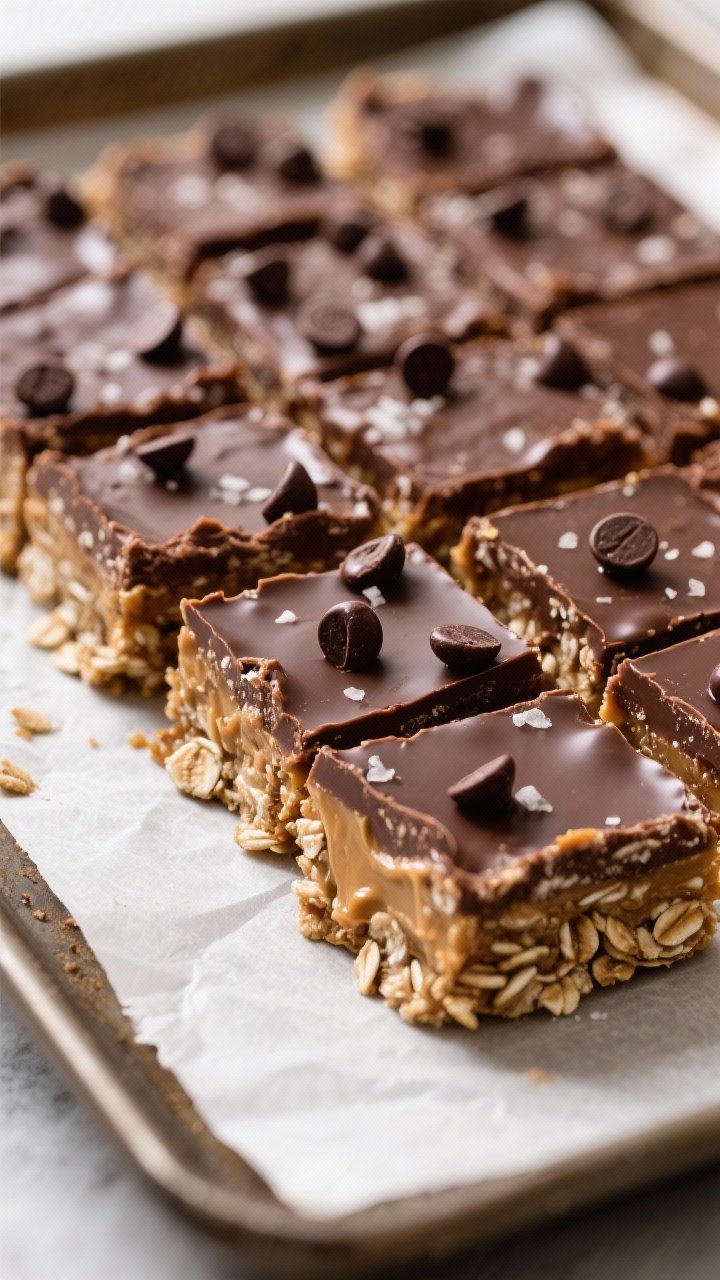
Picnics deserve dessert, and these are make-ahead, no-melt (mostly), and majorly satisfying. Chewy oats, creamy peanut butter, and a snappy dark chocolate top—like a granola bar’s cooler cousin.
Ingredients:
- 2 1/2 cups quick oats
- 1/2 cup peanut butter (smooth)
- 1/3 cup honey or maple syrup
- 1/4 cup coconut oil or unsalted butter
- 1 teaspoon vanilla extract
- Pinch of salt
- 1 cup dark chocolate chips
- 1 tablespoon coconut oil (for chocolate layer)
- Flaky sea salt, for sprinkling
Instructions:
- Line an 8-inch square pan with parchment.
- In a saucepan over low heat, melt peanut butter, honey, and coconut oil. Stir in vanilla and salt. Remove from heat; mix in oats until coated.
- Press firmly into the pan.
- Melt chocolate chips with 1 tablespoon coconut oil. Pour over oats, smoothing the top.
- Chill 1–2 hours until set. Sprinkle flaky salt and cut into small squares.
Store chilled and pack with an ice pack if it’s blazing hot. Variation: add chopped roasted peanuts or mini pretzels for crunch. Pro tip: press hard when forming the base so the squares hold together on the go.
Bonus Packing Tips
Because the best finger foods deserve a smooth trip:
- Layer smart: heavy items on the bottom, delicate greens and phyllo cups on top.
- Keep wet and dry separate until serving. Nobody likes soggy crunch.
- Bring a small cutting board and knife. Instant serving station.
- Toss in extra paper towels, a small trash bag, and a couple of clip-on bag ties.
Ready to picnic like a pro? Pick a few of these finger foods, pack them up, and watch your blanket become the most popular spot on the grass. The only hard part is choosing where to start—so don’t. Make a spread, share generously, and enjoy every bite under the sun.
Printable Recipe Card
Want just the essential recipe details without scrolling through the article? Get our printable recipe card with just the ingredients and instructions.
Leave a Reply