10 Best Picnic Cooler Recipes That Keep Well
· Yogi
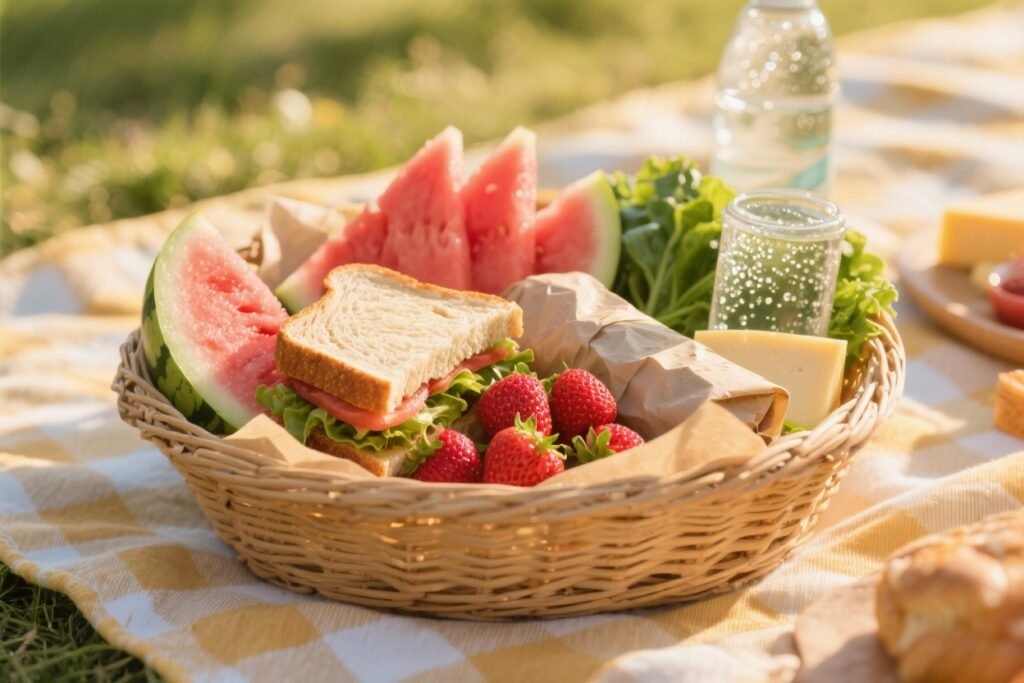
Let’s be honest: a great picnic starts with the cooler. If your drinks aren’t icy and your potato salad is sweating, the mood drops faster than melting popsicles. These 10 picnic cooler “recipes” are all about assembling the perfect cooler loadout—what to pack, how to layer, and clever tricks to keep everything crisp, organized, and picnic-ready. Think of each one as a themed cooler blueprint you can copy for your next sunny day escape.
From ultra-refreshing fruit spreads to beach-day feasts and kid-approved snack crates, I’ve got you covered. Short, punchy prep. Smart packing. Maximum chill. Ready to pack like a pro?
1. The Summer Fruit & Fizz Cooler That Stays Ice-Cold For Hours
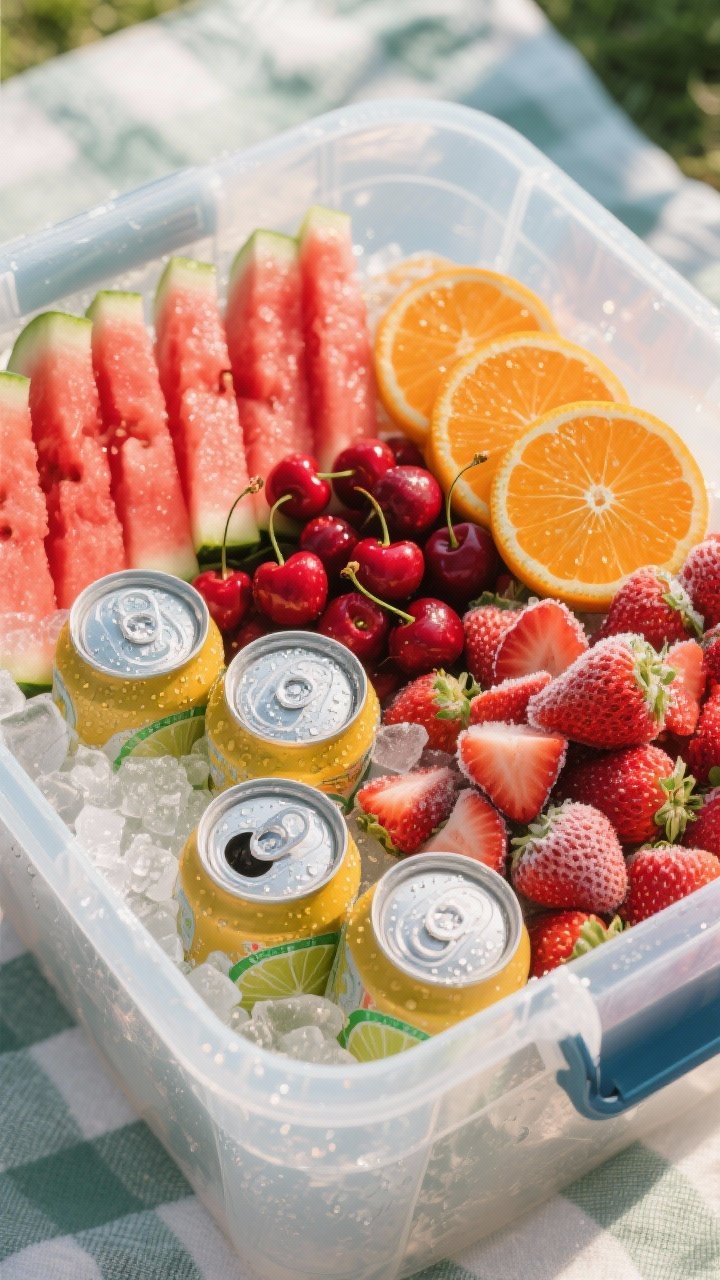
This cooler is your go-to for a bright, hydrating picnic. It’s all fruit, fizz, and sunshine in a chilled box. The secret? Dense, pre-chilled produce and a tight ice strategy so every sip and slice stays frosty.
Ingredients:
- 2 lbs seedless watermelon, cut into sticks
- 1 lb cherries, rinsed and chilled
- 4 oranges, sliced into wheels
- 2 pints strawberries, hulled
- 4 cans lemon-lime seltzer (12 oz each), chilled
- 2 cans ginger beer (12 oz each), chilled
- 1 small bunch fresh mint
- 1 lime, cut into wedges
- 1 cup simple syrup (optional, for DIY spritzes)
- 1 reusable ice block + 6 cups ice cubes
- 2 frozen water bottles (16 oz each) to use as extra ice and hydration
Instructions:
- Pre-chill everything in the fridge overnight. Cold-in, cold-out—this step is huge.
- Line the bottom of your cooler with the reusable ice block and two frozen water bottles.
- Add a layer of oranges and watermelon sticks (densest fruits closest to ice).
- Fill gaps with strawberries and cherries to reduce air pockets.
- Nestle the seltzer and ginger beer along the sides; keep them upright.
- Tuck mint and lime wedges in a small sealed container up top.
- Top with a bag of ice cubes, then close the lid firmly. Resist opening until you’ve arrived.
Serve the fruit with mint and lime for a quick, bright refresh. Mix seltzer, ginger beer, and a splash of simple syrup for instant cooler-side spritzes. Pro tip: keep a small paring knife and compostable cups in an outer pocket for easy serving—seriously, it makes life easier.
2. The Deli-Style Sandwich & Slaw Cooler For Hungry Crowds
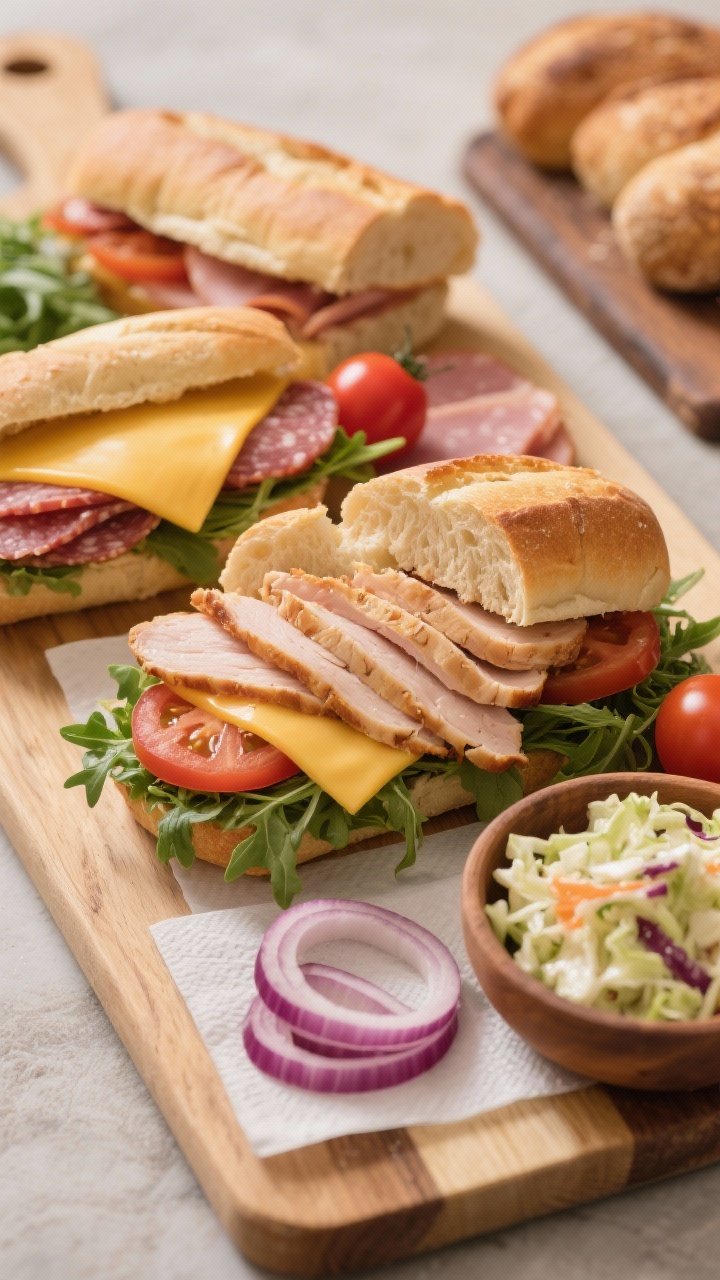
This cooler feeds people who are “just a snack” away from mutiny. Stackable sandwiches, crisp slaw, and pickles that stay crunchy. Perfect for parks, hikes, or tailgates.
Ingredients:
- 8 ciabatta rolls, split
- 1 lb roasted turkey slices
- 1/2 lb provolone slices
- 1/2 lb salami or ham (optional)
- 2 cups arugula
- 1 large tomato, sliced (drain on paper towels)
- 1 small red onion, very thinly sliced
- 1/2 cup pesto
- 1/3 cup Dijon mustard
- 1/2 cup mayo
- 1 jar dill pickles, spears
- 4 cups classic slaw mix
- 1/2 cup slaw dressing (vinegar-based keeps better)
- 1 reusable ice block + crushed ice to fill gaps
- Parchment paper and zip-top bags for assembly
Instructions:
- Spread pesto on one side of the roll, Dijon-mayo on the other. Layer turkey, cheese, salami/ham (if using), onion, arugula. Keep tomato slices separate to avoid soggy bread.
- Wrap each sandwich tightly in parchment, then place in zip-top bags. Label if you’re fun like that.
- Toss slaw mix with dressing and chill in a sealed container.
- Line cooler bottom with ice block. Stack sandwiches flat. Slide tomato slices in a separate container on top.
- Pack pickles along the side and wedge slaw on top. Fill remaining gaps with crushed ice.
Build sandwiches on-site if you want extra-crispy bread—bring tomatoes and pickles on the side. Add banana peppers or a drizzle of hot honey for a twist. Pro tip: press wrapped sandwiches with a heavy skillet for 10 minutes before packing for that deli-style firmness.
3. The Mediterranean Mezze Cooler That Doubles As A Picnic Board
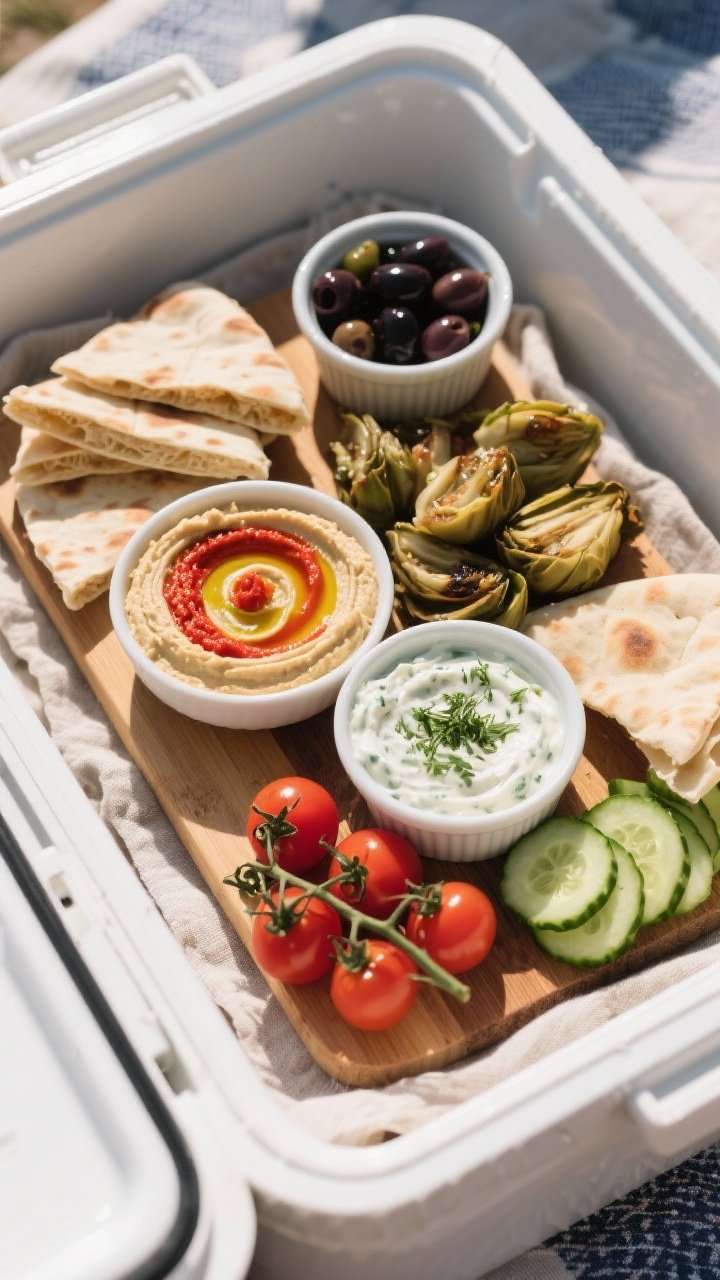
Graze your way through this refreshing, no-cook spread. Everything packs neatly and converts into an instant mezze board—just open the containers and assemble. It’s light, colorful, and ridiculously satisfying.
Ingredients:
- 1 tub classic hummus (10–12 oz)
- 1 tub roasted red pepper hummus (10–12 oz)
- 1 cup tzatziki
- 2 cups cherry tomatoes
- 1 English cucumber, sliced
- 1 cup Kalamata olives, drained
- 1 cup marinated artichokes, drained
- 1 block feta (8 oz), cubed
- 2 pitas per person, cut into wedges
- 1/3 cup olive oil + 1 tbsp dried oregano
- Lemon wedges
- 1 reusable ice block + 6 cups ice
- Small cutting board and knife (for assembly)
Instructions:
- Whisk olive oil with oregano; keep in a small jar.
- Pre-chill dips, olives, artichokes, and feta. Drain olives and artichokes well to prevent watery containers.
- Line cooler with ice block. Place dips at the bottom, then feta and marinated veg.
- Add cucumbers and tomatoes in containers to keep crisp. Place pitas on top wrapped in a clean towel to insulate from moisture.
- Fill gaps with ice and keep lemon wedges up high for quick access.
Spread everything on a board: hummus swirls topped with olive oil, lemon, and oregano; feta cubes; olives; veggies; pitas. Add grilled chicken skewers or falafel if you want protein. Pro tip: keep pita in a zip bag with a dry paper towel—no sogginess, just soft and perfect.
4. The Beach-Day Taco Cooler With Zesty, No-Fuss Fixings
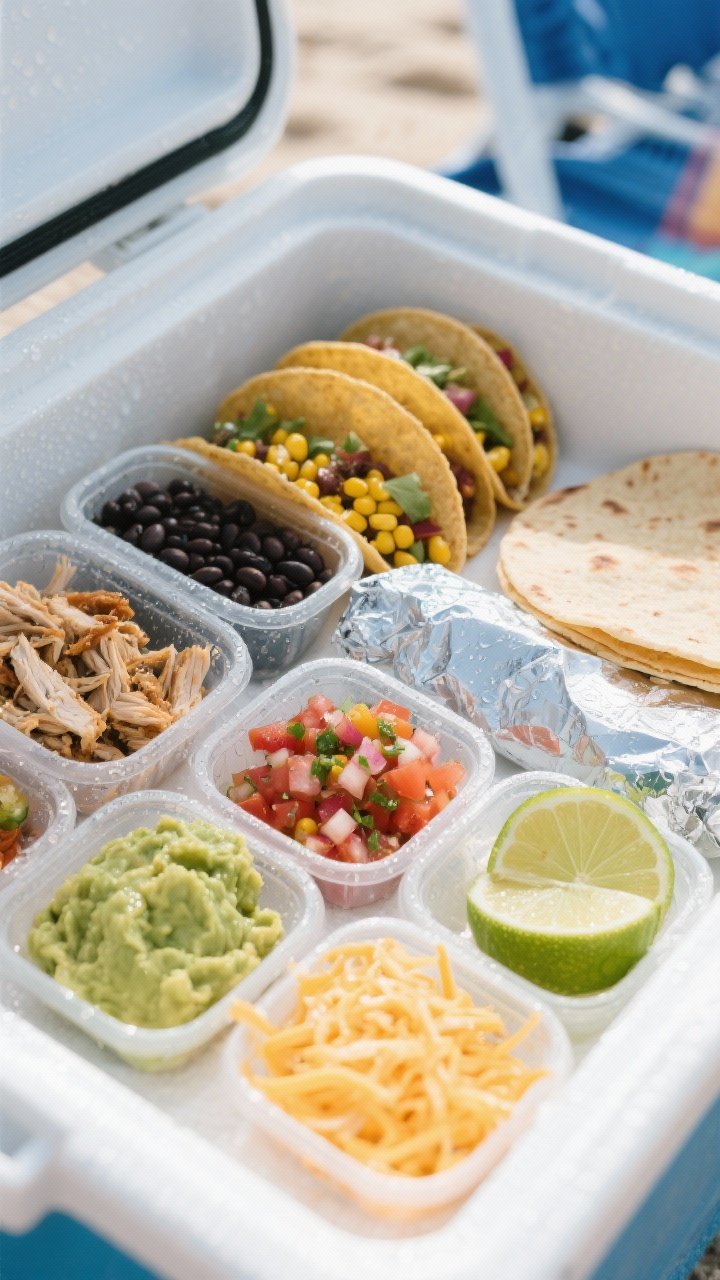
Tacos at the beach? Absolutely. Packable, customizable, and guaranteed to disappear fast. This cooler keeps proteins safe, toppings fresh, and tortillas soft.
Ingredients:
- 1 lb cooked shredded chicken (taco-seasoned, chilled)
- 1 can black beans, rinsed and chilled
- 1 cup corn (grilled or frozen, thawed)
- 1 cup pico de gallo (drained)
- 1 cup guacamole (lime-heavy to prevent browning)
- 1 cup shredded lettuce
- 1 cup shredded cheddar or cotija
- 12 small flour or corn tortillas, wrapped in foil
- 1/2 cup crema or sour cream
- 1 lime, cut into wedges
- Hot sauce packets
- 2 reusable ice blocks + bagged ice
- Thermal bag for tortillas
Instructions:
- Chill chicken, beans, and corn thoroughly. Drain pico and pat dry to avoid watery tacos.
- Line cooler with two ice blocks. Place proteins and beans at the bottom.
- Layer toppings—pico, guac, cheese, lettuce—in sealed containers. Keep crema and lime wedges on top for easy access.
- Place foil-wrapped tortillas in a separate insulated pouch or the cooler lid compartment (away from direct ice).
- Fill remaining space with ice. Keep the cooler closed tight until mealtime.
Build tacos on the spot with a squeeze of lime and your favorite hot sauce. Add pickled onions if you’re fancy. Pro tip: double-wrap tortillas in a towel—it keeps them pliable and protected from condensation.
5. The Backyard BBQ Cooler With Smokehouse Energy
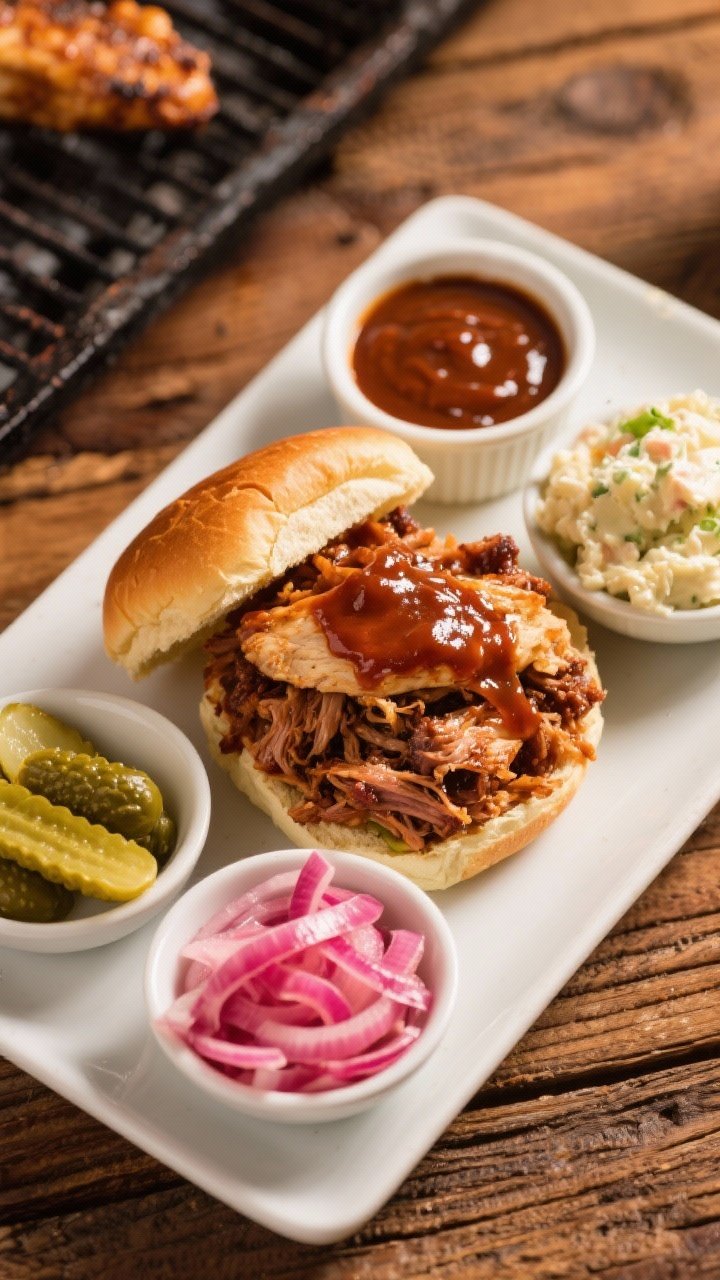
When you’re hauling the flavors of a cookout to a park table, this is your move. Smoky proteins, crunchy sides, and icy drinks—packed for temperature safety and peak texture.
Ingredients:
- 1 lb pulled pork or rotisserie chicken, chilled
- 8 brioche buns
- 1 cup BBQ sauce (plus extra for serving)
- 2 cups classic potato salad, chilled
- 1 cup pickled red onions
- 1 cup bread-and-butter pickles
- Corn chips or kettle chips (1 family-size bag)
- 4 cans iced tea + 4 cans lemonade
- 1 reusable ice block + 8 cups ice
- Two squeeze bottles (for sauce and water rinse)
Instructions:
- Mix pulled pork/chicken with half the BBQ sauce; chill in a sealed container.
- Line cooler with ice block. Place proteins and potato salad on the bottom layer.
- Stash pickles and onions in separate containers to preserve crunch.
- Add drinks along the side in upright rows. Top with a thick layer of ice.
- Keep buns in a separate tote or on top wrapped in a towel to avoid sogginess.
Serve sandwiches with extra sauce, pickles, and chips on the side. Add coleslaw if you like that creamy-crunchy contrast. Pro tip: bring a small spray bottle of water for sticky hands—instant rinse station.
6. The Fancy Cheese & Sparkling Sips Cooler For Date-Night Picnics

Grown-up picnic vibes. This cooler knows how to impress without a single stove or burner. Think cheeses, charcuterie, bright fruit, and bubbles—all kept perfectly chilled and camera-ready.
Ingredients:
- 1 wedge soft cheese (brie/camembert, 8 oz)
- 1 wedge aged hard cheese (manchego/aged cheddar, 8 oz)
- 4 oz prosciutto + 4 oz salami
- 1 bunch grapes (seedless), chilled
- 1 pear or apple, sliced and lemon-tossed
- 1/3 cup fig jam or honey
- 1/2 cup toasted nuts (almonds or walnuts)
- 1 sleeve good crackers + 1 small baguette
- 1 bottle non-alcoholic sparkling wine or seltzer (chilled)
- 2 reusable ice sleeves or blocks + 6 cups ice
- Small parchment squares and a mini cheese knife
Instructions:
- Chill cheeses but don’t freeze; they need to soften slightly at serving time.
- Line cooler with two ice blocks. Place the bottle nestled along one side.
- Add cheeses in their own containers, then charcuterie, grapes, and pear slices (tossed in lemon water and patted dry).
- Add jam/honey and nuts. Keep crackers/baguette in a separate tote or on top wrapped in a towel.
- Top with a sprinkle of ice and seal tight.
At the picnic, let soft cheese sit 10 minutes before serving. Drizzle honey over brie, add nuts, and pair with grapes—simple, perfect. Pro tip: bring a chilled cloth napkin to wrap the bottle; it stays cold and looks suave.
7. The Kid-Approved Snack Attack Cooler That Won’t Melt Into Chaos
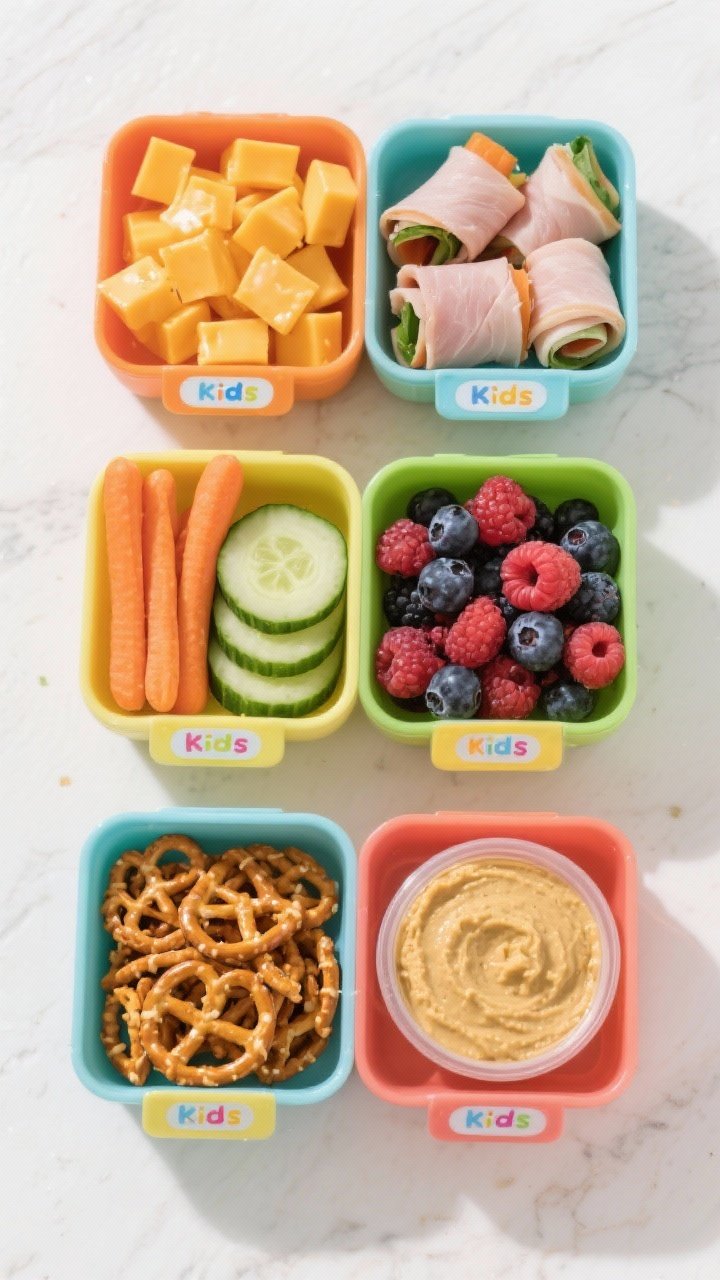
Kids + snacks + sunshine. This cooler is portioned, colorful, and built to survive a thousand openings. It’s all about bite-sized variety and easy grab-and-go containers.
Ingredients:
- 6 snack boxes or small containers with lids
- 1 cup cheddar cubes
- 1 cup turkey or veggie roll-ups (bite-sized)
- 1 cup baby carrots
- 1 cup cucumber coins
- 1 cup berries, washed and dried
- 1 cup pretzels or goldfish crackers
- 6 yogurt tubes (frozen overnight)
- 4 applesauce pouches
- 8 mini water bottles or juice boxes (pre-chilled)
- 1 reusable ice block + 8 cups ice
- Color-coded stickers (optional but fun)
Instructions:
- Assemble snack boxes: mix a protein, veggie, fruit, and crunchy item in each. Label with stickers.
- Freeze yogurt tubes overnight—they’ll act as extra ice packs and thaw into slushy perfection.
- Line cooler with the ice block. Stack snack boxes in neat rows.
- Add yogurt tubes and juice/water along the sides. Fill gaps with ice.
- Place applesauce pouches and napkins up top for quick grabs.
Swap in hummus cups, mini muffins, or string cheese if your crew prefers. Keep a small trash bag tucked into the lid pocket for easy cleanup. Pro tip: set “cooler hours” so it’s not opened every 30 seconds—your ice will last way longer, trust me.
8. The Brunch-In-A-Box Cooler With Bubbly And Bagels

Morning picnic? Bring brunch. This cooler nails the balance of sweet, savory, and fizzy—no soggy bagels, no warm yogurt. Just breezy, bite-by-bite joy.
Ingredients:
- 6 bagels, pre-sliced
- 8 oz smoked salmon
- 8 oz cream cheese (plain or chive)
- 1/2 red onion, very thinly sliced
- Capers (2 tbsp)
- 1 cucumber, thinly sliced
- 1 pint blueberries + 1 pint raspberries
- 4 mini yogurts
- Granola (1 1/2 cups) in a separate container
- 1 bottle sparkling water or brunch mocktail + 2 small juices
- 1 reusable ice block + 6–8 cups ice
- Small cutting board and butter knife
Instructions:
- Chill salmon, cheeses, yogurts, and drinks. Keep bagels in a bread bag with a dry towel.
- Line cooler with the ice block. Place salmon, cream cheese, yogurts, and berries at the bottom.
- Add onion, capers, cucumber in small containers. Set drinks along one side.
- Bagels go on top, away from direct ice. Fill gaps with ice and seal.
- Transport granola separately so it stays crisp.
Build bagels on-site with cream cheese, salmon, capers, onion, and cucumber. Yogurt parfaits are easy: berries + yogurt + granola. Pro tip: pre-slice lemon to squeeze over salmon—it cuts through richness and tastes fancy.
9. The Hiker’s Protein & Hydration Cooler For All-Day Adventures
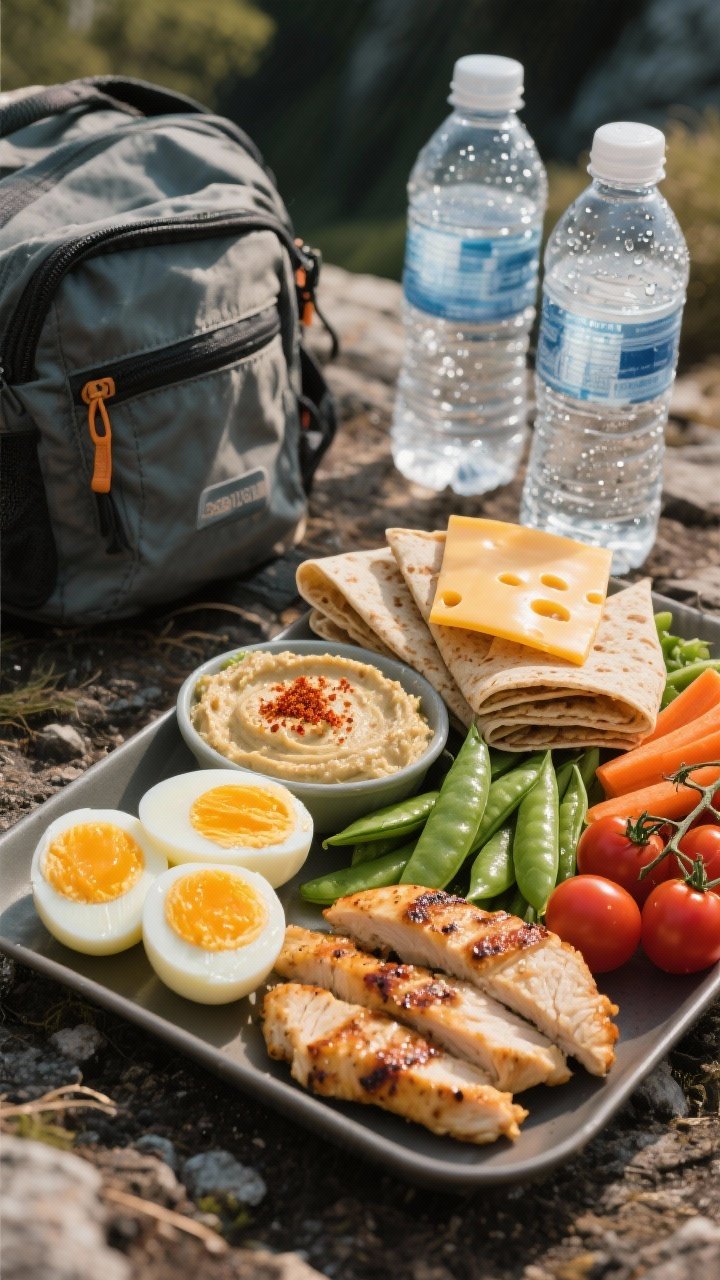
Picnic meets trail fuel. This cooler is lean, efficient, and focused on energy, hydration, and serious chill time. Think savory bites, crunchy veg, and electrolyte-packed drinks.
Ingredients:
- 8 hard-boiled eggs, peeled
- 1 lb grilled chicken tenders, chilled
- 1 cup hummus
- 2 cups snap peas and carrot sticks
- 1 cup cherry tomatoes
- 4 whole-grain wraps
- 4 oz sharp cheddar, sliced
- 4 bananas or apples
- 4 electrolyte drinks (12–16 oz each), chilled
- 2 frozen water bottles + 1 reusable ice block
- Salt packets and mini hot sauce (optional)
Instructions:
- Make wraps with chicken, hummus, cheddar, and tomatoes. Wrap tightly in foil.
- Line cooler with ice block and frozen water bottles.
- Place wraps and chicken tenders at the bottom. Add eggs in a hard container to prevent crushing.
- Pack veggies and fruit on top. Tuck drinks along the sides.
- Fill gaps with ice and keep the lid shut until lunch break.
Sprinkle eggs with salt and hot sauce for an instant energy hit. Swap in turkey jerky or tofu for variety. Pro tip: use frozen grapes—cool, sweet, and double as ice.
10. The Dessert-First Cooler With Icebox Treats And Cold Brew
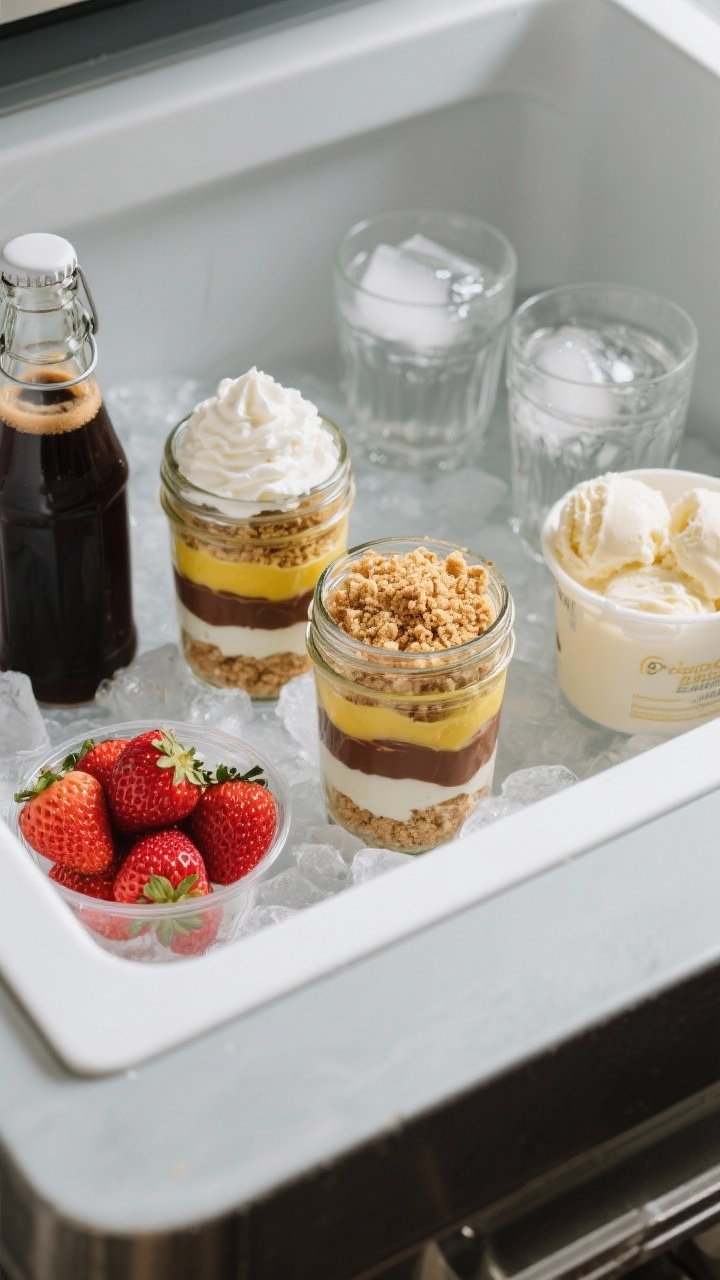
Sweet tooths, assemble. This cooler is the mic drop at a picnic: icy treats, cold brew, and no-melt hacks. Everything stays chilled without turning into a sticky mess.
Ingredients:
- 8 mason jars or lidded cups for parfaits
- 2 cups crushed graham crackers or Biscoff crumbs
- 2 cups whipped cream or coconut whip
- 2 cups lemon curd or chocolate pudding (your pick)
- 1 pint strawberries, sliced and patted dry
- Mini chocolate chips or shaved chocolate (1/2 cup)
- 1 bottle cold brew coffee (32 oz), chilled
- 1 bottle sweetened oat milk or creamer (16 oz)
- 2 reusable ice blocks + 8–10 cups ice
- Optional: mint leaves, caramel drizzle
Instructions:
- Layer parfait jars: crumbs, pudding/curd, whipped cream, berries, repeat. Top with chocolate and a mint leaf. Seal tightly.
- Chill jars at least 2 hours before packing.
- Line cooler with two ice blocks. Place parfait jars upright on the bottom.
- Add cold brew and creamer along the sides. Top with a generous layer of ice.
- Transport spoons and napkins in a zip bag in the cooler lid pocket.
Serve parfaits straight from the jar—no plates needed. Mix cold brew with creamer to taste or pour over ice. Pro tip: keep a small towel in the cooler for condensation—no slippery cups, no mess.
Cooler-Packing Tips You’ll Use Forever
- Pre-chill everything. Warm items melt ice fast.
- Use blocks for base chill, cubes for filling gaps.
- Pack in layers: ice block → dense items → delicate items → top ice.
- Minimize air space. Air warms faster than packed food.
- Open the lid as little as possible. Assign a “cooler captain” if you must.
- Keep a separate small cooler for drinks if you’ll open it constantly.
- Shade matters. Park the cooler under a tree or blanket.
Food Safety Basics
- Keep perishable foods below 40°F. If in doubt, toss it.
- Use separate containers for raw and ready-to-eat items (though all recipes here are ready-to-eat).
- Don’t let mayo-based salads sit out longer than 1–2 hours (less in hot sun).
There you go—10 easy, flavor-packed cooler “recipes” to match any picnic vibe. Whether you’re going fruit-fresh, deli-stacked, or dessert-first, you’ve got a plan that keeps everything crisp, cold, and ridiculously delicious. Grab your blanket, pick a theme, and get that cooler packed. Your best picnic yet is one chill away.
Printable Recipe Card
Want just the essential recipe details without scrolling through the article? Get our printable recipe card with just the ingredients and instructions.
Leave a Reply